Centrally manage VS Code settings with policies
Enterprise policies in Visual Studio Code enable organizations to centrally manage VS Code settings for their development teams to ensure consistency and compatibility across their organization. When a policy value is set, the value overrides the VS Code setting value configured at any level (default, user, and workspace).
IT admins can deploy and enforce specific VS Code configurations on users' devices through different device management solutions. VS Code supports applying policies on Windows, macOS, and Linux.
In this article, you learn which enterprise policies are available in VS Code and how to configure them on different operating systems.
Windows group policies
VS Code has support for Windows Registry-based Group Policy.
These profiles can be deployed using Mobile Device Management (MDM) solutions or installed manually on individual devices.
Step 1: Obtain the sample ADMX and ADML files
Starting from VS Code version 1.69, each release ships with a policies directory containing ADMX template files that define the available policies.
You can get the ADMX and ADML files from either an existing installation or by downloading and extracting the VS Code zip archive. Follow these steps to obtain the files:
- Download the VS Code zip archive for your version of VS Code.
- Extract the zip file to a temporary location.
- Navigate to the
policiesfolder in the extracted files. This folder contains the ADMX template files (for example,vscode.admx) and alocalessubfolder with ADML files for different languages.
Step 2: Configure policy values
After installing the ADMX and ADML files, configure policy values through your management tool:
- For Active Directory environments, use the Group Policy Editor (
gpedit.msc) and navigate to Computer Configuration > Administrative Templates > Visual Studio Code. - For cloud-managed devices, use your MDM solution (for example, Microsoft Intune) to configure the imported VS Code administrative template policies.
- Open each policy, set it to Enabled or Disabled, and provide any required value in the policy UI.
- Leave policies in the Not Configured state if you don't want to enforce them.
Configured policy values are written to the registry under Software\Policies\Microsoft\VSCode.
Refer to the policy reference below for details on each policy's accepted values and behavior.
Step 3: Deploy the policies
You can now deploy the configured policies at scale to all relevant devices in your organization using a device management solution. You can manually test the policies on a local Windows machine before deploying them at scale using the Local Group Policy Editor.
Deploy policies at scale
Products such as Microsoft Intune or Active Directory Group Policy can be used to centrally manage device policy at scale across an organization. These solutions allow administrators to deploy the ADMX/ADML files and policy configurations to multiple devices from a central location.
For Active Directory environments, copy the ADMX and ADML files to the Central Store to make the policies available across the domain.
Manually test policies on a local machine
If you want to test the policies on a local Windows machine before deploying them at scale, you can manually install the ADMX/ADML files and configure the policies using the Local Group Policy Editor.
Follow these steps to configure VS Code policies on a local Windows machine:
Step 1: Install the policy definition files
- Copy the
vscode.admxfile toC:\Windows\PolicyDefinitions. - Copy the appropriate ADML file from the
localessubfolder (for example,en-US\vscode.adml) toC:\Windows\PolicyDefinitions\<your-locale>(for example,C:\Windows\PolicyDefinitions\en-US).
You need administrator privileges to copy files to the PolicyDefinitions directory.
Step 2: Open the Local Group Policy Editor
- Press
Windows+Rto open the Run dialog. - Type
gpedit.mscand press Enter to open the Local Group Policy Editor. - If prompted by User Account Control, select Yes to allow the app to make changes.
Step 3: Navigate to VS Code policies
The VS Code policies are available under both Computer Configuration and User Configuration:
- Computer Configuration > Administrative Templates > Microsoft VS Code
- User Configuration > Administrative Templates > Microsoft VS Code
Computer-level policies take precedence over user-level policies when both are configured.
Step 4: Configure a policy
- Select the policy category (either Computer Configuration or User Configuration).
- Navigate to Administrative Templates > Microsoft VS Code.
- Double-click on the policy you want to configure (for example, Update Mode).
- In the policy settings dialog, select Enabled to enforce the policy.
- Configure the policy value using the available options or text fields.
- Select OK to save the changes.
- Close the Local Group Policy Editor.
The policy will take effect the next time VS Code is started. Some policies may require restarting Windows to take effect.
macOS configuration profiles
Configuration profiles manage settings on macOS devices. A profile is an XML file (.mobileconfig) with key/value pairs that correspond to available policies.
These profiles can be deployed using Mobile Device Management (MDM) solutions or installed manually on individual devices.
Step 1: Obtain the sample configuration profile
Starting from VS Code version 1.99, each release ships with a sample .mobileconfig file. Follow these steps to locate the sample file on a macOS device with VS Code installed:
- Open Finder and navigate to
/Applications. - Right-click on Visual Studio Code.app (or your VS Code variant) and select Show Package Contents.
- Navigate to
Contents/Resources/app/policies. - Locate the sample
.mobileconfigfile (for example,vscode-sample.mobileconfig).
Step 2: Configure policy values
-
Copy the sample
.mobileconfigfile to a working location (for example, your Desktop or Documents folder). -
Open the copied file in a text editor (for example, TextEdit, VS Code, or any XML editor).
-
Edit the policy values according to your requirements:
Example
policy.jsonconfiguration:{ "AllowedExtensions": { "microsoft": true, "github": true }, "UpdateMode": "start", "EnableFeedback": true, "EnableTelemetry": false }ImportantIf there's a syntax error in the policy value, the setting will not be applied. You can check the Window log in VS Code for errors (press ⇧⌘P (Windows, Linux Shift+cmd+P) and enter Show Window Log).
Remove unwanted policies - remove the corresponding JSON property for any policy you don't want to enforce.
Refer to the policy reference for details on each policy's accepted values and behavior.
Step 3: Deploy the policies
You can now deploy the configured policies at scale to all relevant devices in your organization with an MDM solution. You can manually test the policies on a local machine before deploying them at scale.
Deploy profiles at scale
For enterprise deployments across multiple devices, use Mobile Device Management (MDM) solutions such as:
- Microsoft Intune
- Apple Business Manager with MDM
For more information on configuration profiles, refer to Apple's documentation.
Manually test policies on a local machine
Configure policies manually
Follow these steps to manually test your VS Code policy configuration on a macOS device before deploying at scale:
Step 1: Install the configuration profile
- Save your edited
.mobileconfigfile. - Double-click the
.mobileconfigfile in Finder. - The System Settings (or System Preferences on older macOS versions) will open.
- Review the profile details and select Install (or Continue depending on your macOS version).
- If prompted, authenticate with your administrator credentials.
- Confirm the installation when prompted.
Step 2: Verify the profile installation
- Open System Settings (macOS Ventura and later) or System Preferences (earlier versions).
- Navigate to Privacy & Security > Profiles (or General > Device Management on older versions).
- Verify that your VS Code configuration profile appears in the list.
- Launch VS Code to see the policies in effect.
Policies take effect immediately for new VS Code instances. You may need to restart VS Code if it's already running.
Remove a configuration profile
To remove policies and revert to default settings:
- Open System Settings > Privacy & Security > Profiles.
- Select the VS Code configuration profile.
- Select the Remove (or -) button.
- Authenticate with your administrator credentials to confirm removal.
Linux JSON policies
Starting from VS Code version 1.106, you can configure VS Code setting policies on Linux devices by placing a JSON policy file at /etc/vscode/policy.json. This approach uses a simple JSON format to define policy values.
These profiles can be deployed using Mobile Device Management (MDM) solutions or installed manually on individual devices.
Step 1: Obtain the sample policy file
Starting from VS Code version 1.106, each release ships with a sample .policy.json file. You can obtain it from either an existing installation or by downloading and extracting the VS Code archive. The file is located in the resources/app/policies directory.
Step 2: Configure policy values
-
Copy the sample
policy.jsonfile to a working location:sudo cp /usr/share/code/resources/app/policies/policy.json /tmp/policy.json -
Edit the file using your preferred text editor:
sudo nano /tmp/policy.json # or sudo vim /tmp/policy.json # or code /tmp/policy.json -
Edit the policy values according to your requirements:
Example
policy.jsonconfiguration:{ "AllowedExtensions": { "microsoft": true, "github": true }, "UpdateMode": "start", "EnableFeedback": true, "EnableTelemetry": false }ImportantIf there's a syntax error in the policy value, the setting will not be applied. You can check the Window log in VS Code for errors (press ⇧⌘P (Windows, Linux Shift+cmd+P) and enter Show Window Log).
Remove unwanted policies - remove the corresponding JSON property for any policy you don't want to enforce.
Refer to the policy reference for details on each policy's accepted values and behavior.
Step 3: Deploy the policies
You can now deploy the configured policies at scale to all relevant devices in your organization with an MDM solution. You can manually test the policies on a local machine before deploying them at scale.
Deploy policies at scale
For enterprise Linux deployments across multiple devices, use configuration management tools such as Ansible, Puppet, Chef, or Salt to deploy the policy.json file.
These tools allow administrators to deploy, update, and remove policies remotely across all managed Linux devices in the organization.
Manually test policies on a local machine
Step 1: Copy the policy file
-
Ensure the
/etc/vscodedirectory exists:sudo mkdir -p /etc/vscodeNoteYou need root or sudo privileges to create the directory and manage policy files in
/etc/vscode. -
Copy the edited policy file to the
/etc/vscode/system location:sudo cp /tmp/policy.json /etc/vscode/policy.jsonSet appropriate permissions:
sudo chmod 644 /etc/vscode/policy.json
sudo chown root:root /etc/vscode/policy.json
Step 2: Verify the policy installation
- Launch VS Code (or restart it if already running).
- Open File > Preferences > Settings (or press
Ctrl+,). - Look for settings that correspond to your configured policies - they should show as "managed by your organization" or have a lock icon.
- Hover over managed settings to see that they are controlled by policy.
You can verify the policy file is being read by checking VS Code's logs or by attempting to change a managed setting (the change will be prevented).
Remove policies
To remove all policies and revert to default settings, delete the /etc/vscode/policy.json file and restart VS Code.
Verify policy enforcement
After you deploy enterprise policies to a device, you can confirm that VS Code is reading and enforcing them with the Developer: Policy Diagnostics command. The command opens a new untitled Markdown document with a report of the current policy state on the device. It works the same way on Windows, macOS, and Linux.
The report includes the following sections:
- System Information: VS Code product name, version, and commit, useful for matching the report to a specific build.
- Account Information: details of the default account that is signed in, including the raw account-level policy data returned by the account provider.
- Account Policy Gate: state of the approved GitHub organizations gate that controls AI features. Possible states are
inactive,satisfied, andrestricted. When the state isrestricted, the report also lists a reason such asnoAccount,wrongProvider,orgNotApproved, orpolicyNotResolved. - Policy-Controlled Settings: two tables that list the policy state for each registered setting:
- Applied Policy: settings that are currently overridden by a policy, with the setting key, policy name, policy source, default value, current value, and the value enforced by the policy.
- Non-applied Policy: registered policies that are not currently being enforced. Use this table to detect deployment errors, such as a misspelled key or a policy file that is not being read.
- Authentication Information: registered authentication providers, sessions, accounts, and the extensions that have access to each account.
The report can contain sensitive information such as account identifiers, session details, and the list of extensions with access to each account. Review the contents before you share the report.
If the Account Policy Gate state is policyNotResolved, run the Developer: Sync Account Policy command to force a refresh of the account-side policy data, then regenerate the report.
VS Code enterprise policy reference
The following table lists all available enterprise policies in VS Code.
| Policy Setting ID |
Description |
|---|---|
CopilotOtelOtlpProtocol |
Controls the enterprise-managed OTLP wire protocol (protobuf vs JSON) for Copilot OpenTelemetry export. |
CopilotOtelServiceName |
Controls the enterprise-managed OTel service.name resource attribute for Copilot OpenTelemetry export. |
CopilotOtelResourceAttributes |
Controls the enterprise-managed OTel resource attributes for Copilot OpenTelemetry export. |
CopilotOtelHeaders |
Controls the enterprise-managed OTLP exporter headers for Copilot OpenTelemetry export. |
McpEnterpriseManagedAuthIdp |
The OAuth/OIDC IdP configuration used for enterprise-managed Model Context Protocol (MCP) server authentication. |
ChatExtraMarketplaces |
Additional plugin marketplaces to query. Keys are marketplace names; values are GitHub shorthand (owner/repo[#ref]) or Git URIs ({url}[#ref]). |
McpGalleryServiceUrl |
Configure the MCP Gallery service URL to connect to |
ChatApprovedAccountOrganizations |
Setting this policy to a non-empty list activates the Approved Account gate: all AI features are disabled until the user signs into a GitHub account whose organizations intersect this list AND the account-side policy data has resolved. Comparison is case-insensitive. Use '*' as a wildcard to accept any signed-in GitHub or GHE account (use this for GHE deployments where the organization list is not surfaced). |
ExtensionGalleryServiceUrl |
Configure the Marketplace service URL to connect to |
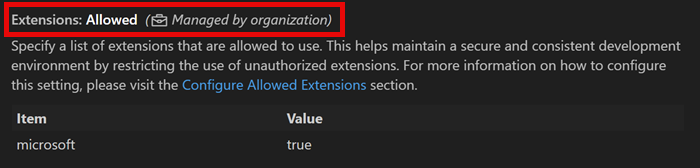
AllowedExtensionsextensions.allowed This setting is managed at the organization level. Contact your administrator to change it. |
Specify a list of extensions that are allowed to use. This helps maintain a secure and consistent development environment by restricting the use of unauthorized extensions. More information: https://aka.ms/vscode/enterprise/extensions/allowed |
ChatAgentHostEnabledchat.agentHost.enabled This setting is managed at the organization level. Contact your administrator to change it. |
When enabled, some agents run in a separate agent host process. |
Claude3PIntegrationchat.agentHost.claudeAgent.enabled This setting is managed at the organization level. Contact your administrator to change it. github.copilot.chat.claudeAgent.enabled This setting is managed at the organization level. Contact your administrator to change it. |
Enable Claude Agent sessions in VS Code. Start and resume agentic coding sessions powered by Anthropic Claude Agent SDK directly in the editor. Uses your existing Copilot subscription. |
Codex3PIntegrationchat.agentHost.codexAgent.enabled This setting is managed at the organization level. Contact your administrator to change it. |
Enable Codex Agent sessions in VS Code. Start and resume agentic coding sessions powered by OpenAI Codex SDK. Uses your existing Copilot subscription. |
CopilotOtelEnabledchat.agentHost.otel.enabled This setting is managed at the organization level. Contact your administrator to change it. |
Controls whether Copilot OpenTelemetry export is enabled. When managed, users cannot override the enterprise value. |
CopilotOtelProtocolchat.agentHost.otel.exporterType This setting is managed at the organization level. Contact your administrator to change it. |
Controls the enterprise-managed OTLP protocol for Copilot OpenTelemetry export. |
CopilotOtelEndpointchat.agentHost.otel.otlpEndpoint This setting is managed at the organization level. Contact your administrator to change it. |
Controls the enterprise-managed OTLP collector endpoint for Copilot OpenTelemetry export. |
CopilotOtelCaptureContentchat.agentHost.otel.captureContent This setting is managed at the organization level. Contact your administrator to change it. |
Controls whether Copilot OpenTelemetry export captures prompt, response, and tool content. |
CopilotOtelOutfilechat.agentHost.otel.outfile This setting is managed at the organization level. Contact your administrator to change it. |
Prevents local file export when enterprise-managed Copilot OpenTelemetry export is configured. |
ChatDefaultModelchat.defaultModel This setting is managed at the organization level. Contact your administrator to change it. |
Sets the default chat model for new conversations. Accepts "auto", a model family name (such as "opus" or "gemini"), or a full model id. Users can still switch the model within a conversation. |
ChatToolsAutoApprovechat.tools.global.autoApprove This setting is managed at the organization level. Contact your administrator to change it. |
Global auto approve also known as "YOLO mode" disables manual approval completely for all tools in all workspaces, allowing the agent to act fully autonomously. This is extremely dangerous and is never recommended, even containerized environments like Codespaces and Dev Containers have user keys forwarded into the container that could be compromised. This feature disables critical security protections and makes it much easier for an attacker to compromise the machine. Note: This setting only controls tool approval and does not prevent the agent from asking questions. To automatically answer agent questions, use the #chat.autoReply# setting. |
CopilotSessionSyncchat.sessionSync.enabled This setting is managed at the organization level. Contact your administrator to change it. |
Enable session sync to GitHub.com for cross-device Copilot session history. When disabled by organization policy, session data is kept local only. |
ChatToolsEligibleForAutoApprovalchat.tools.eligibleForAutoApproval This setting is managed at the organization level. Contact your administrator to change it. |
Controls which tools are eligible for automatic approval. Tools set to 'false' will always present a confirmation and will never offer the option to auto-approve. The default behavior (or setting a tool to 'true') may result in the tool offering auto-approval options. |
ChatMCPchat.mcp.access This setting is managed at the organization level. Contact your administrator to change it. |
Controls access to installed Model Context Protocol servers. |
ChatAgentExtensionToolschat.extensionTools.enabled This setting is managed at the organization level. Contact your administrator to change it. |
Enable using tools contributed by third-party extensions. |
ChatPluginsEnabledchat.plugins.enabled This setting is managed at the organization level. Contact your administrator to change it. |
Enable agent plugin integration in chat. |
ChatEnabledPluginschat.plugins.enabledPlugins This setting is managed at the organization level. Contact your administrator to change it. |
Plugin enablement. Keys are plugin IDs in {plugin}@{marketplace} form; values enable or disable the plugin. |
ChatStrictMarketplaceschat.plugins.strictMarketplaces This setting is managed at the organization level. Contact your administrator to change it. |
Allowlist of plugin marketplace sources. When set, only marketplaces matching an entry are trusted; an empty array blocks all marketplaces. |
ChatAgentModechat.agent.enabled This setting is managed at the organization level. Contact your administrator to change it. |
When enabled, agent mode can be activated from chat and tools in agentic contexts with side effects can be used. |
ChatAgentNetworkFilterchat.agent.networkFilter This setting is managed at the organization level. Contact your administrator to change it. |
When enabled, network access by agent tools (fetch tool, integrated browser) is restricted according to #chat.agent.allowedNetworkDomains# and #chat.agent.deniedNetworkDomains#. Domain filtering is also applied to those tools when #chat.agent.sandbox.enabled# is enabled. |
ChatAgentAllowedNetworkDomainschat.agent.allowedNetworkDomains This setting is managed at the organization level. Contact your administrator to change it. |
Allowed domains for network access by agent tools (fetch tool, integrated browser). Applies when #chat.agent.networkFilter# or #chat.agent.sandbox.enabled# is enabled. When #chat.agent.sandbox.allowNetwork# is enabled, all domains are allowed. Supports wildcards like *.example.com. When both allowed and denied lists are empty, all domains are blocked. Denied domains (see #chat.agent.deniedNetworkDomains#) take precedence. |
ChatAgentDeniedNetworkDomainschat.agent.deniedNetworkDomains This setting is managed at the organization level. Contact your administrator to change it. |
Denied domains for network access by agent tools (fetch tool, integrated browser). Applies when #chat.agent.networkFilter# or #chat.agent.sandbox.enabled# is enabled. This does not apply when #chat.agent.sandbox.allowNetwork# is enabled. Takes precedence over #chat.agent.allowedNetworkDomains#. Supports wildcards like *.example.com. |
ChatHookschat.useHooks This setting is managed at the organization level. Contact your administrator to change it. |
Controls whether chat hooks are executed at strategic points during an agent's workflow. Hooks are loaded from the files configured in #chat.hookFilesLocations#. |
ExtensionsAutoUpdateextensions.autoUpdate This setting is managed at the organization level. Contact your administrator to change it. |
Controls the automatic update behavior of extensions. The updates are fetched from a Microsoft online service. |
ExtensionsAutoUpdateDelayextensions.autoUpdateDelay This setting is managed at the organization level. Contact your administrator to change it. |
Controls the delay in hours after an extension update is published before it is automatically installed. Only applies when #extensions.autoUpdate# is set to on. This delay helps avoid installing potentially problematic updates immediately after release. |
ChatToolsTerminalEnableAutoApprovechat.tools.terminal.enableAutoApprove This setting is managed at the organization level. Contact your administrator to change it. |
Controls whether to allow auto approval in the run in terminal tool. |
ChatAgentSandboxEnabledchat.agent.sandbox.enabled This setting is managed at the organization level. Contact your administrator to change it. |
Controls whether agent mode uses sandboxing to restrict what tools can do. When enabled, tools like the terminal are run in a sandboxed environment to limit access to the system. Use #chat.agent.sandbox.allowNetwork# to allow all network domains. |
ChatAgentSandboxAllowNetworkchat.agent.sandbox.allowNetwork This setting is managed at the organization level. Contact your administrator to change it. |
When #chat.agent.sandbox.enabled# is enabled, controls whether to allow all network domains in the sandbox. When enabled, the sandbox preserves file system restrictions while relaxing all network restrictions. |
ChatAgentSandboxAllowUnsandboxedCommandschat.agent.sandbox.allowUnsandboxedCommands This setting is managed at the organization level. Contact your administrator to change it. |
Controls whether agent mode terminal commands can run outside the sandbox after user confirmation when a sandboxed command fails or when sandbox restrictions would block the command. This applies only when #chat.agent.sandbox.enabled# is enabled. |
ChatAgentSandboxAllowAutoApprovechat.agent.sandbox.allowAutoApprove This setting is managed at the organization level. Contact your administrator to change it. |
Controls whether agent mode terminal commands that run inside the sandbox are auto-approved. When disabled, the run in terminal tool uses the existing approval flow. This applies only when #chat.agent.sandbox.enabled# is enabled. |
UpdateModeupdate.mode This setting is managed at the organization level. Contact your administrator to change it. |
Configure whether you receive automatic updates. The updates are fetched from a Microsoft online service. |
TelemetryLeveltelemetry.telemetryLevel This setting is managed at the organization level. Contact your administrator to change it. |
Controls the level of telemetry. |
EnableFeedbacktelemetry.feedback.enabled This setting is managed at the organization level. Contact your administrator to change it. |
Enable feedback mechanisms such as the issue reporter, surveys, and other feedback options. |
BrowserChatToolsworkbench.browser.enableChatTools This setting is managed at the organization level. Contact your administrator to change it. |
When enabled, chat agents can use browser tools to open and interact with pages in the Integrated Browser. |
CopilotNextEditSuggestionsgithub.copilot.nextEditSuggestions.enabled This setting is managed at the organization level. Contact your administrator to change it. |
Whether to enable next edit suggestions (NES). NES can propose a next edit based on your recent changes. |
CopilotReviewSelectiongithub.copilot.chat.reviewSelection.enabled This setting is managed at the organization level. Contact your administrator to change it. |
Enables code review on current selection. |
CopilotReviewAgentgithub.copilot.chat.reviewAgent.enabled This setting is managed at the organization level. Contact your administrator to change it. |
Enables the code review agent. |
If you want to enact more policies, open an issue in the VS Code GitHub repository. The team will determine if there is already a corresponding setting for the behavior or if a new setting and policy should be created.