Custom agents in VS Code
Custom agents enable you to configure the AI to adopt different personas tailored to specific development roles and tasks. For example, you might create agents for a security reviewer, planner, solution architect, or other specialized roles. Each persona can have its own behavior, available tools, and instructions.
You can also use handoffs to create guided workflows between agents. Transition seamlessly from one specialized agent to another with a single select. For example, move from a planning agent directly into an implementation agent, or hand off to a code reviewer with the relevant context.
This article describes how to create and manage custom agents in VS Code.
Not sure which customization to use? See the decision matrix to compare custom agents with prompt files, agent skills, and the other options.
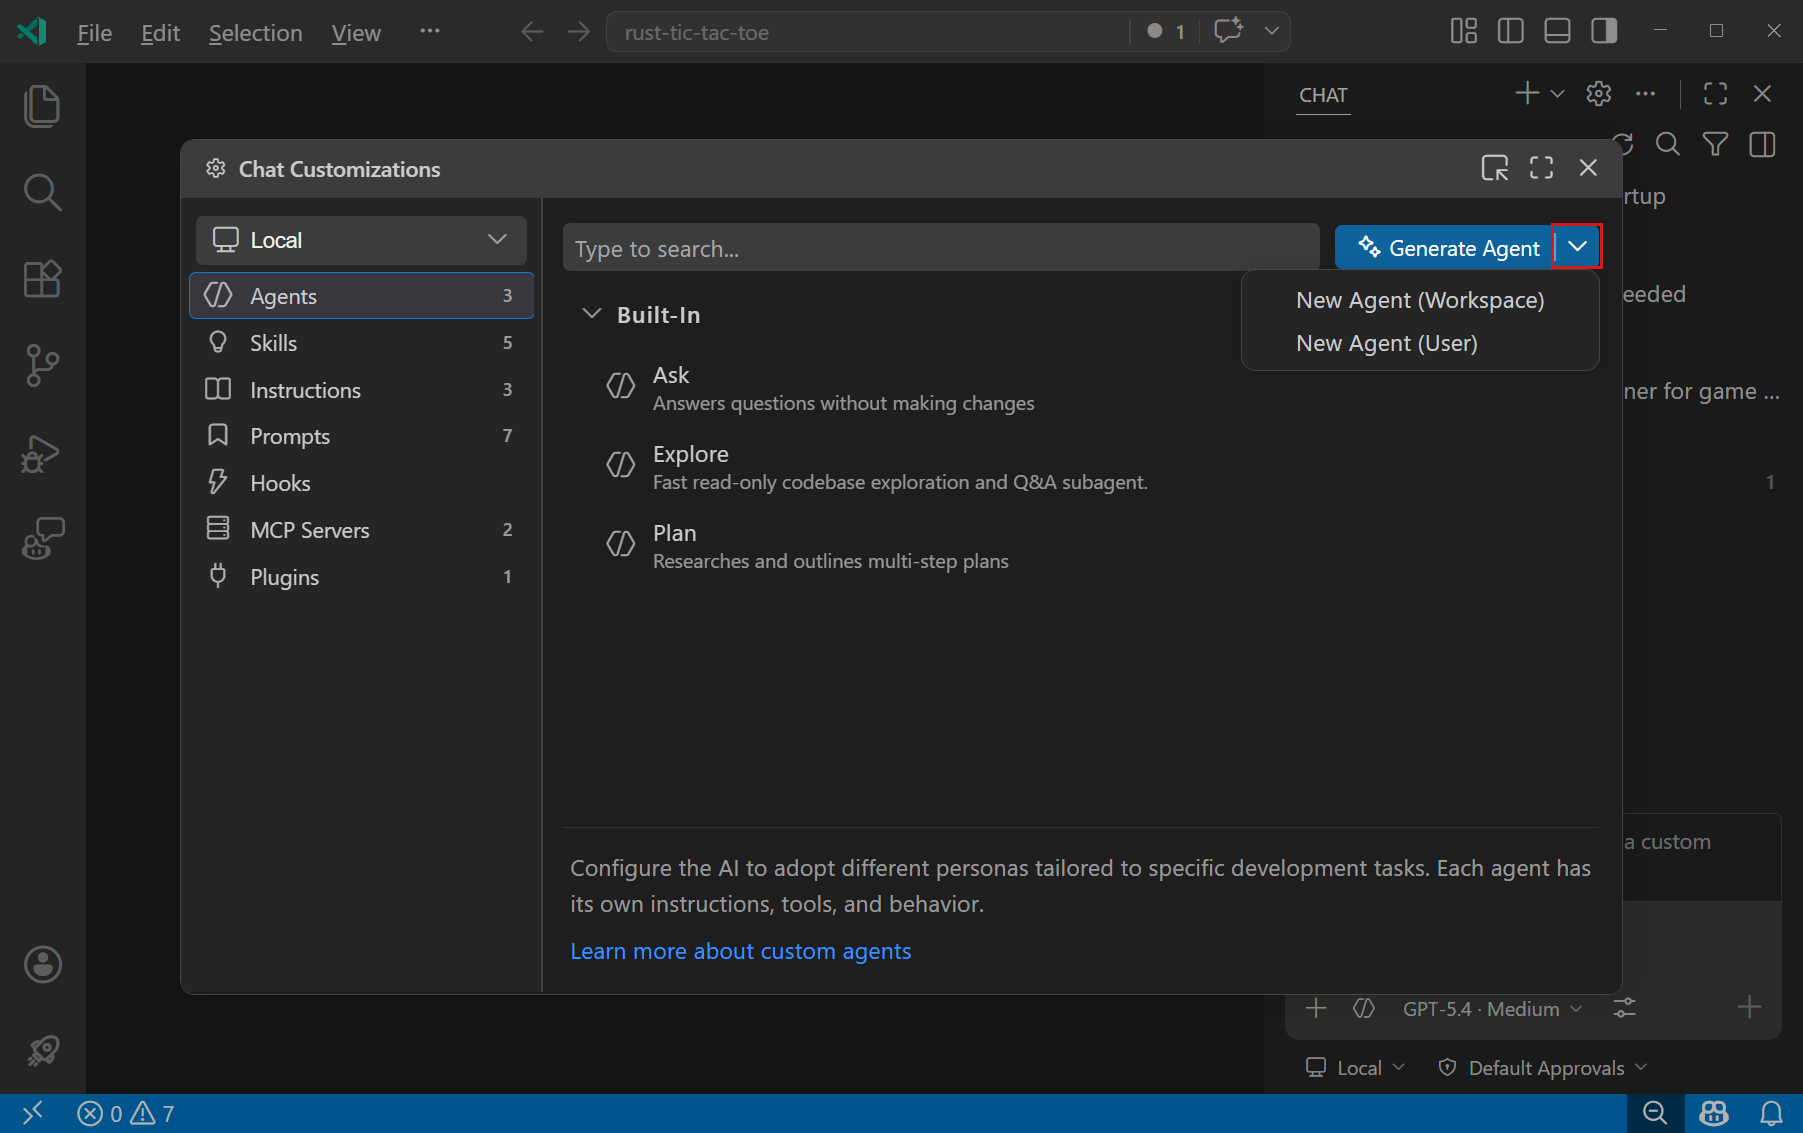
Use the Agent Customizations editor (Preview) to discover, create, and manage all your agent customizations in one place. Run Chat: Open Customizations from the Command Palette.
What are custom agents?
The built-in agents provide general-purpose configurations for chat in VS Code. For a more tailored chat experience, you can create your own custom agents.
Custom agents consist of a set of instructions and tools that are applied when you switch to that agent. For example, a "Plan" agent could include instructions for generating an implementation plan and only use read-only tools. By creating a custom agent, you can quickly switch to that specific configuration without having to manually select relevant tools and instructions each time.
Custom agents are defined in a .agent.md Markdown file, and can be stored in your workspace for others to use, or in your user profile, where you can reuse them across different workspaces.
You can reuse your custom agents in background agents and cloud agents, enabling you to run autonomous tasks with the same specialized configurations.
Why use custom agents?
Different tasks require different capabilities. A planning agent might only need read-only tools for research and analysis to prevent accidental code changes, while an implementation agent would need full editing capabilities. Custom agents let you specify exactly which tools are available for each task, ensuring the AI has the right capabilities for the job.
Custom agents also let you provide specialized instructions that define how the AI should operate. For instance, a planning agent could instruct the AI to collect project context and generate a detailed implementation plan, while a code review agent might focus on identifying security vulnerabilities and suggesting improvements. These specialized instructions ensure consistent, task-appropriate responses every time you switch to that agent.
Subagents can run with a custom agent. Learn more about running subagents with custom agents (experimental).
Handoffs
Handoffs enable you to create guided sequential workflows that transition between agents with suggested next steps. After a chat response completes, handoff buttons appear that let users move to the next agent with relevant context and a pre-filled prompt.
Handoffs are useful for orchestrating multi-step workflows that give developers control for reviewing and approving each step before moving to the next one. For example:
- Planning → Implementation: Generate a plan in planning agent, then hand off to implementation agent to start coding.
- Implementation → Review: Complete implementation, then switch to a code review agent to check for quality and security issues.
- Write Failing Tests → Write Passing Tests: Generate failing tests that are easier to review than big implementations, then hand off to make those tests pass by implementing the required code changes.
To define handoffs in your agent file, add them to the frontmatter. Each handoff specifies the target agent, the button label, and an optional prompt to send:
---
description: Generate an implementation plan
tools: ['search', 'web']
handoffs:
  - label: Start Implementation
    agent: implementation
    prompt: Now implement the plan outlined above.
    send: false
    model: GPT-5.2 (copilot)
---
When users see the handoff button and select it, they switch to the target agent with the prompt pre-filled. If send: true, the prompt automatically submits to start the next workflow step.
Custom agent file locations
You can define custom agents for a specific workspace or at the user level, where they are available across all your workspaces. The following table lists the default file locations for custom agents based on their scope. You can configure additional file locations for workspace custom agent files with the chat.agentFilesLocations setting.
| Scope | Default file location |
|---|---|
| Workspace | .github/agents folder |
| Workspace (Claude format) | .claude/agents folder |
| User profile | ~/.copilot/agents or your user data (specific to your VS Code profile) |
To create a custom agent in user data, use the Agent Customizations editor or use the Chat: New Custom Agent command.
In a monorepo, enable chat.useCustomizationsInParentRepositories to discover custom agents from the parent repository root. Learn more about parent repository discovery.
Custom agent file structure
Custom agent files are Markdown files and use the .agent.md extension and have the following structure.
VS Code detects any .md files in the .github/agents folder of your workspace as custom agents.
Header (optional)
The header is formatted as YAML frontmatter with the following fields:
| Field | Description |
|---|---|
description |
A brief description of the custom agent, shown as placeholder text in the chat input field. |
name |
The name of the custom agent. If not specified, the file name is used. |
argument-hint |
Optional hint text shown in the chat input field to guide users on how to interact with the custom agent. |
tools |
A list of tool or tool set names that are available for this custom agent. Can include built-in tools, tool sets, MCP tools, or tools contributed by extensions. To include all tools of an MCP server, use the <server name>/* format.Learn more about tools in chat. |
agents |
A list of agent names that are available as subagents in this agent. Use * to allow all agents, or an empty array [] to prevent any subagent use. If you specify agents, ensure the agent tool is included in the tools property. To create a self-referential agent that lists itself in agents, enable
chat.subagents.allowInvocationsFromSubagents
. Learn more about nested subagents. |
model |
The AI model to use when running the prompt. Specify a single model name (string) or a prioritized list of models (array). When you specify an array, the system tries each model in order until an available one is found. If not specified, the currently selected model in model picker is used. |
user-invocable |
Optional boolean flag to control whether the agent appears in the agents dropdown in chat (default is true). Set to false to create agents that are only accessible as subagents or programmatically. |
disable-model-invocation |
Optional boolean flag to prevent the agent from being invoked as a subagent by other agents (default is false). |
infer |
Deprecated. Use user-invocable and disable-model-invocation instead. Previously, infer: true (the default) made the agent both visible in the picker and available as a subagent. infer: false hid it from both. The new fields give you independent control: use user-invocable: false to hide from the picker while still allowing subagent invocation, or disable-model-invocation: true to prevent subagent invocation while keeping it in the picker. |
target |
The target environment or context for the custom agent (vscode or github-copilot). |
mcp-servers |
Optional list of Model Context Protocol (MCP) server config json to use with custom agents in GitHub Copilot (target: github-copilot). |
handoffs |
Optional list of suggested next actions or prompts to transition between custom agents. Handoff buttons appear as interactive suggestions after a chat response completes. |
handoffs.label |
The display text shown on the handoff button. |
handoffs.agent |
The target agent identifier to switch to. |
handoffs.prompt |
The prompt text to send to the target agent. |
handoffs.send |
Optional boolean flag to auto-submit the prompt (default is false) |
handoffs.model |
Optional language model to use when the handoff executes. Use the qualified model name in the format Model Name (vendor), for example GPT-5 (copilot) or Claude Sonnet 4.5 (copilot). |
hooks (Preview) |
Optional hook commands scoped to this agent. Hooks defined here only run when this agent is active, either invoked by the user or as a subagent. Uses the same format as hook configuration files. Requires chat.useCustomAgentHooks to be enabled. |
If a given tool is not available when using the custom agent, it is ignored.
Body
The custom agent file body contains the custom agent implementation, formatted as Markdown. This is where you provide specific prompts, guidelines, or any other relevant information that you want the AI to follow when in this custom agent.
You can reference other files by using Markdown links, for example to reuse instructions files.
To reference agent tools in the body text, use the #tool:<tool-name> syntax. For example, to reference the fetch tool, use #tool:web/fetch.
When you select the custom agent in the Chat view, the guidelines in the custom agent file body are prepended to the user chat prompt.
Examples
Planning agent example
The following code snippet shows an example of a "Plan" custom agent file that generates an implementation plan and doesn't make any code edits. For more community-contributed examples, see the Awesome Copilot repository.
---
description: Generate an implementation plan for new features or refactoring existing code.
name: Planner
tools: ['web/fetch', 'search/codebase', 'search/usages']
model: ['Claude Opus 4.5', 'GPT-5.2']  # Tries models in order
handoffs:
  - label: Implement Plan
    agent: agent
    prompt: Implement the plan outlined above.
    send: false
---
# Planning instructions
You are in planning mode. Your task is to generate an implementation plan for a new feature or for refactoring existing code.
Don't make any code edits, just generate a plan.

The plan consists of a Markdown document that describes the implementation plan, including the following sections:

* Overview: A brief description of the feature or refactoring task.
* Requirements: A list of requirements for the feature or refactoring task.
* Implementation Steps: A detailed list of steps to implement the feature or refactoring task.
* Testing: A list of tests that need to be implemented to verify the feature or refactoring task.
Agent orchestration example
The following example shows a "Feature Builder" agent that coordinates specialized subagents for a research-then-implement workflow. The main agent uses the agents property to restrict which agents can be invoked as subagents.
feature-builder.agent.md - The coordinating agent:
---
name: Feature Builder
description: Build features by researching first, then implementing
tools: ['agent']
agents: ['Researcher', 'Implementer']
---
You are a feature builder. For each task:
1. Use the Researcher agent to gather context and find relevant patterns in the codebase
2. Use the Implementer agent to make the actual code changes based on research findings
researcher.agent.md - Read-only research agent:
---
name: Researcher
description: Research codebase patterns and gather context
tools: ['search/codebase', 'web/fetch', 'search/usages']
---
Research thoroughly using read-only tools. Return a summary of findings.
implementer.agent.md - Code editing agent:
---
name: Implementer
description: Implement code changes based on provided context
tools: ['edit', 'read/terminalLastCommand']
---
Implement changes following existing code patterns. Make minimal, focused edits.
Agent with scoped hooks example (Preview)
The following example shows a custom agent that defines hooks in its frontmatter. The PostToolUse hook runs a formatter after file edits and only runs when this agent is active. Enable
chat.useCustomAgentHooks
to use this feature.
---
name: "Strict Formatter"
description: "Agent that auto-formats code after every edit"
hooks:
  PostToolUse:
    - type: command
      command: "./scripts/format-changed-files.sh"
---

You are a code editing agent. After making changes, files are automatically formatted.
Learn more about hooks in Agent hooks.
Claude agent format
Agent files in the .claude/agents folder use plain .md files and support Claude-specific frontmatter properties:
| Field | Description |
|---|---|
name |
Agent name (required) |
description |
What the agent does |
tools |
Comma-separated string of allowed tools (for example, "Read, Grep, Glob, Bash") |
disallowedTools |
Comma-separated string of tools to block |
VS Code maps Claude-specific tool names to the corresponding VS Code tools. Both the VS Code .agent.md format (with YAML arrays for tools) and the Claude format (with comma-separated strings) are supported.
VS Code also detects .md files in the .claude/agents folder, following the Claude sub-agents format. This enables you to use the same agent definitions across VS Code and Claude Code.
Create a custom agent
You can create a custom agent file in your workspace or user profile.
Type /agents in the chat input to quickly open the Configure Custom Agents menu.
-
In the Chat view, select Configure Chat (gear icon) to open the Agent Customizations editor and then select the Agents tab.
-
Select New Agent (Workspace) or New Agent (User) from the dropdown, depending on where you want to store the agent file.
Alternatively, run the Chat: New Custom Agent command from the Command Palette (⇧⌘P (Windows, Linux Ctrl+Shift+P)).
TipYou can configure additional locations where VS Code searches for custom agent files by using the chat.agentFilesLocations setting. This is useful for sharing agents across projects or keeping them in a central location outside your workspace.
-
Select the location and enter a file name for the custom agent. This is the default name that appears in the agents dropdown.
-
Provide the details for the custom agent in the newly created
.agent.mdfile.- Fill in the YAML frontmatter at the top of the file to configure the custom agent's name, description, tools, and other settings.
- Add instructions for the custom agent in the body of the file.
You can modify existing custom agents by opening them in the Agent Customizations editor.
Generate a custom agent with AI
You can use AI to generate a custom agent based on a description of the role. Type /create-agent in Agent mode chat and describe the persona you want (for example, "a security review agent"). The agent asks clarifying questions and generates an .agent.md file with appropriate tools, instructions, and frontmatter.
You can also extract a custom agent from an ongoing conversation. For example, after a multi-turn debugging session, ask "make an agent for this kind of task" to capture the workflow as a reusable custom agent.
You can also generate a custom agent from the Agent Customizations editor by selecting Generate Agent from the dropdown.
Customize the agents dropdown list
If you have multiple custom agents, you can customize which ones appear in the agents dropdown. To show or hide specific custom agents:
-
Select Configure Custom Agents from the agents dropdown.
-
Hover over a custom agent in the list, and then select the eye icon to show or hide it from the agents dropdown.
Tool list priority
When you use tools in both a custom agent and a prompt file, the prompt file's tools take precedence. For the full priority order, see Tool list priority in the prompt files documentation.
Share custom agents across teams
To share custom agents across your team, you can create a workspace-level custom agent (.github/agents folder). If you want to share custom agents across multiple workspaces within your organization, you can define them at the GitHub organization level.
VS Code automatically detects custom agents defined at the organization level to which your account has access. These agents appear in the Agents dropdown in chat alongside the built-in agents, and your personal and workspace custom agents.
To enable discovery of organization-level custom agents, set
github.copilot.chat.organizationCustomAgents.enabled
to true.
Learn how you can create custom agents for your organization in the GitHub documentation.
Frequently asked questions
Are custom agents different from chat modes?
Custom agents were previously known as custom chat modes. The functionality remains the same, but the terminology has been updated to better reflect their purpose in customizing AI behavior for specific tasks.
If you have existing .chatmode.md files, rename them to .agent.md to convert them to the new custom agent format and place them in the appropriate location (
chat.agentFilesLocations
) to continue using them.
How do I remove a custom agent?
To completely remove a custom agent from VS Code:
- Delete the corresponding
.agent.mdfile from your workspace or user profile. - Select Configure Custom Agents from the agents dropdown, hover over the custom agent in the list, and select the trash icon.
To remove a custom agent that was contributed by an extension, you need to uninstall the extension that provides it. If you don't want to uninstall the extension, you can hide the custom agent from the agents dropdown instead. Follow the steps in Customize the agents dropdown list.
How do I know where a custom agent comes from?
Custom agents can come from different sources: built-in agents, user-defined agents in your profile, workspace-defined agents in your current workspace, organization-defined agents, or extension-contributed agents.
To identify the source of a custom agent:
- Select Configure Custom Agents from the agents dropdown.
- Hover over the custom agent in the list. The source location is displayed in a tooltip.
Use the chat customization diagnostics view to see all loaded custom agents, prompt files, instruction files, and skills along with any errors. Right-click in the Chat view and select Diagnostics. Learn more about troubleshooting AI in VS Code.
Security considerations
Custom agents can restrict which tools are available, which gives you control over what the AI can do. For security-sensitive workflows, create agents with read-only tools to prevent unintended modifications. When sharing agents in a repository, review the tool list and instructions to ensure they follow the principle of least privilege.