Editing and Navigating C++ Code
This article provides an overview of code editing and navigating features specific to the C/C++ extension. For more information about general editing and navigating in Visual Studio Code, see Basic Editing and Code Navigation.
Editing C++ code
The source code editing features provided by the C/C++ extension are powerful tools for editing, formatting, and understanding your codebase.
Identifying header files
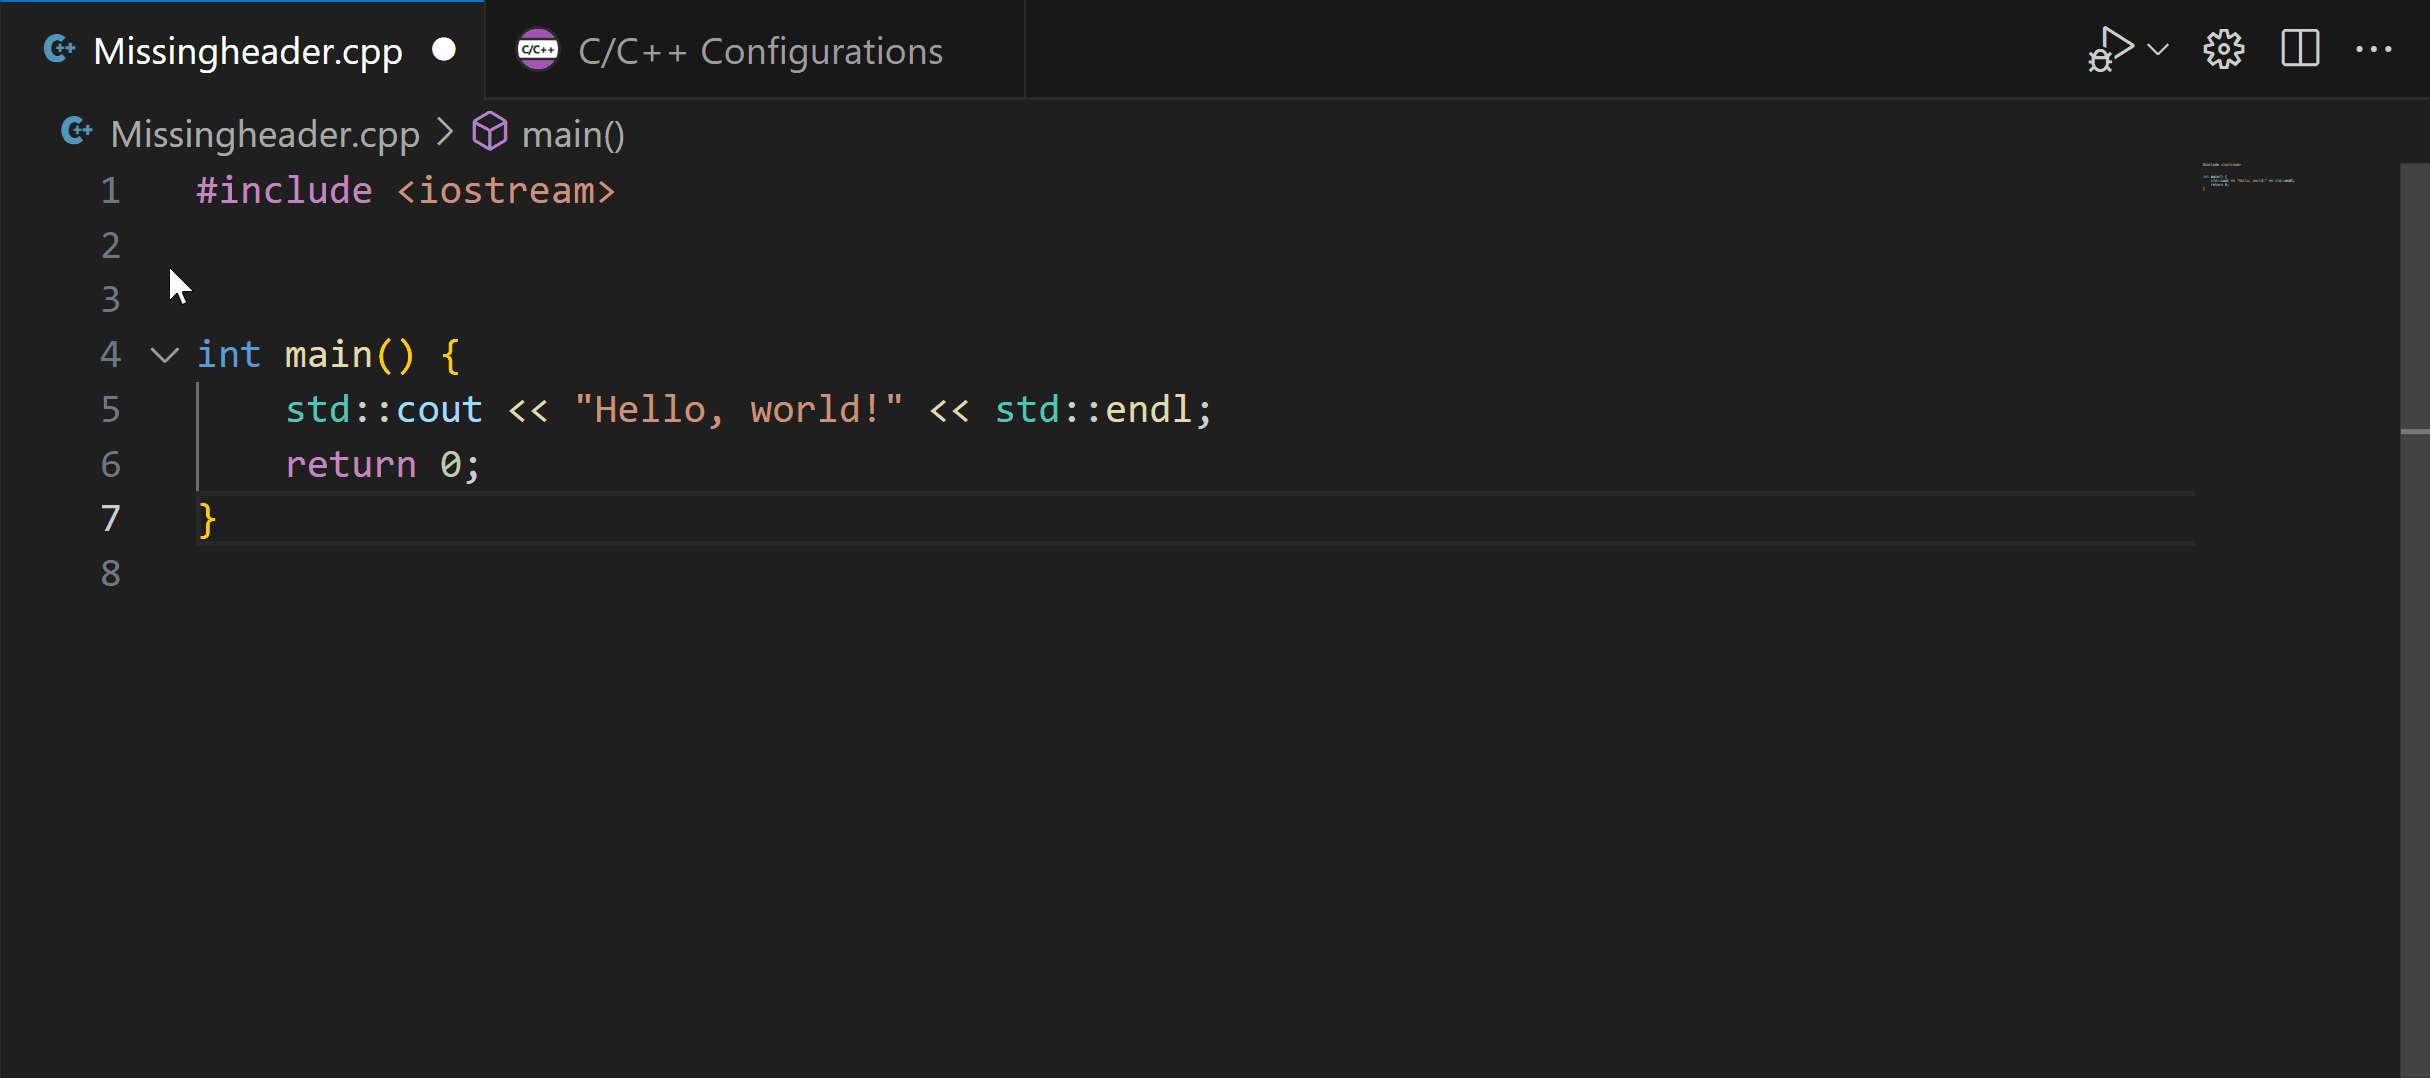
To provide the best editing experience, the C++ extension needs to know where to find each header file that is referenced in your code. By default, the extension searches the current source directory, its subdirectories, and some platform-specific locations. If a referenced header file can't be found, a red squiggle is displayed underneath the #include directive.
To specify additional include directories,
- Select an
#includepath that has no reference. - Select the light bulb that appears and choose
Edit "includePath" setting, which opens the C/C++ extension's Settings editor. - Under the Include Path section, you can specify the paths for any additional include directories.
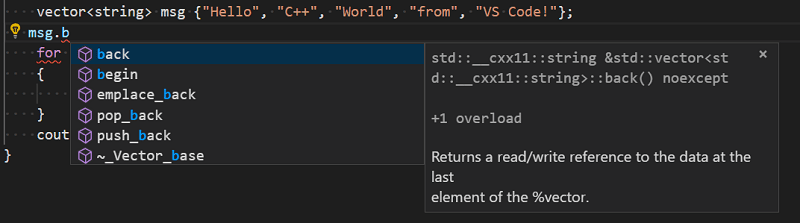
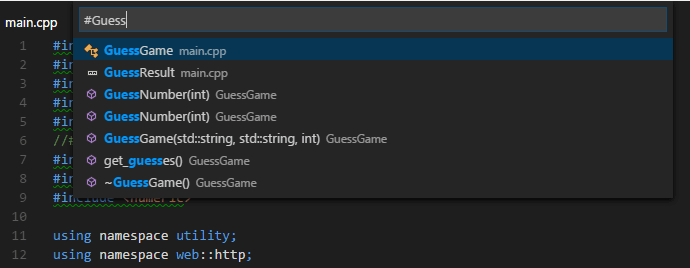
List members
When you type a member access symbol (. or ->), the editor displays a list of members. As you type more letters, the list is filtered in real time:
Code formatting
The C/C++ extension for Visual Studio Code supports source code formatting using clang-format and vc_format. Both of these formatting options are included in the extension, with clang-format being the default.
You can format an entire file with Format Document (⇧⌥F (Windows, Linux Shift+Alt+F)) or just the current selection with Format Selection (⌘K ⌘F (Windows, Linux cmd+K cmd+F)) in right-click context menu. You can also trigger formatting based on user gestures such as typing, saving, and pasting with the following settings:
editor.formatOnSave- to format when you save your file.editor.formatOnType- to format as you type (triggered on the ; character).
To learn more about formatting, see Formatting.
Clang-format
By default, the clang-format style is set to file. This means that if a .clang-format file is found in your workspace, the settings specified in the file are used as the formatting reference. Otherwise formatting is based on the default style specified in the C_Cpp.clang_format_fallbackStyle setting.
Currently, the default formatting style is Visual Studio, an approximation of the default code formatter in Visual Studio. It implies the following settings:
UseTab: (VS Code current setting)
IndentWidth: (VS Code current setting)
BreakBeforeBraces: Allman
AllowShortIfStatementsOnASingleLine: false
IndentCaseLabels: false
ColumnLimit: 0
To use a different version of clang-format than the one that ships with the extension, change the C_Cpp.clang_format_path setting to the path where the clang-format binary is installed.
For example, on the Windows platform, use:
"C_Cpp.clang_format_path": "C:\\Program Files (x86)\\LLVM\\bin\\clang-format.exe"
vc_format
By default, if an .editorconfig file with relevant settings is identified near the code being formatted, the Visual C++ formatting engine is used instead of clang-format. Otherwise, navigate to the C_Cpp.formatting setting and set it to vc_format to use the Visual C++ formatting engine.
Enhanced semantic colorization
When IntelliSense is enabled, the Visual Studio Code C/C++ extension supports semantic colorization. For more information about setting colors for classes, functions, variables, and more, see Enhanced colorization. For more information on configuring IntelliSense, see IntelliSense configuration.
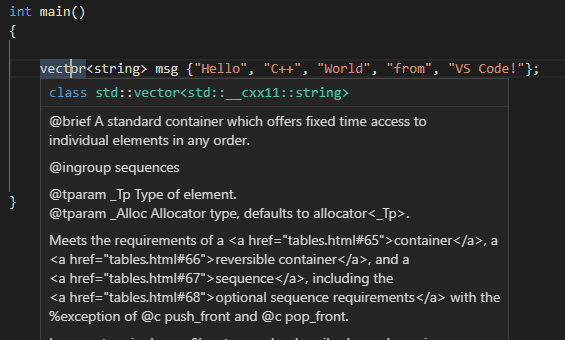
Quick Info
You can hover over a symbol to see an inline view of its definition:
Doxygen comments
Doxygen is a tool that generates documentation from source code. When you annotate code with comments, Doxygen then generates documentation for these functions. For doxygen comments, type /** and press Enter to generate a doxygen comment block. Supported doxygen tags include: @brief,@tparam, @param, @return, @exception, @deprecated, @note, @attention, and @pre.
Markdown comments
By default, the C++ extension supports showing a subset of markdown in your editor. This subset supports all markdown comments except the symbols _ and *. Toggle the new Markdown in Comments setting to either enable all markdown, keep this subset of markdown, or disable markdown support.
Navigate source code
The source code navigation features can help improve your understanding of your codebase. These let you quickly search for symbols in your code, navigate to their definitions, or find references to them.
Navigation is powered by a set of tags stored in a local database of symbol information. Whenever a folder containing C++ source code files is opened, the C/C++ extension creates a database of the symbols defined in those files. This database is updated whenever a file is changed. If a document is closed without saving, the database is updated to the last saved state.
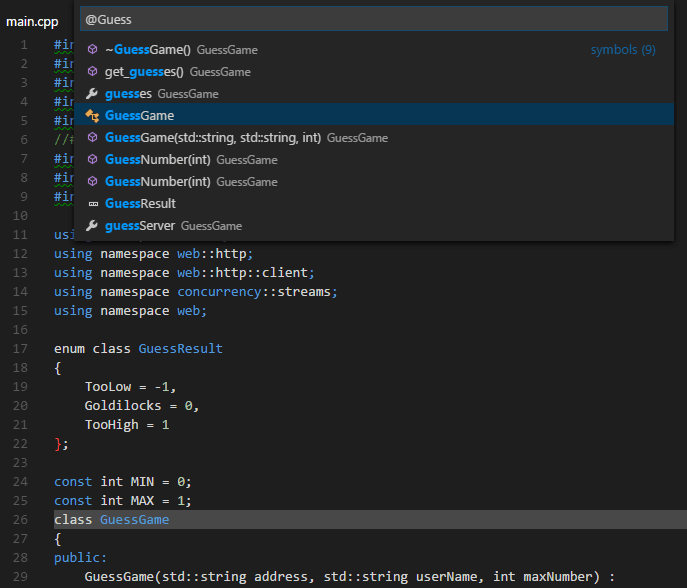
Search for symbols
You can search for symbols in the current file or workspace to navigate your code more quickly.
To search for a symbol in the current file, press ⇧⌘O (Windows, Linux Shift+cmd+O), then enter the name of the symbol you're looking for. A list of potential matches appears, which is filtered as you type. Choose from the list of matches to navigate to that symbol's location.
To search for a symbol in the current workspace, press ⌘T (Windows, Linux cmd+T), then enter the name of the symbol. A list of potential matches will appear. If the match you choose is located in a file that's not already open, the file will be opened before navigating to the match's location.
You can also search for symbols by accessing these commands through the Command Palette(⇧⌘P (Windows, Linux Shift+cmd+P)). Use Quick Open (⌘P (Windows, Linux cmd+P)), then enter the @ command to search the current file, or the # command to search the current workspace. ⇧⌘O (Windows, Linux Shift+cmd+O) and ⌘T (Windows, Linux cmd+T) are shortcuts for the @ and # commands.
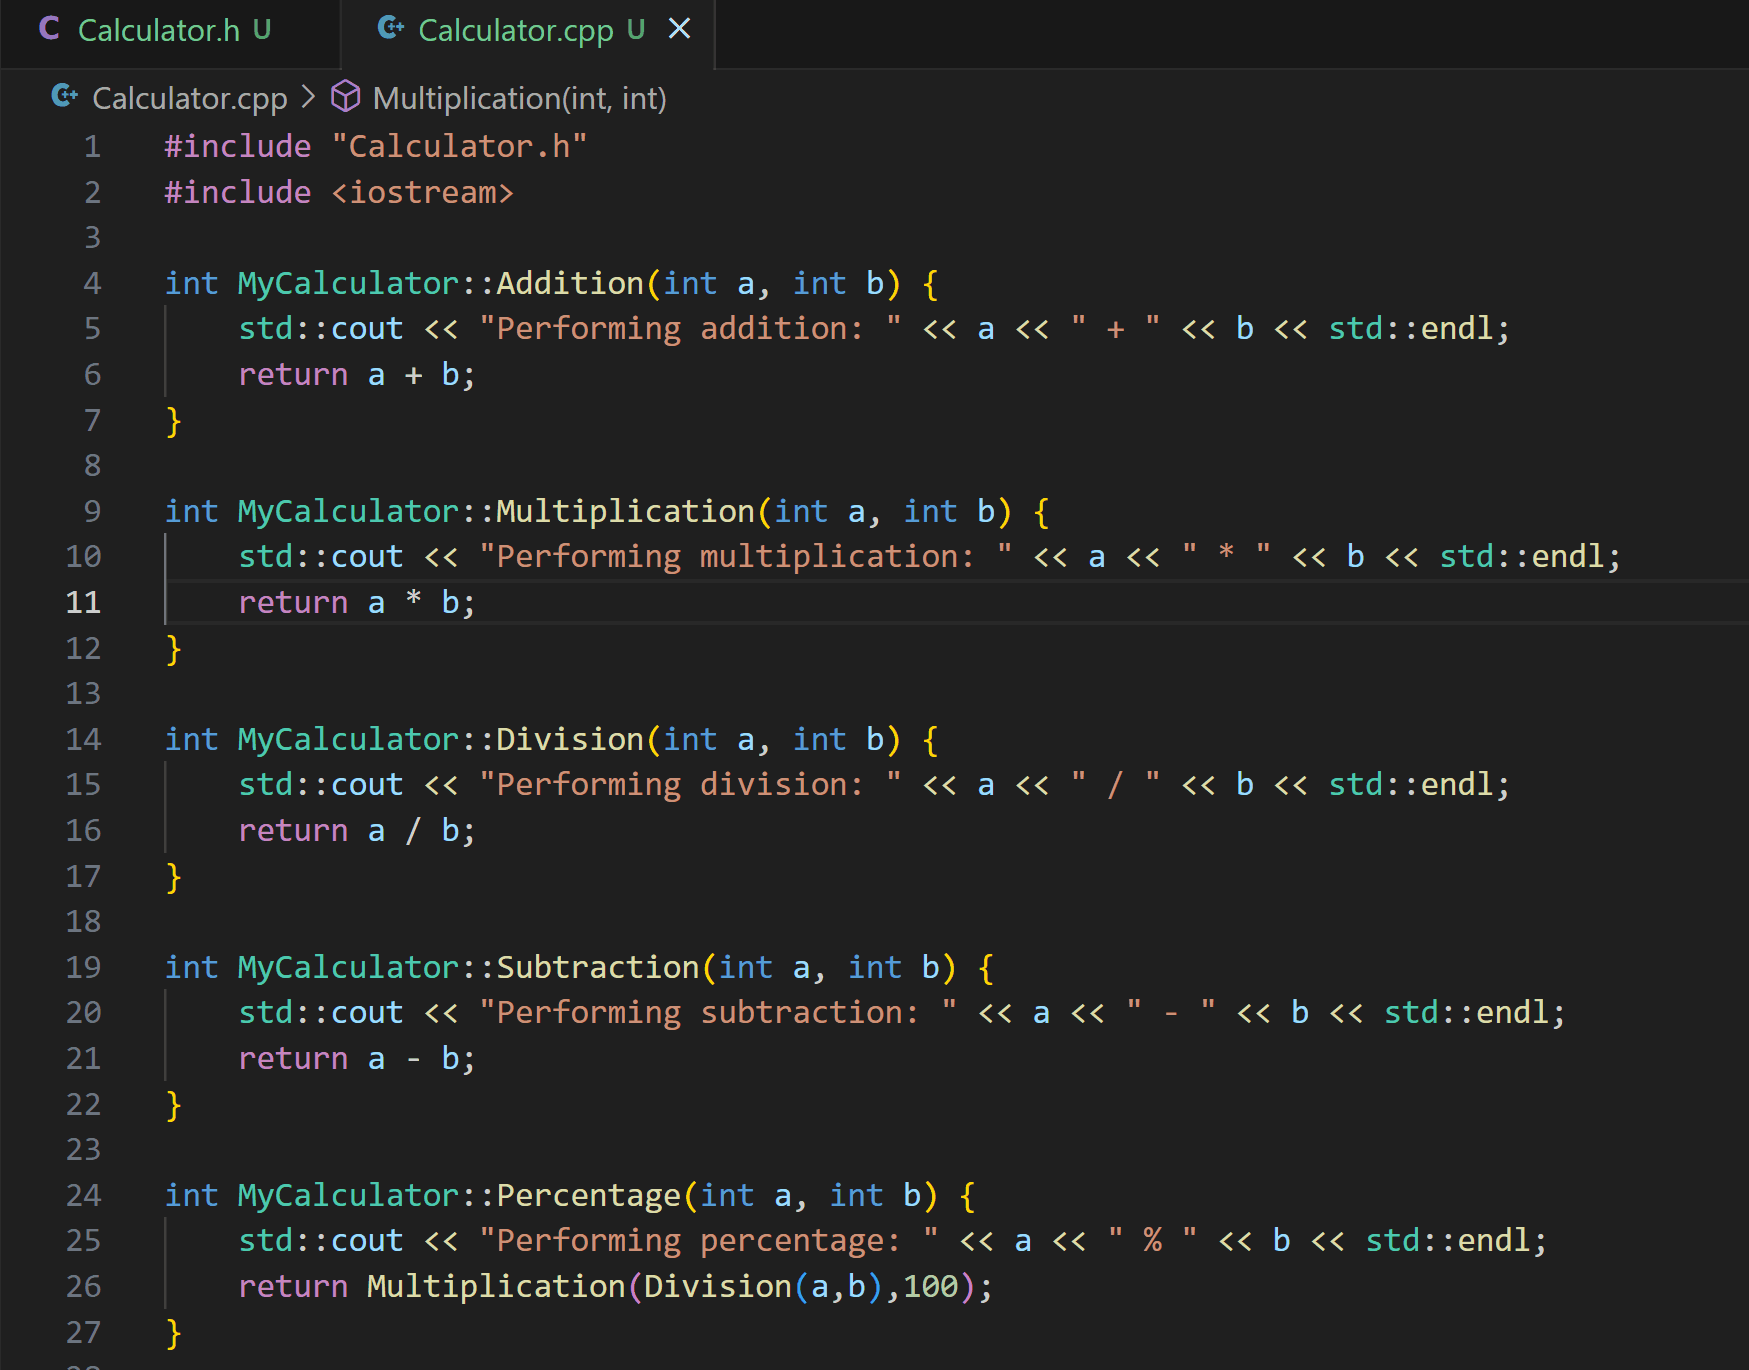
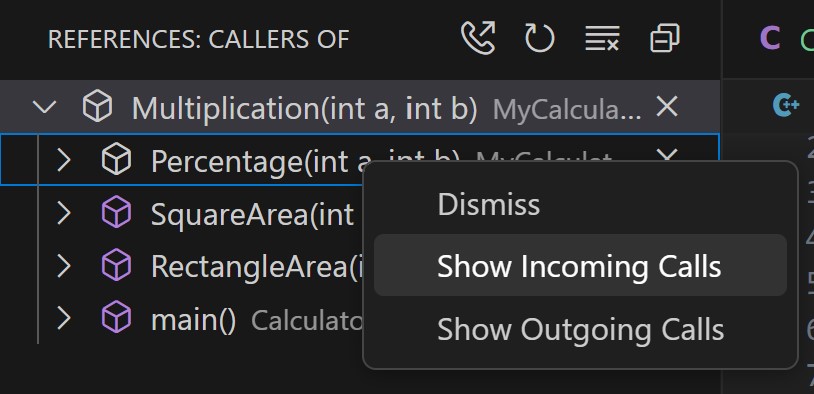
Call hierarchy
The Call Hierarchy view shows all calls to or from a function. It lets you understand the complex calling relationships between the functions in your source code.
To view the call hierarchy, select a function, right-click to display the context menu, and choose Show Call Hierarchy. You can also use the keyboard shortcut (Shift+Alt+H on Windows), or invoke the Command Palette (⇧⌘P (Windows, Linux Shift+cmd+P)) and run the command Calls: Show Call Hierarchy. This populates the call tree in the side bar with all of the functions called by your selected function.
Toggle the phone icon in the side bar menu to switch to incoming calls. Incoming calls show whenever your function is referenced by another function. You can also explore nested calls by selecting a function already shown in the call tree and right-clicking on that function to view the available commands.
Peek
The Peek feature displays a few lines of code inside a peek window, so that you don't have to navigate away from your current location. It's useful for quickly understanding the context of a symbol without having to navigate away from your current code.
To open a peek window, navigate to the context menu by right-clicking, then select Peek. There, you can choose to peek at a symbol's definition, declaration, type definition, or references.
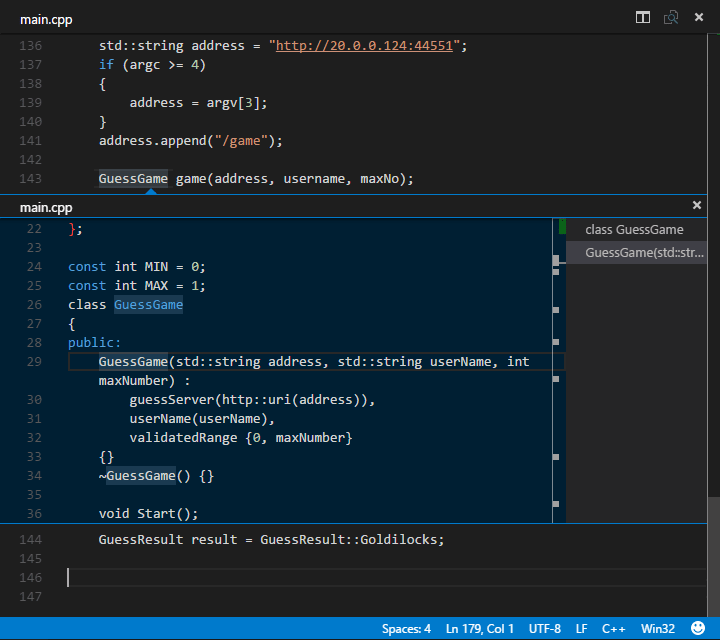
With the peek window open, you browse the list of results shown to find the one you're interested in. If you want to navigate to the location of one of these results, select the result or double-click in the source code displayed on the left-hand side of the peek window.
Go to definition
Use the Go to Definition feature to quickly navigate to where a symbol is defined in your source code. Select a symbol in your source code and then press F12, or right-click and choose Go to Definition from the context menu. When there's only one definition of the symbol, you are navigated directly to its location, otherwise the competing definitions are displayed in a peek window as described in the previous section.
If no definitions can be found for the symbol you selected, the C/C++ extension automatically searches for a declaration of the symbol.
Go to declaration
Use the Go to Declaration feature to navigate to the location where a symbol is declared in your source code. This feature functions the same as Go to Definition, but for declarations. Select a symbol in your source code, right-click, and choose Go to Declaration from the context menu. This navigates you to the location of the symbol's declaration.
Go to references
Use the Go to References feature to understand how often and where a symbol is referenced in your source code. Select a symbol in your source code and press ⇧F12 (Windows, Linux Shift+F12) or right-click and choose Go to References from the context menu. If any references are found, they are displayed in a peek window.
Go to type definition
Use the Go to Type Definition feature to jump to where a type is defined in your source code. Select a type in your source code, right-click to open the context menu, and choose Go to Type Definition.
Next steps
Read on to find out about:
- Debugging C++ Code
- Configure IntelliSense
- Configure VS Code for MSVC
- Configure VS Code for Mingw-w64 and GCC
- Configure VS Code for macOS
- Basic Editing in VS Code
- Code Navigation in VS Code
- Tasks in VS Code
If you have any other questions or run into any issues, please file an issue on GitHub. You might be asked to provide logging information from the extension to help diagnose the issue. See C/C++ extension logging for help on providing extension logs.