Build with AI in VS Code
Use AI in Visual Studio Code to understand unfamiliar code, fix bugs, and build features. For a task that spans files and tools, an agent can find relevant code, make changes, and run checks without you directing each search, edit, and test run. You describe the outcome, review the changes, and verify the result.
Work with an agent in the same workspace as your editor, terminal, tests, and debugger. You can inspect its changes and investigate failures without moving code and command output to a separate chat application. For a question or focused edit, use chat, inline chat, or suggestions without delegating an entire task.
For day-to-day coding and agent tasks, start with the Copilot harness to explore code, plan changes, implement features, and run tests. The harness uses a shared runtime for core capabilities and more consistent behavior across VS Code, GitHub Copilot CLI, and the GitHub Copilot app. You can continue the same live session in the Chat view or Agents window, and discover and continue supported sessions created in GitHub Copilot CLI or the GitHub Copilot app.
Choose another agent harness when you need its tools or workflows, or delegate an independent task to a cloud agent.
Build and validate a small app in the Chat view, then review the result.
If you're new to both VS Code and AI, first install the editor and open a workspace. If you already use agents, skip the sample project and follow the experienced-agent fast track. For AI help without delegating a task, choose between suggestions, focused edits, questions, and agents.
The quickstart uses the GitHub Copilot harness. See the Copilot setup guide for account, usage, and data-handling requirements. If provider, sign-in, or execution location affects your setup, compare agent harnesses and review their requirements and setup.
What you can do with AI
Choose a workflow based on the task, from help with a single line to a coordinated change across your project.
| Your goal | How AI helps |
|---|---|
| Implement a feature, fix a bug, or refactor across files | Work with an agent to find relevant code, make changes, and run tests. |
| Understand a codebase or explore an approach | Ask questions in chat to get explanations grounded in your code and discuss alternatives. |
| Research a complex change before editing | Plan with an agent and review the proposed approach before implementation. |
| Make a focused edit without leaving your code | Use inline chat to describe the change in the editor. |
| Get code suggestions while you type | Use inline suggestions for completions and suggested next edits. |
| Complete a common development task | Use smart actions for tasks such as generating a commit message or explaining selected code. |
You use chat both to ask questions and to direct agents. You can ask Agent to propose an approach before editing, or select Plan, where available, for a dedicated planning workflow.
For a compact comparison, use the AI features cheat sheet to choose the least autonomous option that fits your task.
How you work with an agent
An agent uses a language model to reason about your request and tools to act on your development environment. It gathers context, such as code, error messages, and test results, rather than relying only on the words in your prompt.
For example, ask an agent to fix a failing test while preserving the intended behavior:
- The agent finds the test and reads the related code to understand the failure.
- It edits the implementation or tests based on the task and your constraints.
- It runs the tests, inspects the results, and revises its changes if needed.
- You review the diff and validation results, verify the behavior yourself, and decide which changes to keep.
This repeated reasoning, action, and validation is the agent loop. You can provide more context, redirect the work, or stop the agent along the way. Learn more about how agents work.
The conversation and work for a task belong to a session. Sessions keep related context and changes together so you can return to a task or manage independent tasks separately. Learn about sessions and handoff.
Ways to work with agents
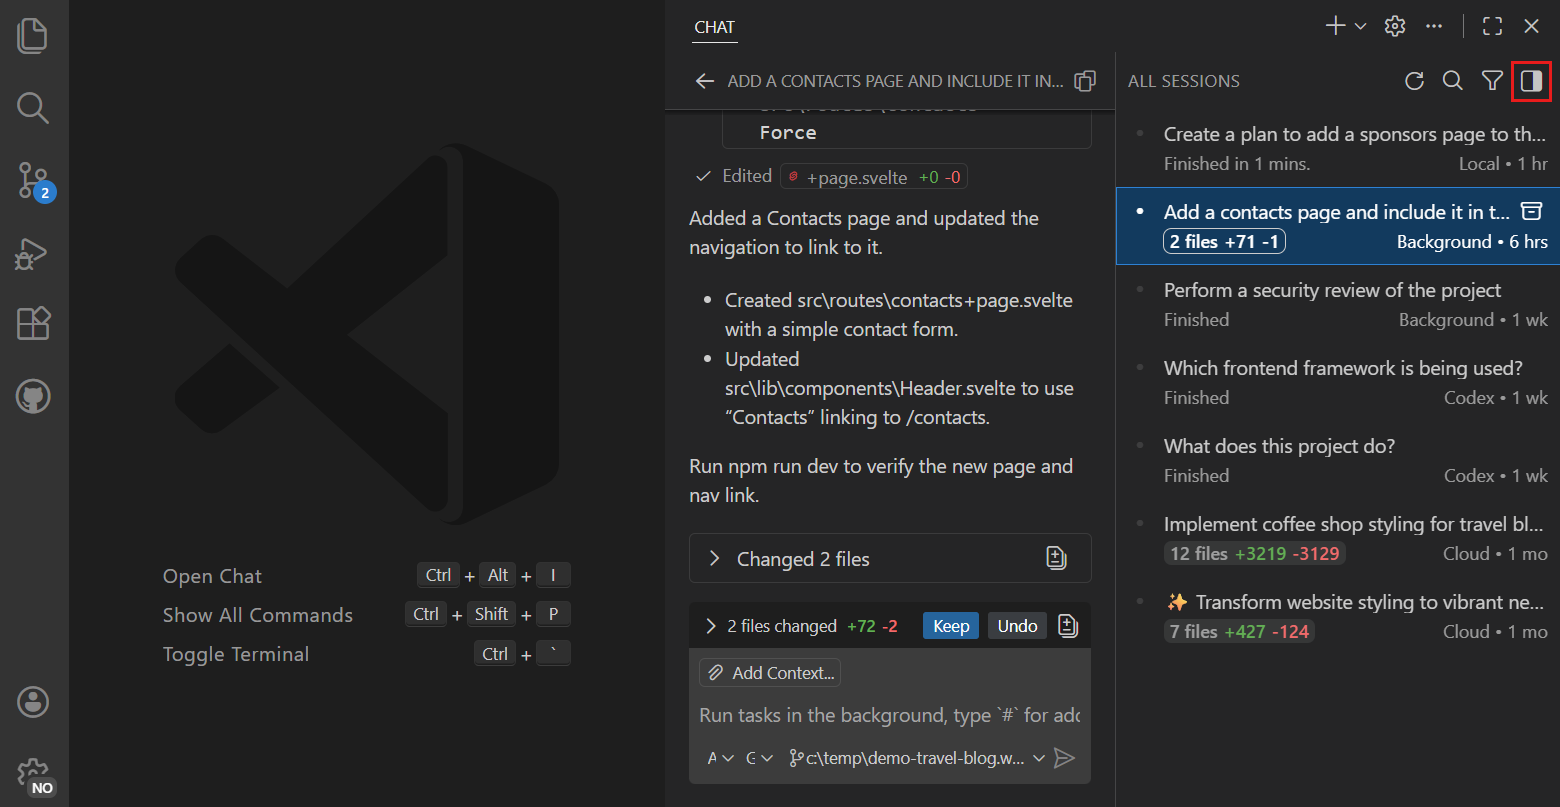
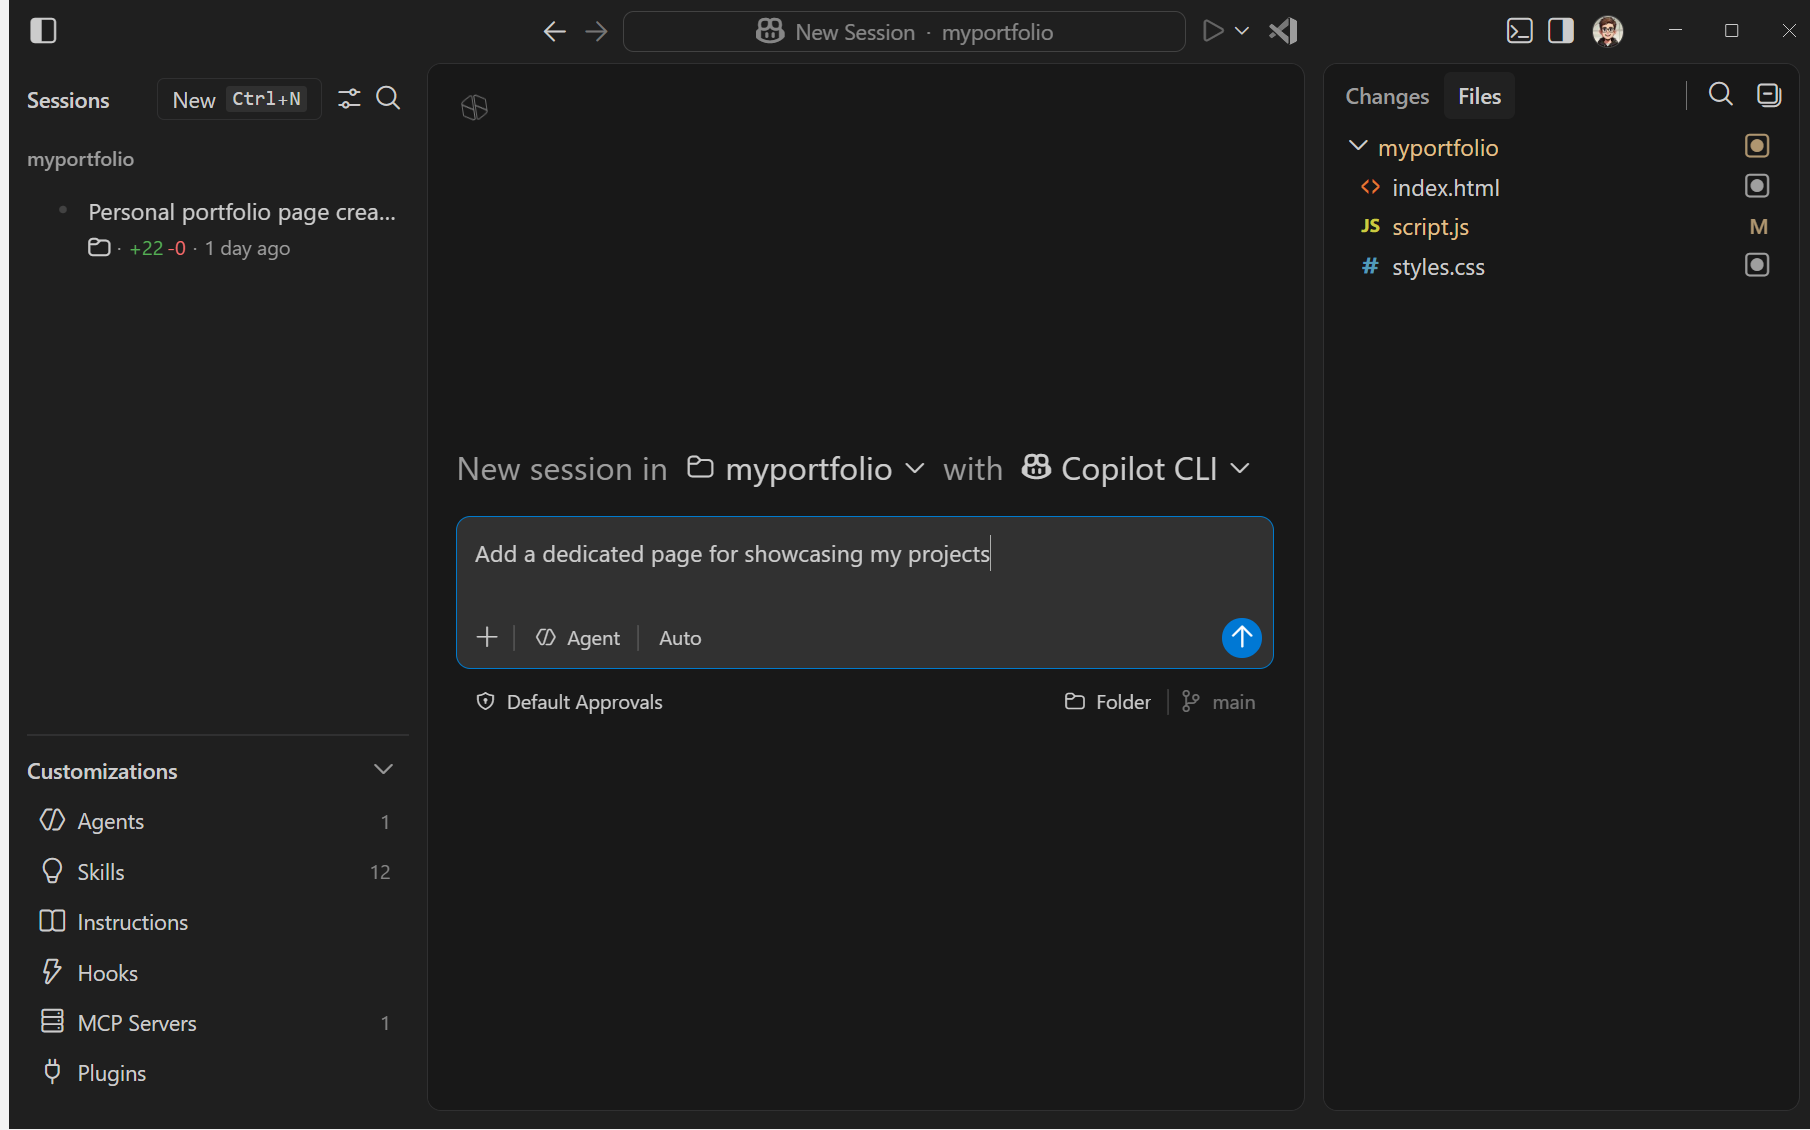
Both the Chat view and the Agents window support agent workflows. Choose the Chat view for collaboration over code in your current workspace, or the Agents window for multi-project orchestration and higher-level task assignment. You can continue supported sessions between them rather than choosing one interface for every task.
For a path from your first request through planning, steering, review, and recovery, see Run agents in VS Code.
Work alongside your code
Use the Chat view when you're working in an open project. Keep the conversation beside your editor, inspect changes as they happen, and use the debugger, terminal, and tests as part of the same workflow. This is the starting point for the agents quickstart.
For keyboard, screen reader, and low-vision workflows, learn how to use the Accessible View and other accessibility features.
Delegate and manage tasks
Use the Agents window when your focus is assigning tasks and reviewing their results. Manage multiple sessions across projects, follow their progress, and open the editor when you want to work directly with the code.
Other ways to access agents
For terminal-based work, use GitHub Copilot CLI. The GitHub Copilot app provides a dedicated desktop experience. You can open and continue supported local sessions created in either application in VS Code. To continue a Copilot session in the CLI, right-click the session and select Resume in Terminal.
For work away from your machine, explore cloud agents that return pull requests or remote sessions and browser access.
Choose your models, agents, and tools
Start with the quickstart's recommended setup, then adjust individual choices to fit your task and project:
- Models: choose a language model based on the reasoning capabilities, speed, and cost your task requires.
- Agent harnesses: use a supported agent harness, such as Copilot, Anthropic Claude, or OpenAI Codex, for its tools and workflows. The harness connects a model to tools and manages the session, so changing harnesses is different from switching models.
- Model access: use models from your GitHub Copilot plan, bring your own API key (BYOK), or connect a supported local model. These options let you use an existing model provider account or keep model processing local.
- Tools and customization: share your coding standards and test commands through project instructions. Connect external systems through Model Context Protocol (MCP) servers, package recurring tasks as agent skills, or install plugins that bundle tools and workflows. Compare the options in agent customization concepts.
Available models, tools, and customizations depend on the selected harness, your account, and your organization's policies.
Where tools run and where the model is hosted are separate choices. An agent can edit files on your machine while sending model requests to a hosted provider.
Stay in control
AI can produce incorrect code or misunderstand your intent. You remain responsible for deciding which changes reach your codebase.
- Review before integrating. Agents can save edits directly to the session folder or worktree. Review the diff and validate the result before you commit or merge changes.
- Control actions and redirect work. Use permissions and approvals to decide which actions require confirmation. You can steer or stop a request, but stopping doesn't undo completed actions or changes to external services.
- Understand isolation. A Git worktree keeps code changes separate, but isn't a security boundary. For file system and network restrictions on agent-run terminal commands, review the platform-specific sandboxing options.
Before using agents on an existing project, review the recommended security baseline. On a managed device, your organization might restrict available agents, models, and tools through enterprise AI policies. If agents don't appear in chat, review the availability troubleshooting steps.
Next steps
- New to VS Code and AI: Install the editor, open a workspace, and choose a first task.
- Already use VS Code, but new to agents: Complete a first agent task with a recommended starting configuration.
- Already use AI agents: Follow the experienced-agent fast track to work in your own repository.
- Prefer lighter-weight AI: Choose an AI feature for suggestions, focused edits, questions, or delegated work.
- Ready to improve a project workflow: Adapt agents to your project, then compare quality, reliability, and usage.