Getting Started with C# in VS Code
This getting started guide introduces you to C# and .NET for Visual Studio Code through the following tasks:
- Installing and setting up your VS Code environment for C#.
- Writing and running a simple "Hello World" application using C#.
- Introduce you to other learning resources for C# in VS Code.
Keep in mind, that this guide won't teach you C#. Instead, it teaches you how to get set up for C# development in VS Code. If you're looking for resources to learn C#, check out the free C# Certificate from freeCodeCamp.
Necessary tools
- Visual Studio Code
- C# Dev Kit extension
- For .NET Development, the .NET SDK
Install
Installing VS Code and extensions
- If you haven't already done so, install VS Code.
- Next, install C# Dev Kit from the Visual Studio Marketplace. For additional details on installing extensions, read Extension Marketplace. The C# extension is called C# Dev Kit and it's published by Microsoft.
Note: C# Dev Kit supports cloud native development. To do cross-platform mobile and desktop development, you can use C# Dev Kit with the .NET MAUI extension. Learn how to get set up with .NET MAUI in VS Code.
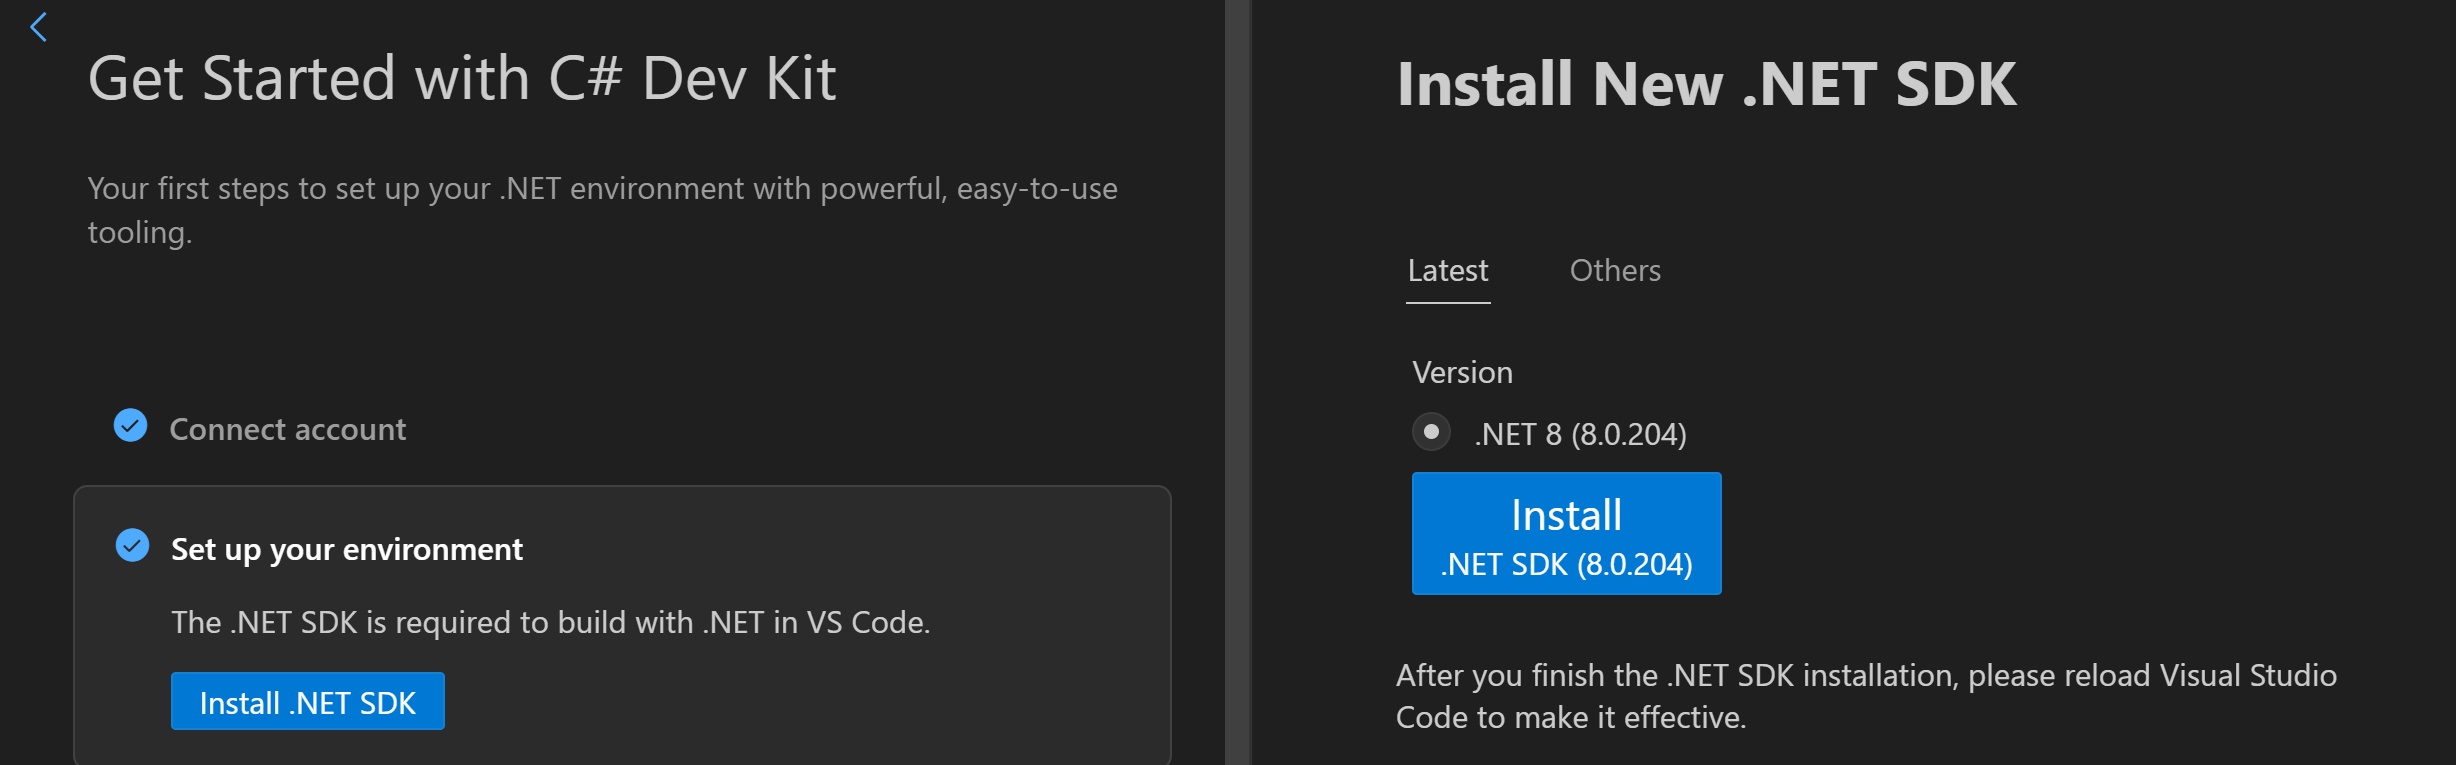
Upon installation, C# Dev Kit launches an extension walkthrough. You can follow the steps of this walkthrough to learn more about the features of the C# extension. You can also use this walkthrough to install the latest .NET SDK. Reopen the walkthrough at any time by opening the Command Palette (⇧⌘P (Windows, Linux Shift+cmd+P)) and selecting Welcome: Open Walkthrough. Here, select Get Started with C# Dev Kit.
Note: You are required to sign in to a Visual Studio subscription to use C# Dev Kit. Check out the Signing in to C# Dev Kit documentation to learn more.
In the walkthrough, select Set up your environment and select Install .NET SDK. This will open a window next to the walkthrough with a button to install the latest version of the .NET SDK. Select the Install button, which will trigger a download and an install of the .NET SDK. Follow the on-screen instructions to complete this process.
Create a Hello World app
To get started, go to the Explorer view and select Create .NET Project. Alternatively, you can bring up the Command Palette using ⇧⌘P (Windows, Linux Shift+cmd+P) and then type ".NET" and find and select the .NET: New Project command.
- After selecting the command, you'll need to choose the project template. Choose Console app.
- To run your app, select Run > Run without Debugging in the upper menu, or use the ⌃F5 (Windows, Linux Ctrl+F5) keyboard shortcut. To learn more about debugging your C# project, read the debugging documentation.
Learn more
Explore all the features the C# extension has to offer by looking for .NET in the Command Palette. For more information on these features, refer to the other documentation pages.
For learning materials on C# and .NET, check out the following resources:
Join the community
Find community resources and connect with user groups.
.NET developer community - Meet with like-minded developers