Add and manage MCP servers in VS Code
Model Context Protocol (MCP) is an open standard for connecting AI models to external tools and services. In Visual Studio Code, MCP servers provide tools for tasks like file operations, databases, or external APIs. MCP servers can also provide resources, prompts, and interactive apps.
For background on how MCP fits into the AI customization framework, see Customization concepts and Tools concepts.
This article covers how to add, configure, and manage MCP servers. To learn about using tools in chat, see Use tools in chat.
Use the Agent Customizations editor (Preview) to discover, create, and manage all your agent customizations in one place. Run Chat: Open Customizations from the Command Palette.
Quickstart: use an MCP server in chat
Follow these steps to install an MCP server and use its tools in chat. This example uses the Playwright MCP server to interact with web pages through a browser.
-
Open the Extensions view (⇧⌘X (Windows, Linux Ctrl+Shift+X)) and enter
@mcp playwrightin the search field. -
Select Install to install the Playwright MCP server in your user profile.
-
When prompted, confirm that you trust the server to start it. VS Code discovers the server's tools and makes them available in chat.
-
Open the Chat view (⌃⌘I (Windows, Linux Ctrl+Alt+I)) and enter a prompt that uses the Playwright tools. For example:
Go to code.visualstudio.com, decline the cookie banner, and give me a screenshot of the homepage.VS Code invokes the Playwright tools to open the page in a browser, and take a screenshot. You might be asked to confirm each tool invocation.
Select the Configure Tools button in the chat input to see all available tools for the Playwright MCP server and toggle specific tools on or off.
Add an MCP server
To install an MCP server from the MCP server gallery:
-
Open the Extensions view (⇧⌘X (Windows, Linux Ctrl+Shift+X)) and enter
@mcpin the search field. This shows the list of available MCP servers in the gallery. -
You can install an MCP server in your user profile or in your workspace:
-
To install in your user profile, select Install.
-
To install in your workspace, right-click the MCP server and select Install in Workspace. This updates the
.vscode/mcp.jsonfile in your workspace.
-
-
To view the MCP server details, select the MCP server in the list to open the details page.
Local MCP servers can run arbitrary code on your machine. Only add servers from trusted sources, and review the publisher and server configuration before starting it. Read the Security documentation for using AI in VS Code to understand the implications.
Configure the mcp.json file
You can manually configure MCP servers by editing the mcp.json file. There are two locations for this file:
- Workspace: create or open
.vscode/mcp.jsonin your project. Include this file in source control to share MCP server configurations with your team. - User profile: run the MCP: Open User Configuration command to open the
mcp.jsonfile in your user profile folder. Servers configured here are available across all your workspaces. When you use multiple profiles, each profile can have its own MCP server configuration.
You can also run MCP: Add Server in the Command Palette (⇧⌘P (Windows, Linux Ctrl+Shift+P)) to add a server through a guided flow, choosing either Workspace or Global as the target.
Avoid hardcoding sensitive information like API keys. Use input variables or environment files instead.
The following example shows an mcp.json file that configures a remote MCP server and a local MCP server:
{
  "servers": {
    "github": {
      "type": "http",
      "url": "https://api.githubcopilot.com/mcp"
    },
    "playwright": {
      "command": "npx",
      "args": ["-y", "@microsoft/mcp-server-playwright"]
    }
  }
}
VS Code provides IntelliSense for the configuration file. For the full configuration schema and field reference, see the MCP configuration reference.
MCP servers run wherever they are configured. Servers in your user profile run locally. If you're connected to a remote and want a server to run on the remote machine, define it in the workspace settings or remote user settings (MCP: Open Remote User Configuration).
Other options to add an MCP server
Add an MCP server to a dev container
MCP servers can be configured in Dev Containers through the devcontainer.json file. This allows you to include MCP server configurations as part of your containerized development environment.
To configure MCP servers in a Dev Container, add the server configuration to the customizations.vscode.mcp section:
{
  "image": "mcr.microsoft.com/devcontainers/typescript-node:latest",
  "customizations": {
    "vscode": {
      "mcp": {
        "servers": {
          "playwright": {
            "command": "npx",
            "args": ["-y", "@microsoft/mcp-server-playwright"]
          }
        }
      }
    }
  }
}
When the Dev Container is created, VS Code automatically writes the MCP server configurations to the remote mcp.json file, making them available in your containerized development environment.
Automatically discover MCP servers
VS Code can automatically detect and reuse MCP server configurations from other applications, such as Claude Desktop.
With the chat.mcp.discovery.enabled setting, you can select one or more tools from which to discover their MCP server configuration.
Install an MCP server from the command line
You can also use the VS Code command-line interface to add an MCP server to your user profile or to a workspace.
To add an MCP server to your user profile, use the --add-mcp VS Code command line option, and provide the JSON server configuration in the form {\"name\":\"server-name\",\"command\":...}.
code --add-mcp "{\"name\":\"my-server\",\"command\": \"uvx\",\"args\": [\"mcp-server-fetch\"]}"
Other MCP capabilities
Beyond tools, MCP servers can provide other capabilities:
| Capability | Description | How to use |
|---|---|---|
| Resources | Access data from MCP servers as context in your prompts, such as files, database tables, or API responses. Resources provide read-only context that you attach to a chat request. | In the Chat view, select Add Context > MCP Resources. You can also use the MCP: Browse Resources command. |
| Prompts | Use preconfigured prompt templates from MCP servers to standardize common tasks. Each MCP server can expose its own set of prompts tailored to its capabilities. | Type /<MCP server>.<prompt> in the chat input. |
| MCP Apps | Get interactive UI components like forms, visualizations, and drag-and-drop lists rendered directly in chat. MCP Apps enable richer interactions beyond text responses. Learn more in the MCP Apps blog post. | MCP Apps appear inline when an MCP server supports them. |
Sandbox MCP servers
On macOS and Linux, you can enable sandboxing for locally-running stdio MCP servers to restrict their access to the file system and network. Sandboxed servers run in an isolated environment and can only access the file paths and network domains that you explicitly permit.
To enable sandboxing for a server, set "sandboxEnabled": true in the server configuration in your mcp.json file. You can further customize the sandbox restrictions by adding a top-level sandbox object with specific file system and network rules.
The following example shows how to enable sandboxing for a local MCP server and restrict its access to only write to files in the workspace and access a specific API domain:
{
  "servers": {
    "myServer": {
      "type": "stdio",
      "command": "npx",
      "args": ["-y", "@example/mcp-server"],
      "sandboxEnabled": true
    }
  },
  "sandbox": {
    "filesystem": {
      "allowWrite": ["${workspaceFolder}"]
    },
    "network": {
      "allowedDomains": ["api.example.com"]
    }
  }
}
When sandboxing is enabled, tool calls from the server are auto-approved because they run in a controlled environment.
For the full sandbox configuration schema, see the Sandbox configuration reference.
Sandboxing is currently not available on Windows.
Manage MCP servers
VS Code provides several options to manage your MCP servers, such as starting or stopping a server, viewing logs, uninstalling, or clearing cached tools.
| Method | Description | |
|---|---|---|
| Extensions view | Right-click a server in the MCP SERVERS - INSTALLED section or select the gear icon. | 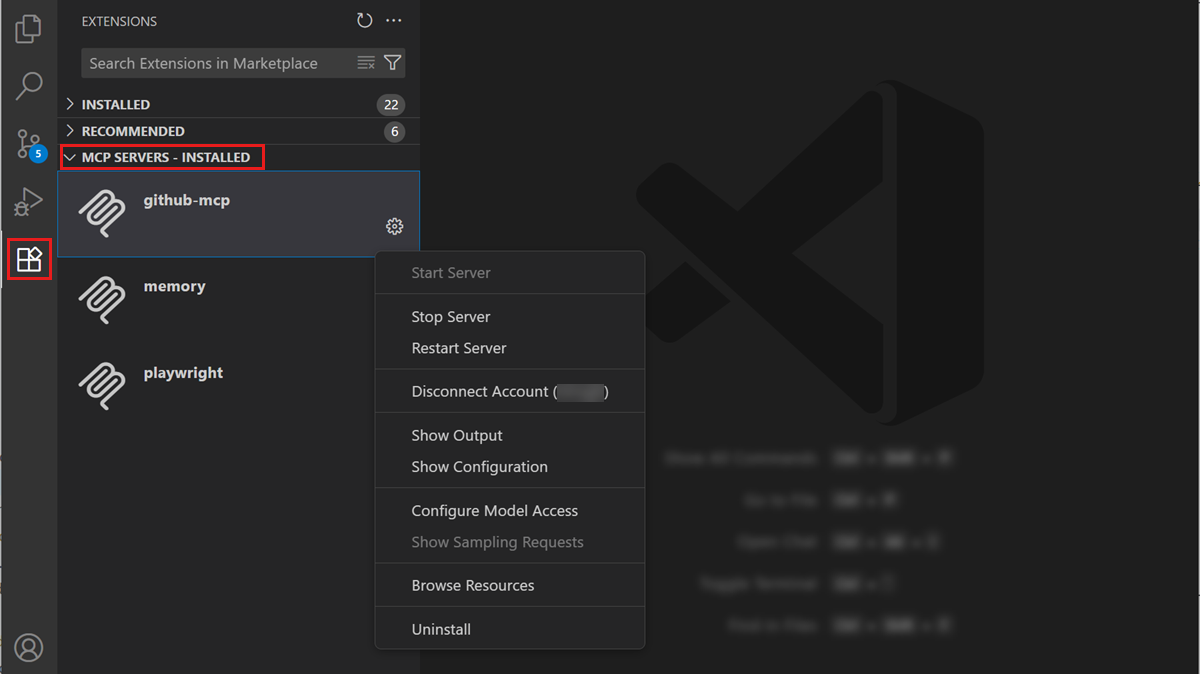 |
mcp.json editor |
Open the configuration file and use the inline actions (code lenses). Use MCP: Open User Configuration or MCP: Open Workspace Folder Configuration to open the file. | 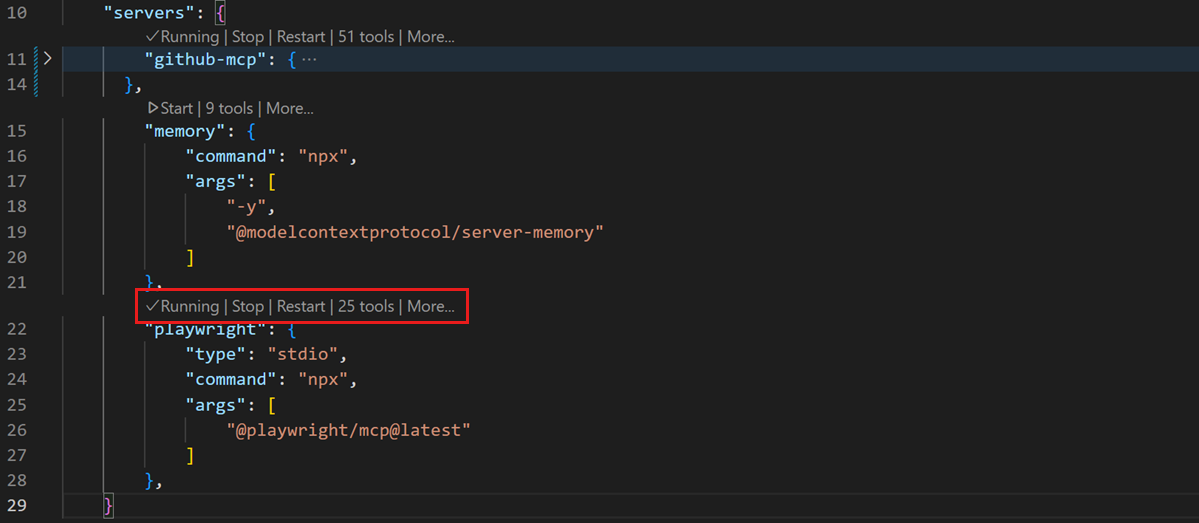 |
| Command Palette | Run MCP: List Servers, select a server, and choose an action. |  |
Enable or disable MCP servers
You can enable or disable an MCP server globally or for a specific workspace. When an MCP server is disabled, it does not start and its tools, prompts, resources, and MCP apps are excluded from chat.
To enable or disable an MCP server:
- Right-click a server in the MCP SERVERS - INSTALLED section of the Extensions view and select Enable or Disable.
- Run MCP: List Servers from the Command Palette, select a server, and choose Enable or Disable.
- Use the Agent Customizations editor to toggle the server's enabled state.
The enable/disable state is stored separately from the server configuration in mcp.json, so it does not affect shared configuration files.
Centrally manage access to MCP servers in VS Code
Organizations can centrally manage access to MCP servers via GitHub policies. Learn more about enterprise management of MCP servers.
Automatically start MCP servers
When you add an MCP server or change its configuration, VS Code needs to (re)start the server to discover the tools it provides.
You can configure VS Code to automatically restart the MCP server when configuration changes are detected by using the chat.mcp.autoStart setting (Experimental).
MCP server trust
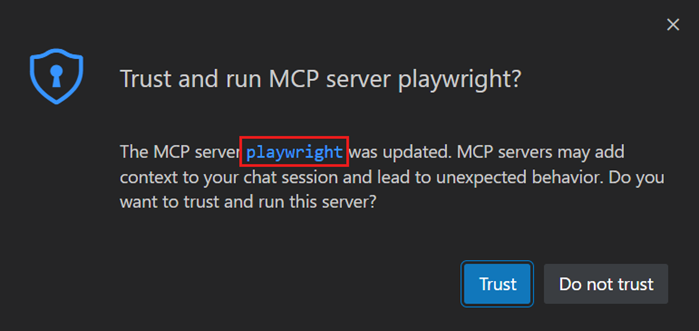
When you add an MCP server to your workspace or change its configuration, you need to confirm that you trust the server and its capabilities before starting it. VS Code shows a dialog to confirm that you trust the server when you start a server for the first time. In the dialog, select the link to the MCP server to review its configuration.
If you don't trust the MCP server, it will not be started, and chat requests will continue without using the tools provided by the server.
You can reset trust for your MCP servers by running the MCP: Reset Trust command from the Command Palette.
If you start the MCP server directly from the mcp.json file, you will not be prompted to trust the server configuration.
Synchronize MCP configuration across devices
With Settings Sync enabled, you can synchronize settings and configurations across devices, including MCP server configurations. This enables you to maintain a consistent development environment and access the same MCP servers on all your devices.
To synchronize MCP server configuration with Settings Sync:
-
Run the Settings Sync: Configure command from the Command Palette
-
Enable the MCP Servers option in the list of synchronized configurations
Troubleshoot and debug MCP servers
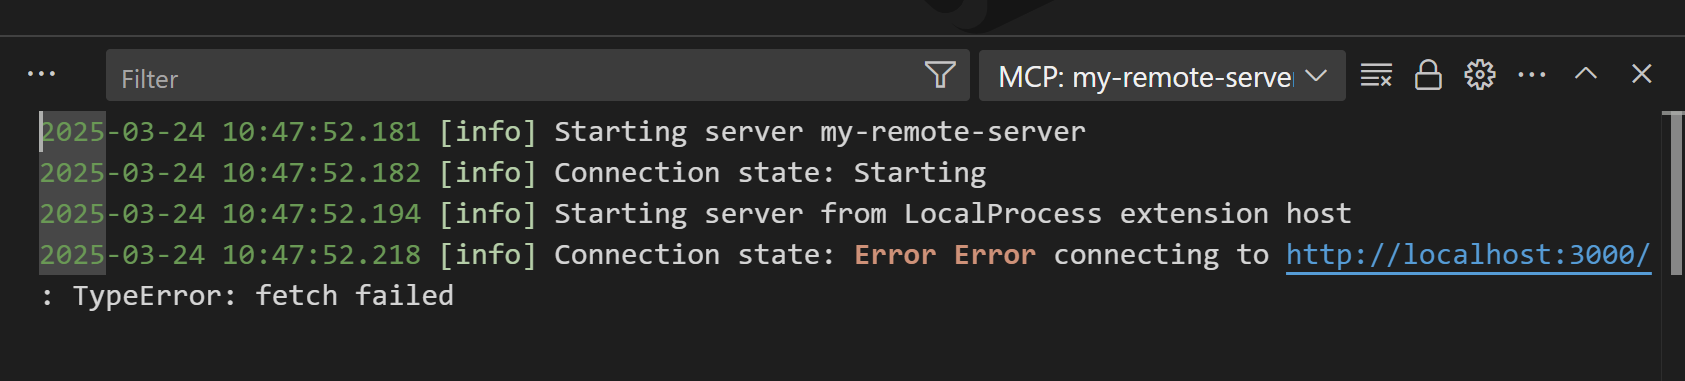
MCP output log
When VS Code encounters an issue with an MCP server, it shows an error indicator in the Chat view.
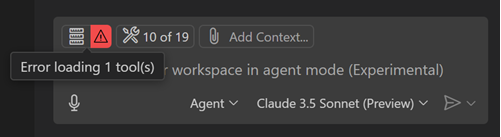
Select the error notification in the Chat view, and then select the Show Output option to view the server logs. Alternatively, run MCP: List Servers from the Command Palette, select the server, and then choose Show Output.
Frequently asked questions
The MCP server is not starting when using Docker
Verify that the command arguments are correct and that the container is not running in detached mode (-d option). You can also check the MCP server output for any error messages (see Troubleshooting).