Use tools in chat
Tools extend chat in Visual Studio Code with specialized functionality for accomplishing specific tasks like searching code, running commands, fetching web content, or invoking APIs. VS Code supports three types of tools: built-in tools, Model Context Protocol (MCP) tools, and extension tools.
This article describes the different types of tools available in VS Code, how to use them in your chat prompts, and how to manage tool invocations and approvals.
Types of tools
VS Code supports three types of tools that you can use in chat:
Built-in tools
VS Code provides a comprehensive set of built-in tools that are automatically available in chat. These tools cover common development tasks and are optimized for working within your workspace.
Built-in tools don't require any installation or configuration and are available as soon as you start using chat.
For a complete list of built-in tools and their descriptions, see the Chat tools reference.
MCP tools
Model Context Protocol (MCP) is an open standard that enables AI models to use external tools and services through a unified interface. MCP servers provide tools that you can add to VS Code to extend chat with extra capabilities.
You need to install and configure MCP servers before you can use their tools in chat. MCP servers can run locally on your machine or be hosted remotely.
Learn more about configuring MCP servers in VS Code.
Your organization might have disabled the use of MCP servers in VS Code or restricted which MCP servers you can use. Contact your admin for more information.
Extension tools
VS Code extensions can contribute tools that integrate deeply with the editor. Extension tools use the Language Model Tools API to provide specialized functionality while accessing the full range of VS Code extension APIs.
Extension tools are automatically available when you install an extension that contributes them. Users don't need separate installation or configuration beyond installing the extension itself.
For developers looking to create extension tools, see the Language Model Tools API guide.
Enable tools for chat
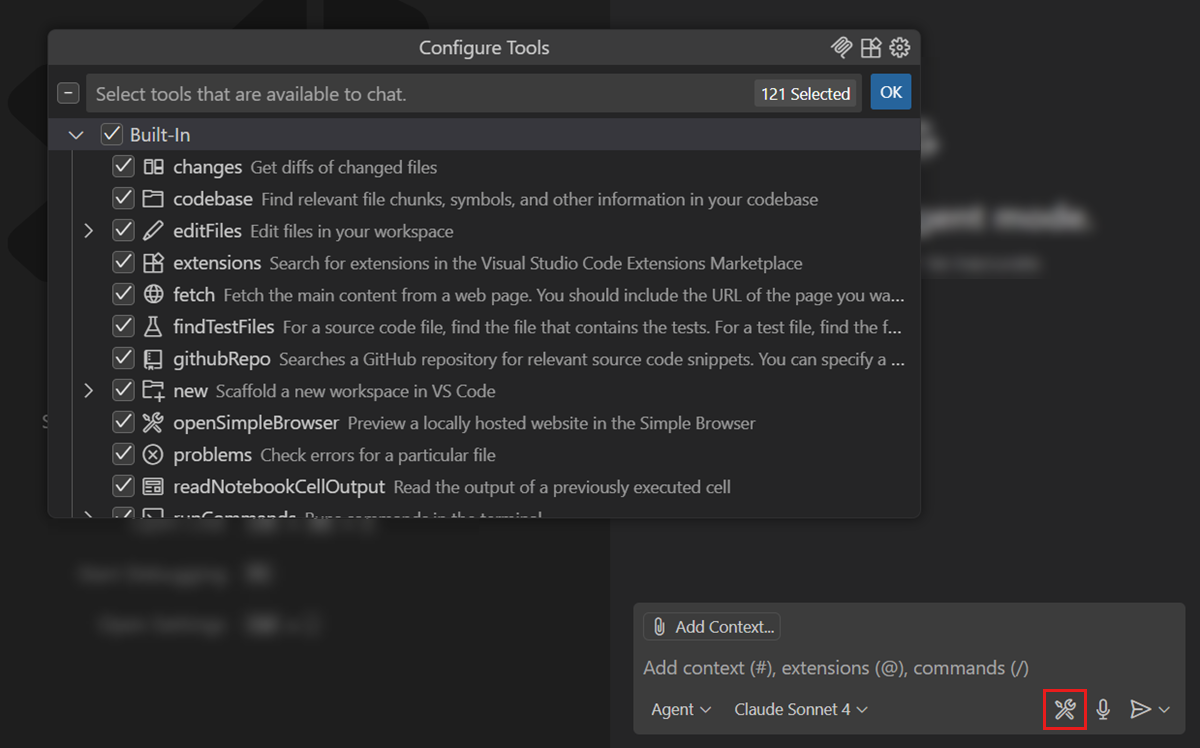
Before you can use tools in chat, you need to enable them in the Chat view. You can enable or disable tools on a per-request basis by using the tools picker. You can add more tools by installing MCP servers or extensions that contribute tools.
Select only the tools that are relevant for your prompt to improve your results.
To access the tools picker:
-
Open the Chat view and select Agent from the agent picker.
-
Select the Configure Tools button in the chat input field.
-
Select or deselect tools to control which ones are available for the current request.
Use the search box to filter the list of tools.
When you customize chat with prompt files or custom agents, you can specify which tools are available for a given prompt or mode. Learn more about the tool list priority order.
Use tools in your prompts
When using agents, the agent automatically determines which tools to use from the enabled tools based on your prompt and the context of your request. The agent autonomously chooses and invokes relevant tools as needed to accomplish the task.
You can also explicitly reference tools in your prompts by typing # followed by the tool name. This is useful when you want to ensure a specific tool is used. Type # in the chat input field to see a list of available tools, including built-in tools, MCP tools from installed servers, extension tools, and tool sets.
Examples of explicit tool references:
"Summarize the content from #fetch https://code.visualstudio.com/updates""How does routing work in Next.js? #githubRepo vercel/next.js""Fix the issues in #problems""Explain the authentication flow #codebase"
Some tools accept parameters directly in the prompt. For example, #fetch requires a URL and #githubRepo requires a repository name.
By default, tool call details are collapsed in the chat conversation. You can uncollapse them by selecting the tool summary line in chat, or change the default behavior with the
Tool approval
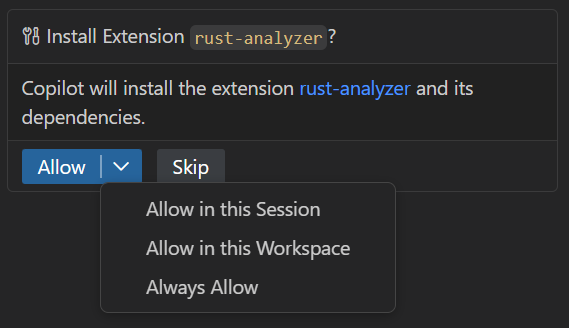
Some tools require your approval before they can run. This is a security measure because tools can perform actions that modify files, your environment, or attempt prompt injection attacks through malicious tool output.
When a tool requires approval, a confirmation dialog appears showing the tool details. Review the information carefully before approving the tool. You can approve the tool for a single use, for the current session, for the current workspace, or for all future invocations.
Tools and agent actions might result in file modifications. Learn how you can prevent accidental edits to sensitive files in your workspace.
Always review tool parameters carefully before approving, especially for tools that modify files, run commands, or access external services. See the Security considerations for using AI in VS Code.
Enable or disable tool auto approval (Experimental)
By default, you can choose to automatically approve any tool. To prevent accidental approvals, you can disable automatic approvals for specific tools with the false to always require manual approval for that tool.
Organizations can also use device management policies to enforce manual approvals for specific tools. Learn more in the Enterprise documentation.
URL approval
When a tool attempts to access a URL, such as with the fetch tool, a two-step approval process is used to protect you from malicious or unexpected content. VS Code shows a confirmation dialog with the URL details for your review in the Chat view.
-
Pre-approval: approving the request to the URL
This step ensures that you trust the domain being contacted and can prevent sensitive data to be sent to untrusted sites.
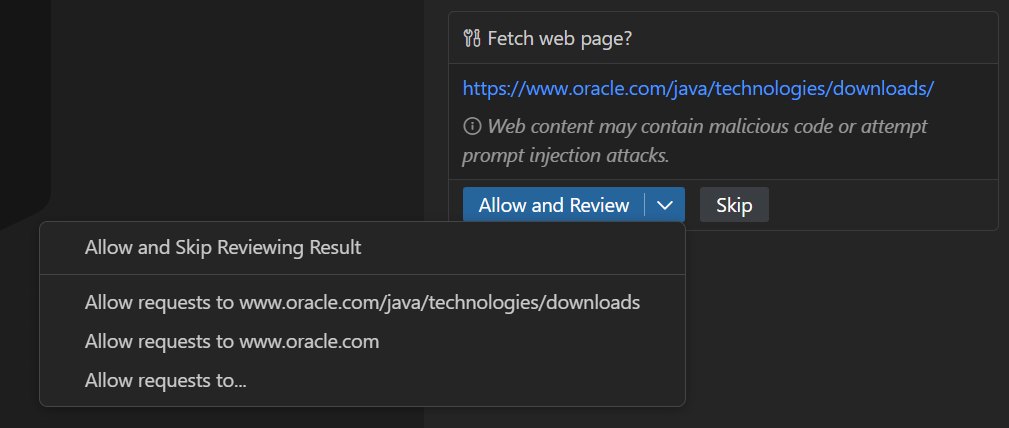
You have options for one-time approval or for automatically approving future requests to the specific URL or domain. Selecting auto-approval does not influence the need for reviewing the results. When you select Allow requests to, you can choose to configure both pre and post approvals for the URL or domain.
NoteThe pre-approval respects the "Trusted Domains" feature. If a domain is listed there, you are automatically approved to make requests to that domain and defer the response reviewing step.
-
Post-approval: approving the response content fetched from the URL
This step ensures that you review the fetched content before it is added to the chat or passed to other tools, preventing potential prompt injection attacks.
For example, you might approve a request to fetch content from a well-known site, like GitHub.com. But because the content, such as issue description or comments, is user-generated, it could contain harmful content that might manipulate the model's behavior.
You have options for one-time approval or for automatically approving future responses from the specific URL or domain.
ImportantThe post-approval step is not linked to the "Trusted Domains" feature and always requires your review. This is a security measure to prevent issues with untrusted content on a domain that you would otherwise trust.
The approveRequest and approveResponse properties for granular control. You can use exact URLs, glob patterns, or wildcards.
URL auto-approval examples:
{
"chat.tools.urls.autoApprove": {
    "https://www.example.com": false,
    "https://*.contoso.com/*": true,
    "https://example.com/api/*": {
        "approveRequest": true,
        "approveResponse": false
    }
}
Reset tool confirmations
To clear all saved tool approvals, use the Chat: Reset Tool Confirmations command in the Command Palette (⇧⌘P (Windows, Linux Ctrl+Shift+P)).
Edit tool parameters
You can review and edit the input parameters before a tool runs:
-
When the tool confirmation dialog appears, select the chevron next to the tool name to expand its details.
-
Edit any tool input parameters as needed.
-
Select Allow to run the tool with the modified parameters.
Terminal commands
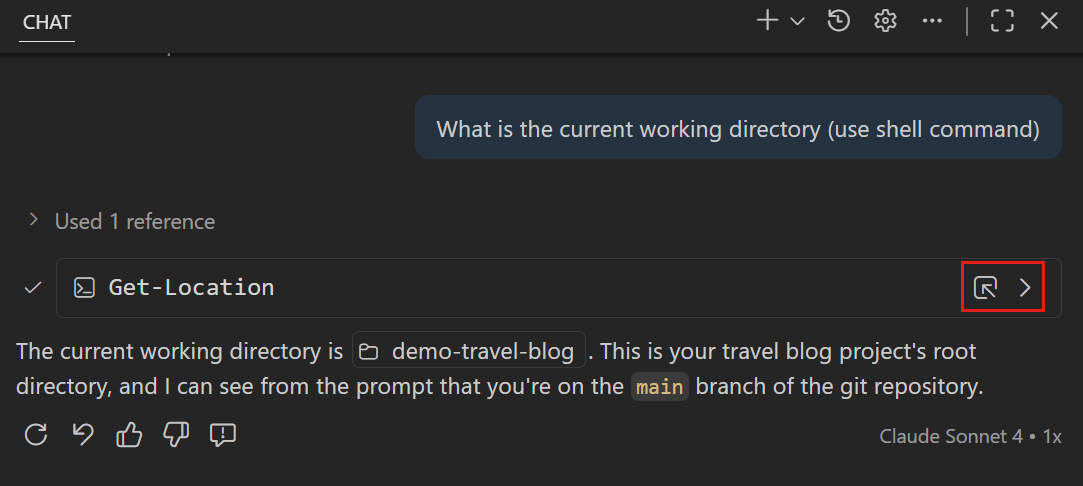
The agent might use terminal commands as part of its workflow to accomplish tasks. When the agent decides to run terminal commands, it uses the built-in terminal tool to execute them in an integrated terminal within VS Code.
In the chat conversation, the agent displays the commands it ran. You can view the output of the command inline in chat by selecting Show Output (>) next to the command. You can also view the full output in the integrated terminal by selecting Show Terminal.
Use the experimental
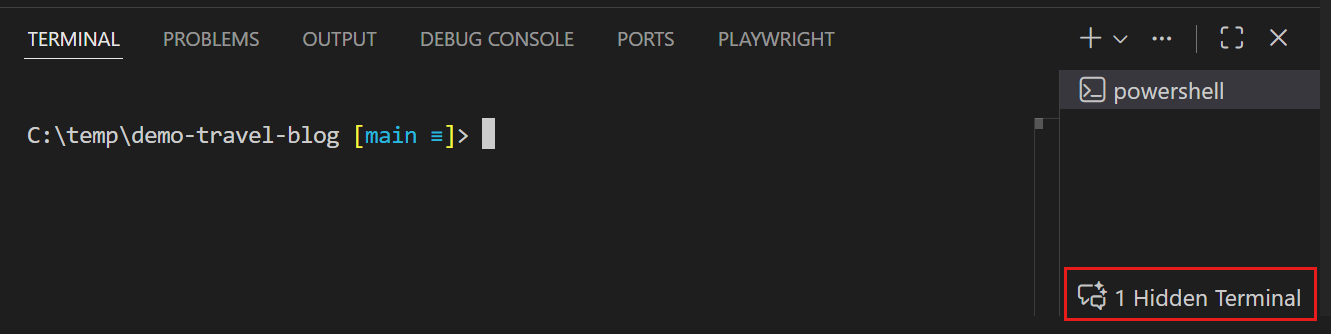
In the terminal pane, you can see the list of terminals that the agent has used for a chat session. You can also distinguish agent terminals by the chat icon in the terminals list.
Automatically approve terminal commands
You can configure which terminal commands are automatically approved by using the
- Set commands to
trueto automatically approve them - Set commands to
falseto always require approval - Use regular expressions by wrapping patterns in
/characters
For example:
{
  // Allow the `mkdir` command
  "mkdir": true,
  // Allow `git status` and commands starting with `git show`
  "/^git (status|show\\b.*)$/": true,

  // Block the `del` command
  "del": false,
  // Block any command containing "dangerous"
  "/dangerous/": false
}
By default, patterns match against individual subcommands. For a command to be auto-approved, all subcommands must match a true entry and must not match a false entry.
For advanced scenarios, use object syntax with the matchCommandLine property to match against the full command line instead of individual subcommands.
Related settings:
- chat.tools.terminal.enableAutoApproveORG: permanently disable auto-approve functionality
- chat.tools.terminal.blockDetectedFileWrites(experimental): detection of file writes (experimental)
- chat.tools.terminal.ignoreDefaultAutoApproveRules(experimental): disable all default rules (both allow and block), giving full control over all rules.
Automatically approving terminal commands provides best effort protections and assumes the agent is not acting maliciously. It's important to protect yourself from prompt injection when you enable terminal auto approve, as it might be possible for some commands to slip through. Here are some examples where the detection can fall over:
- VS Code uses PowerShell and bash tree sitter grammars to extract sub-commands, so patterns are not detected if these grammars don't detect them.
- VS Code uses bash grammar because there is no zsh or fish grammar, so some sub-commands are not detected.
- Detection of file writes is currently minimal, so it might be possible to write to files with the terminal that would not be possible by using the file editing agent tools.
- Subverting auto approval is possible through various techniques such as quote concatenation. For example
find -execis normally blocked, butfind -e"x"ecis not, despite doing the same thing.
If prompt injection is a possibility or you're in a high risk environment, you should look into sandboxing or running VS Code within a container.
Group tools with tool sets
A tool set is a collection of tools that you can reference as a single entity in your prompts. Tool sets help you organize related tools and make them easier to use in a chat prompt, prompt files, and custom chat agents. Some of the built-in tools are part of predefined tool sets, such as #edit and #search.
Create a tool set
To create a tool set:
-
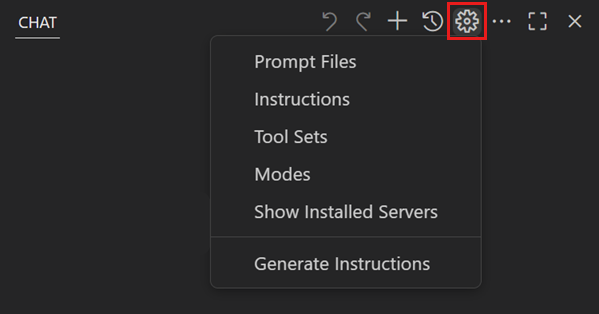
Run the Chat: Configure Tool Sets command from the Command Palette and select Create new tool sets file.
Alternatively, select Configure Chat in the Chat view > Tool Sets > Create new tool sets file.
-
Define your tool set in the
.jsoncfile that opens.A tool set has the following structure:
{
  "reader": {
    "tools": ["changes", "codebase", "problems", "usages"],
    "description": "Tools for reading and gathering context",
    "icon": "book"
  }
}
Tool set properties:
tools: Array of tool names (built-in tools, MCP tools, or extension tools)description: Brief description displayed in the tools pickericon: Icon for the tool set (see Product Icon Reference)
Use a tool set
Reference a tool set in your prompts by typing # followed by the tool set name:
"Analyze the codebase for security issues #reader""Where is the DB connection string defined? #search"
In the tools picker, tool sets are available as collapsible groups of related tools. You can select or deselect entire tool sets to quickly enable or disable multiple related tools at once.
Frequently asked questions
How do I know which tools are available?
Type # in the chat input field to see a list of all available tools. You can also use the tools picker in chat to view and manage the list of active tools.
I'm getting an error that says "Cannot have more than 128 tools per request."
A chat request can have a maximum of 128 tools enabled at a time. If you see an error about exceeding 128 tools per request:
-
Open the tools picker in the Chat view and deselect some tools or entire MCP servers to reduce the count.
-
Alternatively, enable virtual tools with the
github.copilot.chat.virtualTools.thresholdsetting to automatically manage large tool sets.
Why isn't the agent using Command Prompt as the terminal shell?
The agent uses the shell you have configured as the default for the terminal, except when it's cmd. This is because shell integration is not supported with Command Prompt, which means the agent has very limited visibility into what's going on inside the terminal. Instead of getting direct signals for when commands are being run or have finished running, the agent needs to rely on timeouts and watching for the terminal to idle to continue. This leads to a slow and flaky experience.
You can still configure the agent to use Command Prompt with the
"chat.tools.terminal.terminalProfile.windows": {
  "path": "C:\\WINDOWS\\System32\\cmd.exe"
}
Can I automatically approve all tools and terminal commands?
This setting disables all manual approvals, including potentially destructive actions. It removes critical security protections and makes it easier for an attacker to compromise the machine. Only enable this setting if you understand the implications. See the Security documentation for more details.
To allow all tools and terminal commands to run without prompting for user confirmation, enable the chat.tools.global.autoApprove setting. This setting applies globally across all your workspaces!
What's the difference between tools and chat participants?
Chat participants are specialized assistants that enable you to ask domain-specific questions in chat. Imagine a chat participant as a domain expert to whom you hand off your chat request and it takes care of the rest.
Tools are invoked as part of an agent flow to contribute and perform specific tasks. You can include multiple tools in a single chat request, but only one chat participant can be active at a time.
Can I create my own tools?
Yes. You can create tools in two ways:
- Develop a VS Code extension that contributes tools using the Language Model Tools API
- Create an MCP server that provides tools. See the MCP developer guide