Getting started with chat in VS Code
This tutorial walks you through using chat in Visual Studio Code. You use AI-powered chat conversations to help with refactoring code, improving your code understanding, and finding your way around configuring VS Code.
If you're new to using Copilot in VS Code, see the Copilot Overview or get set up and discover the key capabilities in the Copilot Quickstart.
If you don't yet have a Copilot subscription, you can use Copilot for free by signing up for the Copilot Free plan and get a monthly limit of inline suggestions and chat interactions.
Prerequisites
To use GitHub Copilot in VS Code, you need to have the following:
- Access to GitHub Copilot
- GitHub Copilot extensions installed in VS Code
Follow the steps in the GitHub Copilot set up guide to get access to GitHub Copilot and install the Copilot extensions in VS Code.
Get your first chat conversation
Chat lets you interact with GitHub Copilot by using natural language, to ask and receive answers to coding-related questions.
In this tutorial, you'll be creating a simple Node.js web application.
-
Open a new VS Code window. You'll be creating a new workspace in a follow-up step.
-
Select Open Chat from the Chat menu in the title bar or use the ⌃⌘I (Windows, Linux Ctrl+Alt+I) keyboard shortcut.
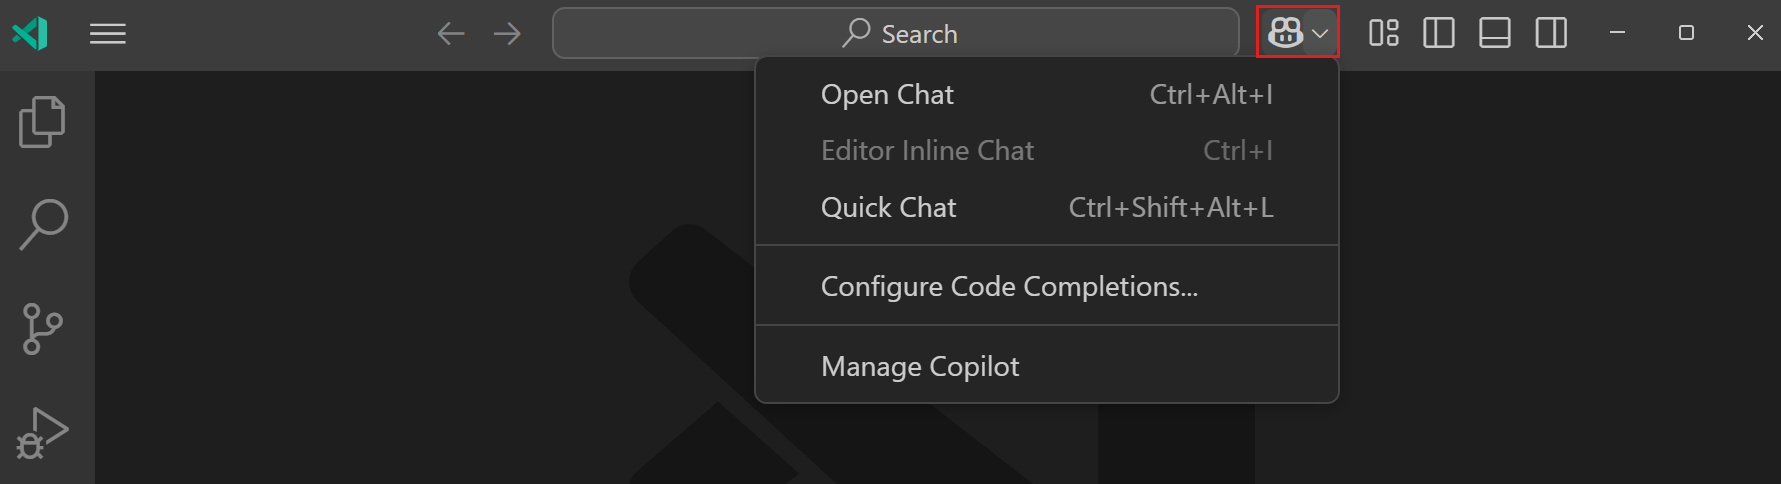
Notice that the Chat view opens in the Secondary Side Bar. Having the Chat view on the side allows you to keep the conversation going while you work on your code.
-
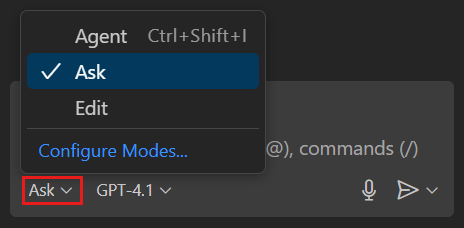
In the Chat view, select Ask from the chat mode dropdown.
Use ask mode to ask questions about coding and technology topics, explain code, or brainstorm ideas.
-
Let's ask about popular web frameworks. Enter "what are the most popular web frameworks?" in the chat input field.
VS Code returns a list of popular web frameworks. Experiment with asking follow-up questions to get more information about a specific framework, or to compare frameworks. For example, you can ask "what are the differences between Express and Fastify?" or "how to do server-side rendering?".
-
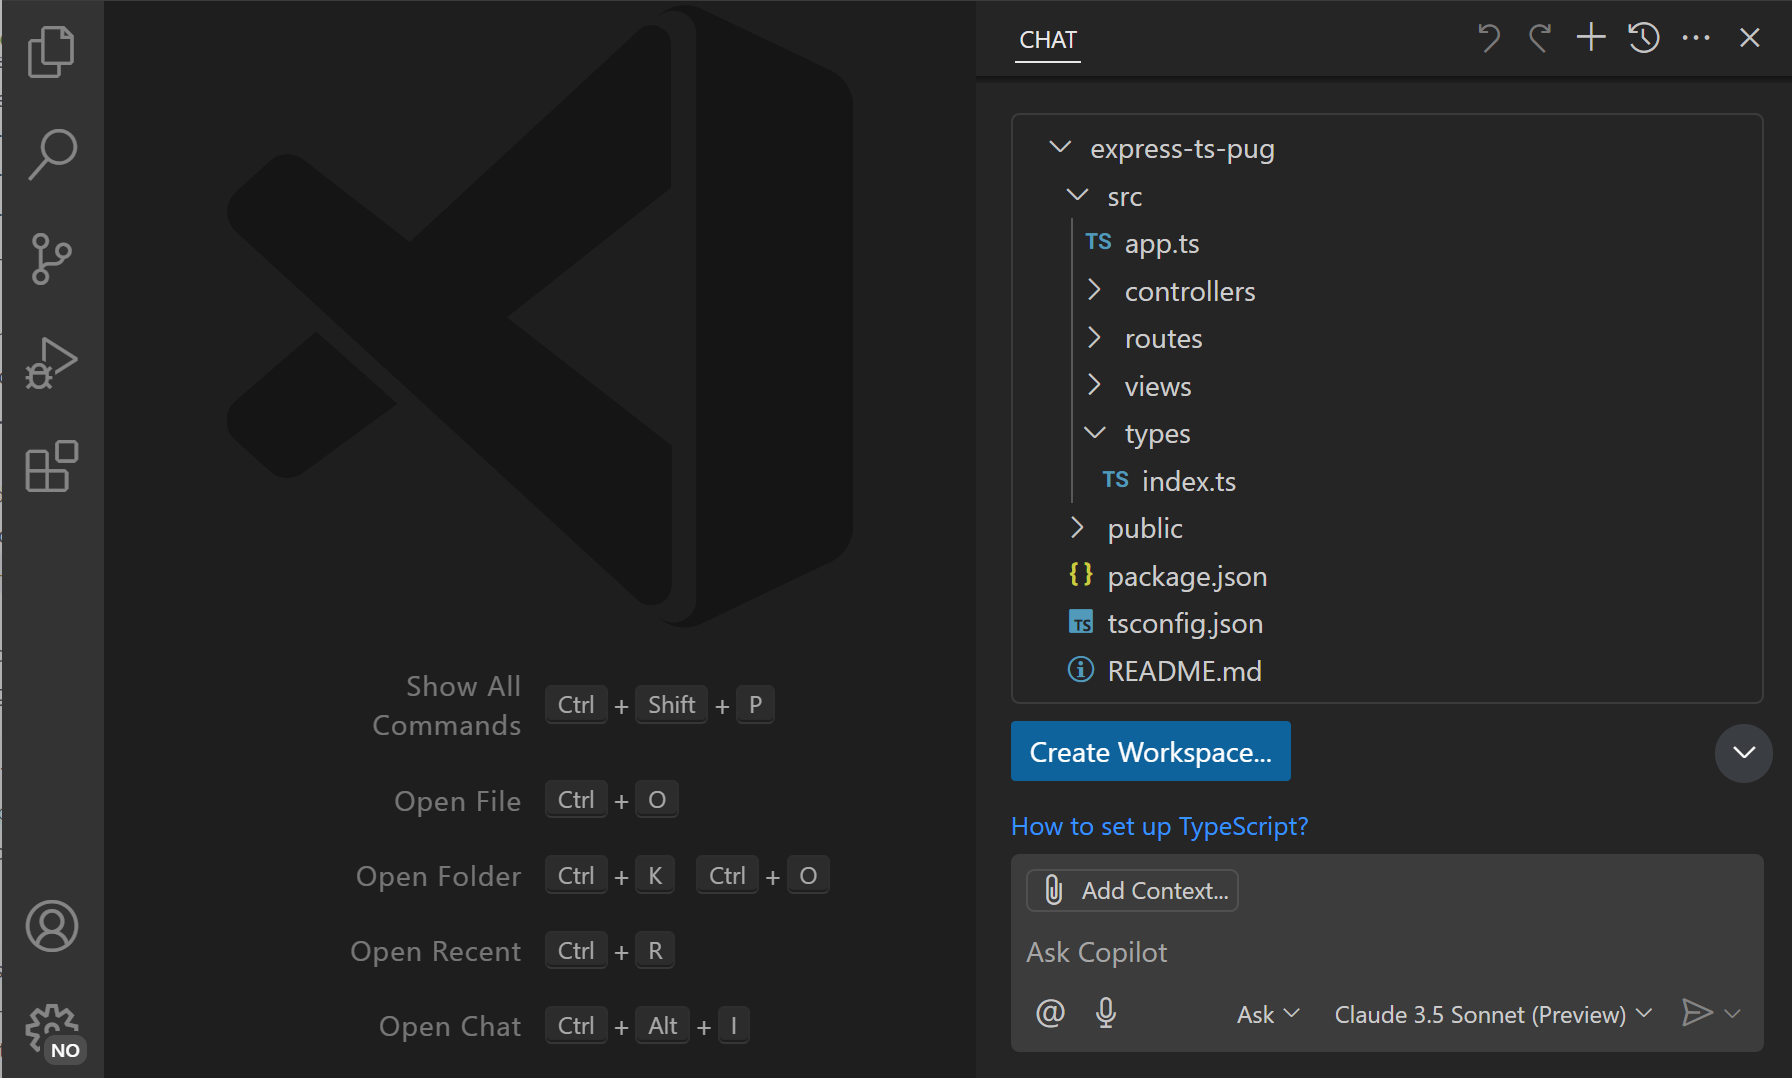
To scaffold a new web app, enter "new express app with typescript and pug" in the chat input field.
Notice how VS Code returns a file tree that represents the new workspace files. Select any file in the file tree to preview its content.
-
Select Create Workspace to create the app, and select a folder on disk where the workspace should be created.
Select Open in the dialog to open the newly-created workspace in VS Code.
NoteVS Code might ask if you want to trust the new workspace. Select Yes, I trust the contents to trust the workspace. Get more details about workspace trust.
Stay in the flow with inline chat
While the Chat view is great for keeping a conversation going, editor inline chat is optimized for situations where you want to ask Copilot about the code you're actively working on in the editor. For example, to refactor a specific piece of code, or explain a complex algorithm.
Let's look at how to use editor inline chat for code refactoring.
-
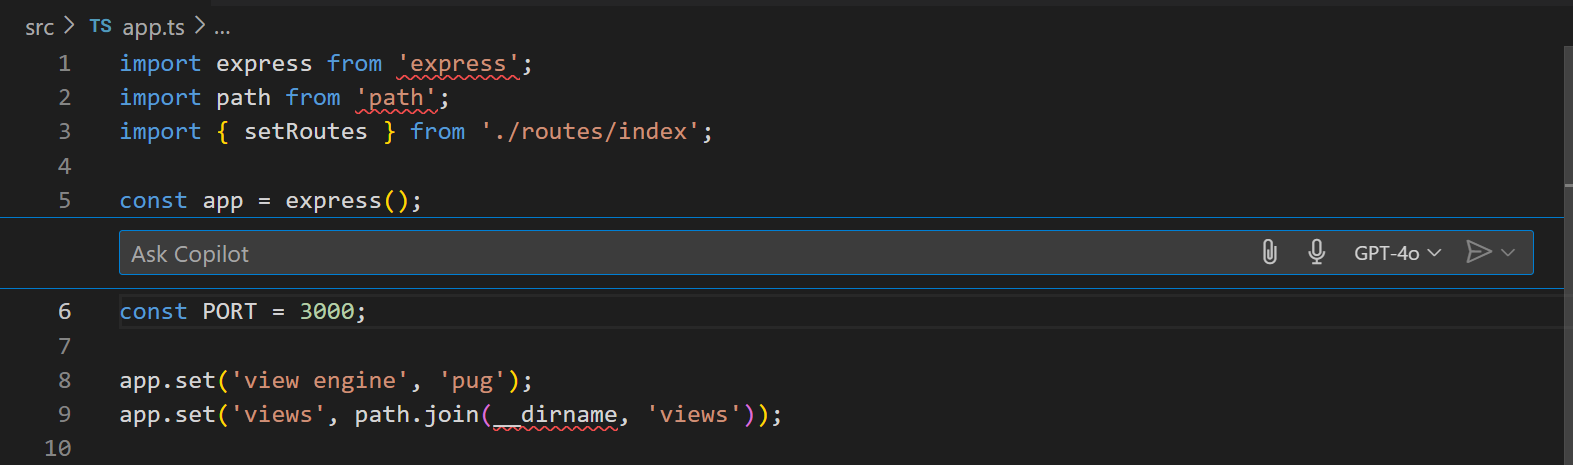
Open the
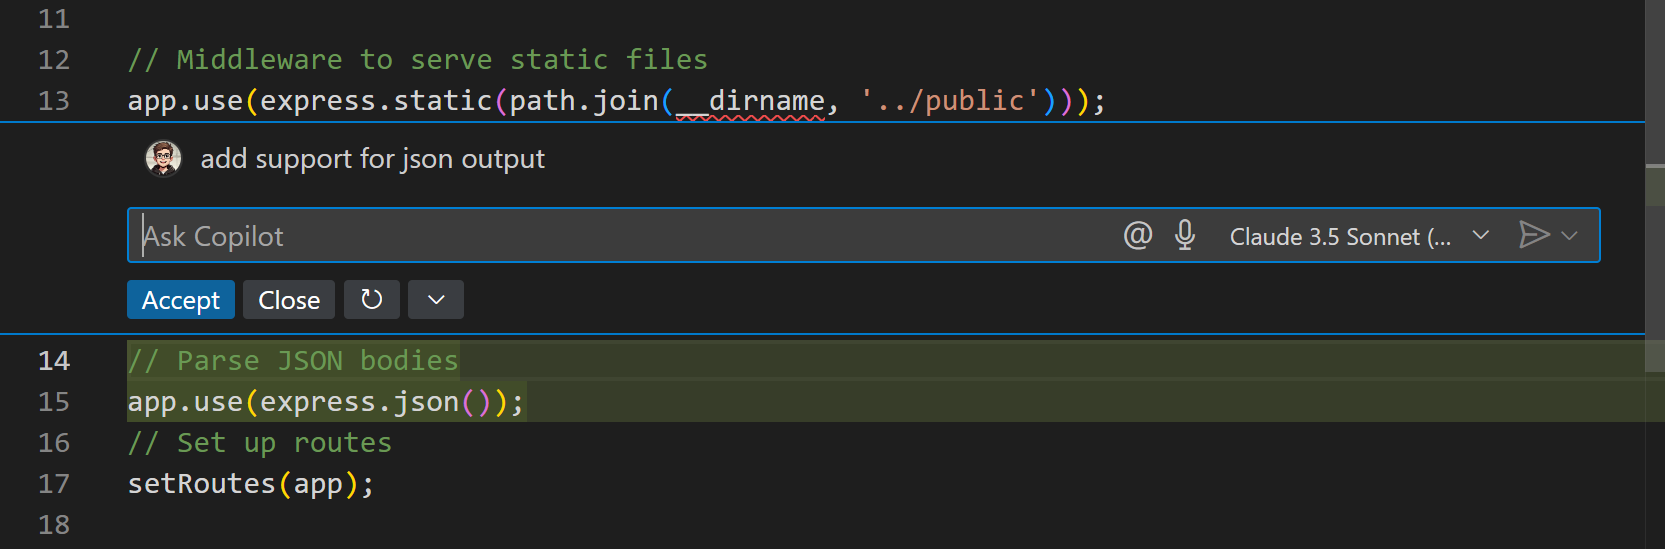
app.tsfile and use the ⌘I (Windows, Linux Ctrl+I) keyboard shortcut to bring up editor inline chat. Alternatively, select Open Inline Chat from the Chat menu in the title bar.A chat input field appears inline in the editor, where you can enter your chat prompt and ask Copilot about the code in the editor.
-
Enter "Add support for JSON output" in the chat input field and press Enter.
Notice how Copilot provides a code suggestion to add support for JSON output in Express.
-
Select Accept or Close to apply or ignore the changes.
If you're not happy with the suggested code changes, you can select the Rerun Request control or ask a follow-up question to get another suggestion.
Right-click in the editor to access commonly used AI commands, such as fixing or explaining code or generating tests.
Make edits across multiple files
With inline chat, you made changes to a single file. You can also use Copilot to make changes across multiple files in your workspace by switching to edit mode in the Chat view.
Let's use edit mode to use a .env file to store the configuration for your web app.
-
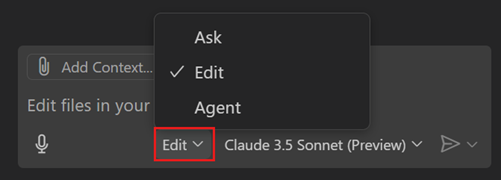
Open the Chat view and select Edit from the chat mode dropdown.
-
To help Copilot understand the scope of your request, let's add
package.jsonandapp.tsas context to the prompt.-
Select Add Context in the Chat view, type
packagein the search field, and select thepackage.jsonfile from the list of files. Notice that there are many types of context you can add. -
Open the
app.tsfile in the editor, and notice that Copilot automatically adds the active file to the chat context.
-
-
Enter "Use a .env file for configuration" in the chat input field and press Enter.
-
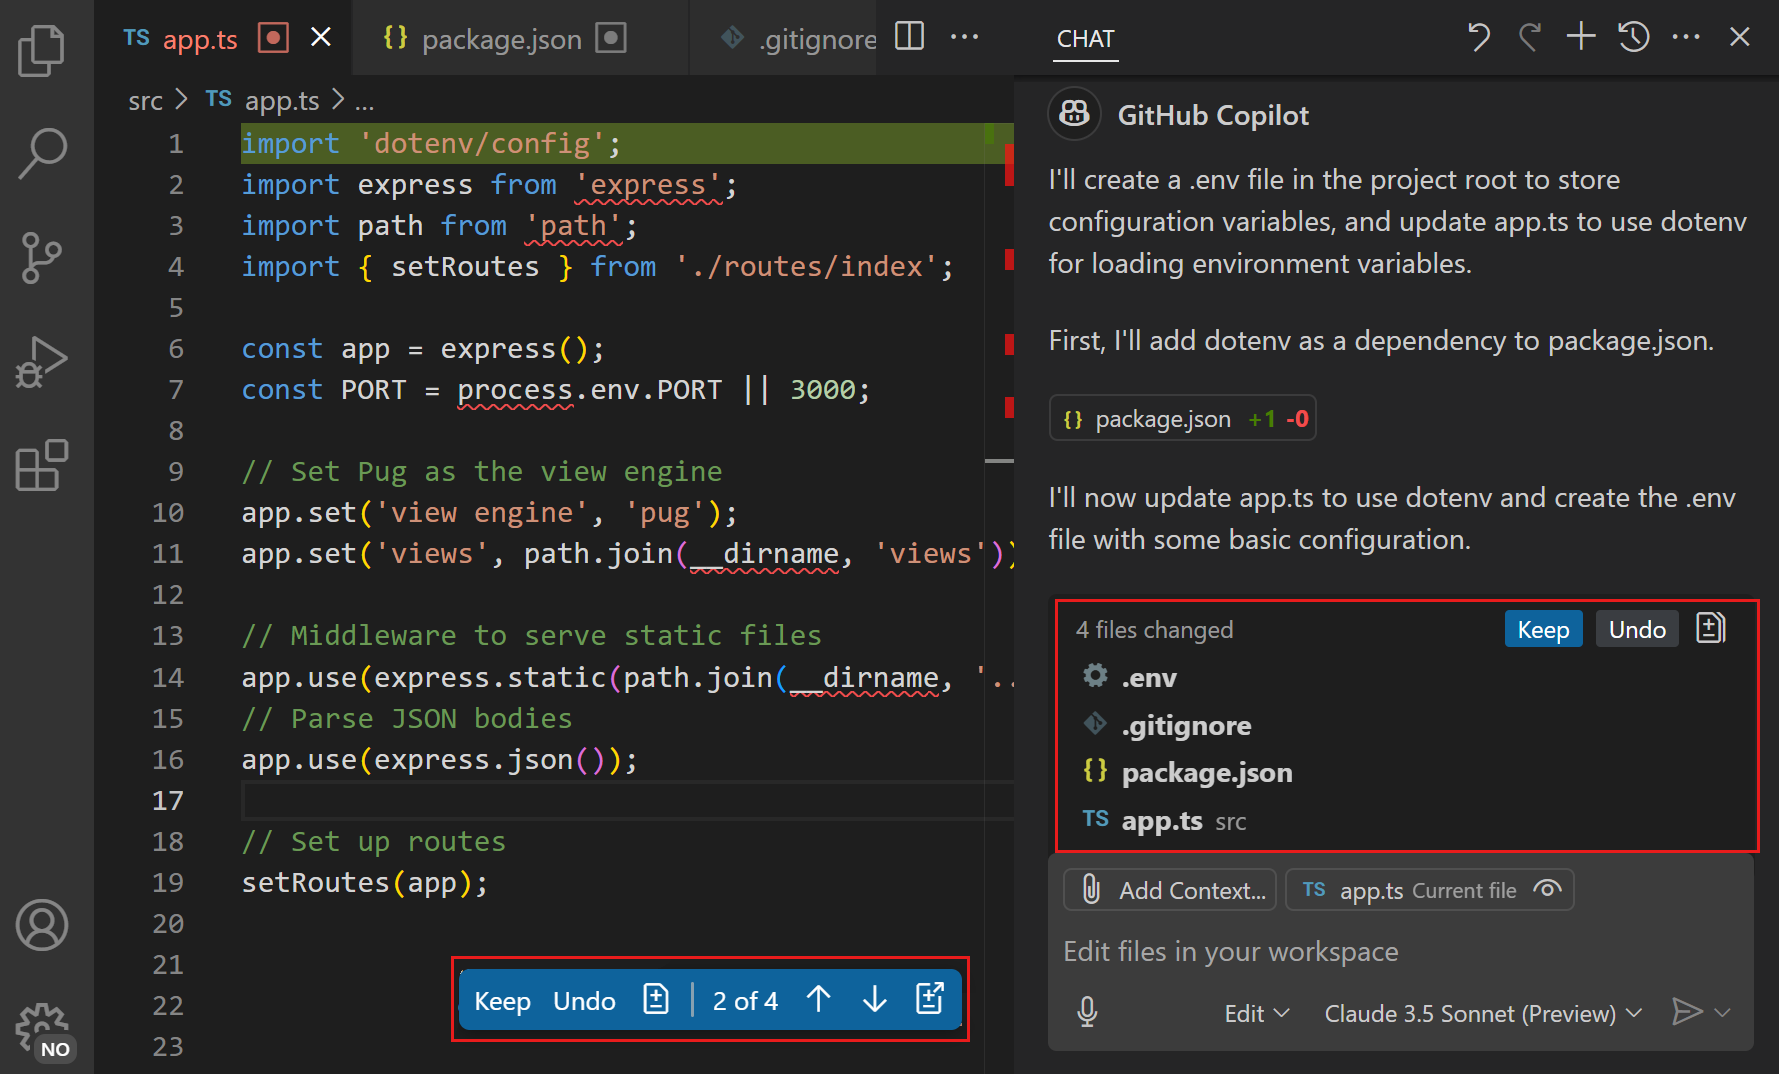
Notice how Copilot makes updates across multiple files and adds a new
.envfile to your workspace.The Chat view shows the files that were changed in bold text in the Chat view.
-
Select Keep in the Chat view to confirm all suggested changes.
Use the overlay controls in the editor to easily navigate and review the individual changes across your files.
Start an agentic coding flow
For more complex requests, you can use agent mode to let Copilot autonomously plan and execute the tasks that are needed to complete your request. These tasks can involve editing code but also include running commands in the terminal. In agent mode, Copilot might invoke different tools to accomplish the task.
Let's use agent mode to make the web app about sharing travel tips and add testing.
-
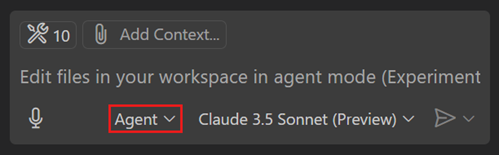
Open the Chat view and select Agent from the chat mode dropdown.
-
Enter "Make the app a travel blog. Add tests to avoid code regression." in the chat input field and press Enter.
Note that you don't need to add context to your prompt. Agent mode automatically analyzes the code in your workspace.
-
Copilot iterates to apply code changes and run commands like running tests. Confirm terminal commands by selecting Continue in the Chat view.
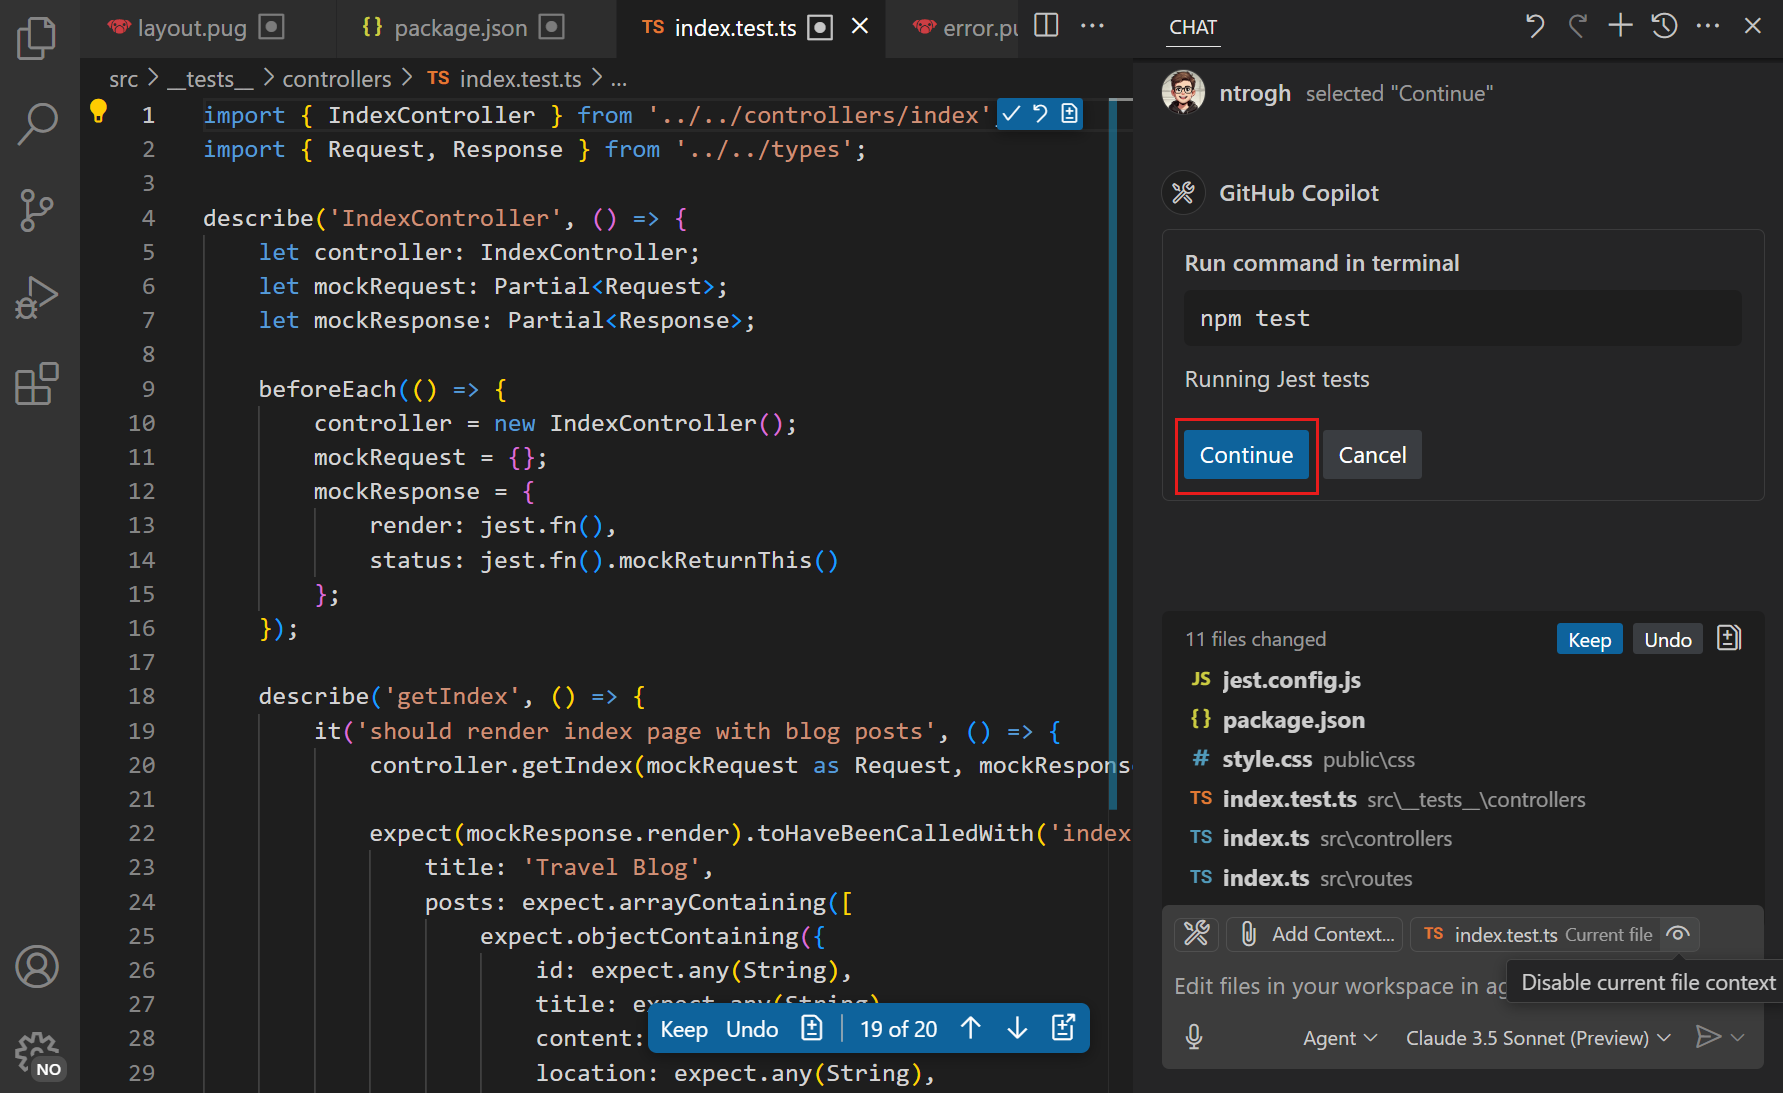
Depending on the complexity of your request, Copilot might take a few minutes to complete all tasks. If it encounters issues along the way, it iterates to fix them.
-
Once Copilot completes the tasks, review the changes, and test the app.
You can also ask Copilot to run the app by giving it a prompt like "Run the app" or "Start the server".
Congratulations
Congratulations, you successfully used Copilot Chat in VS Code to ask questions and make code edits across your workspace. Continue to experiment with different prompts and chat modes to get the most out of Copilot Chat.