Quickstart: Complete your first task with an agent
In this quickstart, you use an AI agent in Visual Studio Code to build a small web app from a natural-language prompt. You then review the generated code, let the agent validate the app with browser tools, and verify the result yourself.
Prerequisites
-
Set up GitHub Copilot in VS Code.
Start with the Copilot harness to complete this quickstart. It connects the model to the tools that build and test your app.
Requests in this quickstart use AI credits from your Copilot plan. Copilot Free includes a monthly allowance. Open the Copilot status dashboard from the Status Bar to monitor your monthly usage. Learn more about AI credits and model costs and what happens when you reach a limit.
1. Create a project folder
Start by creating an empty folder for the quickstart app. In the next section, you open this folder in VS Code and ask an agent to build the app.
Run the following command in your terminal to create the folder:
mkdir agent-quickstart
2. Build the app
VS Code lets you work with agents in different ways:
- Chat view: work with an agent alongside your code in the editor, focused on the current project.
- Agents window: assign (high-level) tasks to agents and switch between projects without reloading the window.
Choose the approach that works best for you and follow the steps in the corresponding tab below.
-
In VS Code, select File > Open Folder from the menu, and then open the
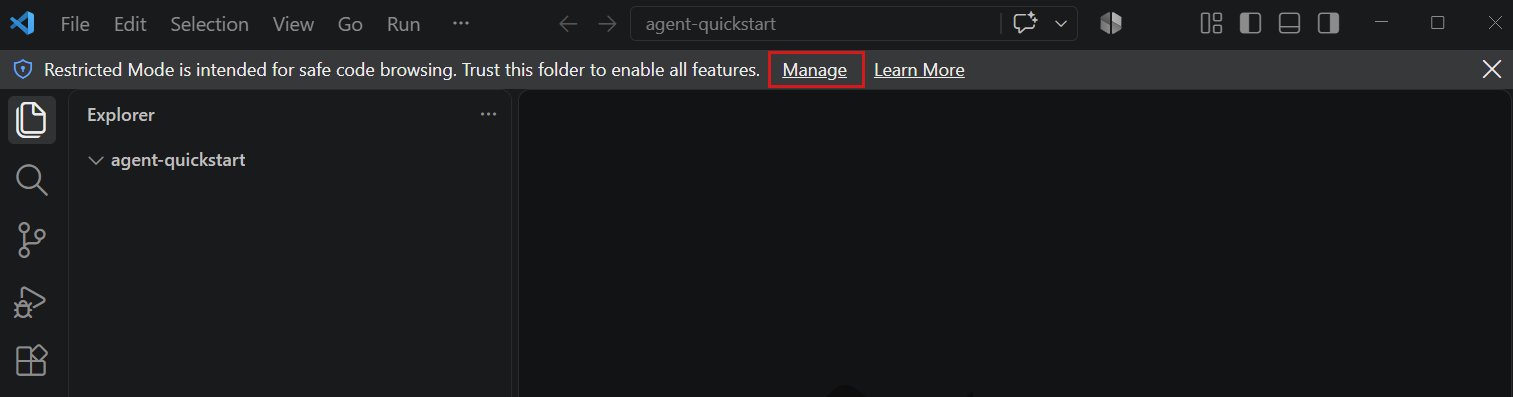
agent-quickstartfolder.If VS Code asks whether you trust the folder, select Manage from the notification, and then select Trust.
-
Open the Chat view with ⌃⌘I (Windows, Linux Ctrl+Alt+I), and then select
+to start a new chat.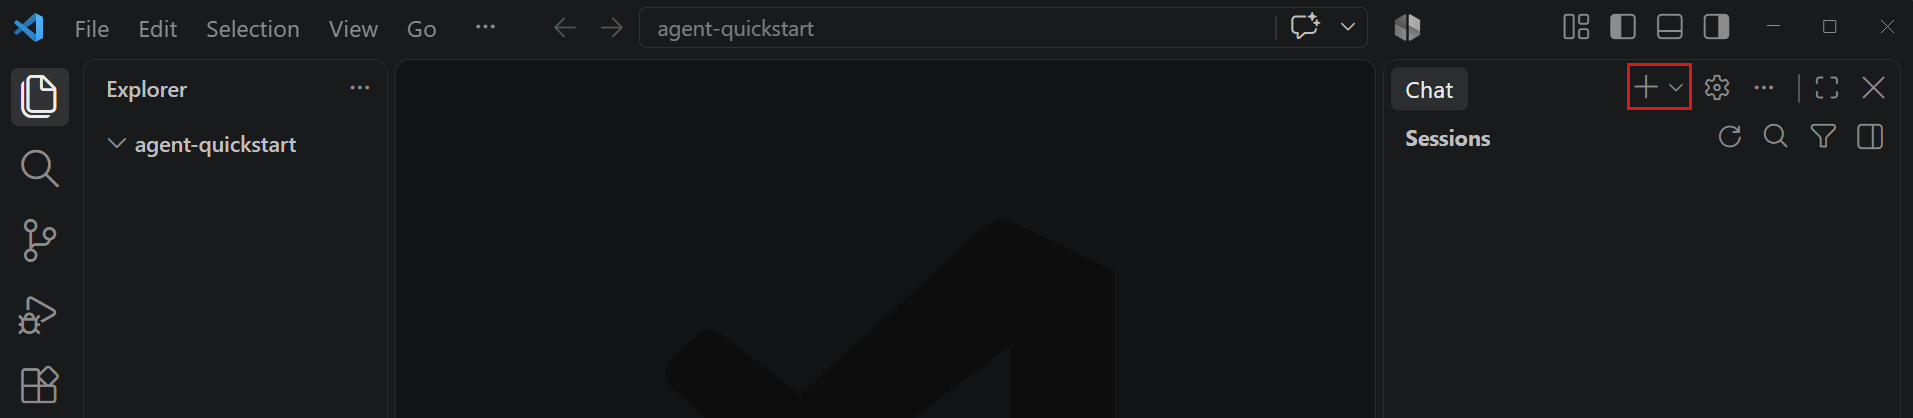
If you already had an active chat, starting a new chat does not close the previous one. The previous chat remains accessible via the sessions list.
-
Configure the following settings for the chat session. Keep the default values for any other options.
Control Value Short description Session Target Copilot Selects the Copilot harness and its tools and workflow for the session. Agent Agent Uses tools to plan, edit files, run commands, and validate the result. Language model Auto Automatically selects a model based on task complexity and availability. Permissions Manual permissions Requests your approval for running tools or accessing resources. The agent can make file edits in your project folder. 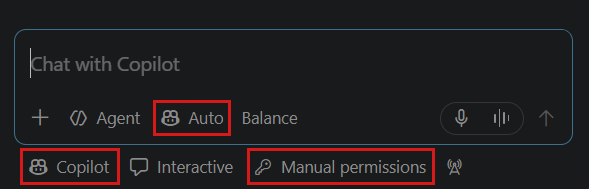
-
Enter the following prompt and press Enter:
Create a task list web app in a single index.html file with embedded CSS and JavaScript. Let me add, complete, and delete tasks. Save the tasks in local storage so they persist after a page reload. Use no external libraries. -
Follow the agent's progress and review each approval request before you accept it.
The agent creates the
index.htmlfile and saves updates as it progresses. Approval prompts appear for actions that aren't covered by your approval settings.TipAt any time you can stop the agent by selecting the Stop button in the chat input or steer it in another direction by sending a new prompt.
-
If the agent asks to open the
index.htmlfile in the integrated browser, select Allow in this Session. You can interact with the app directly in the integrated browser in VS Code.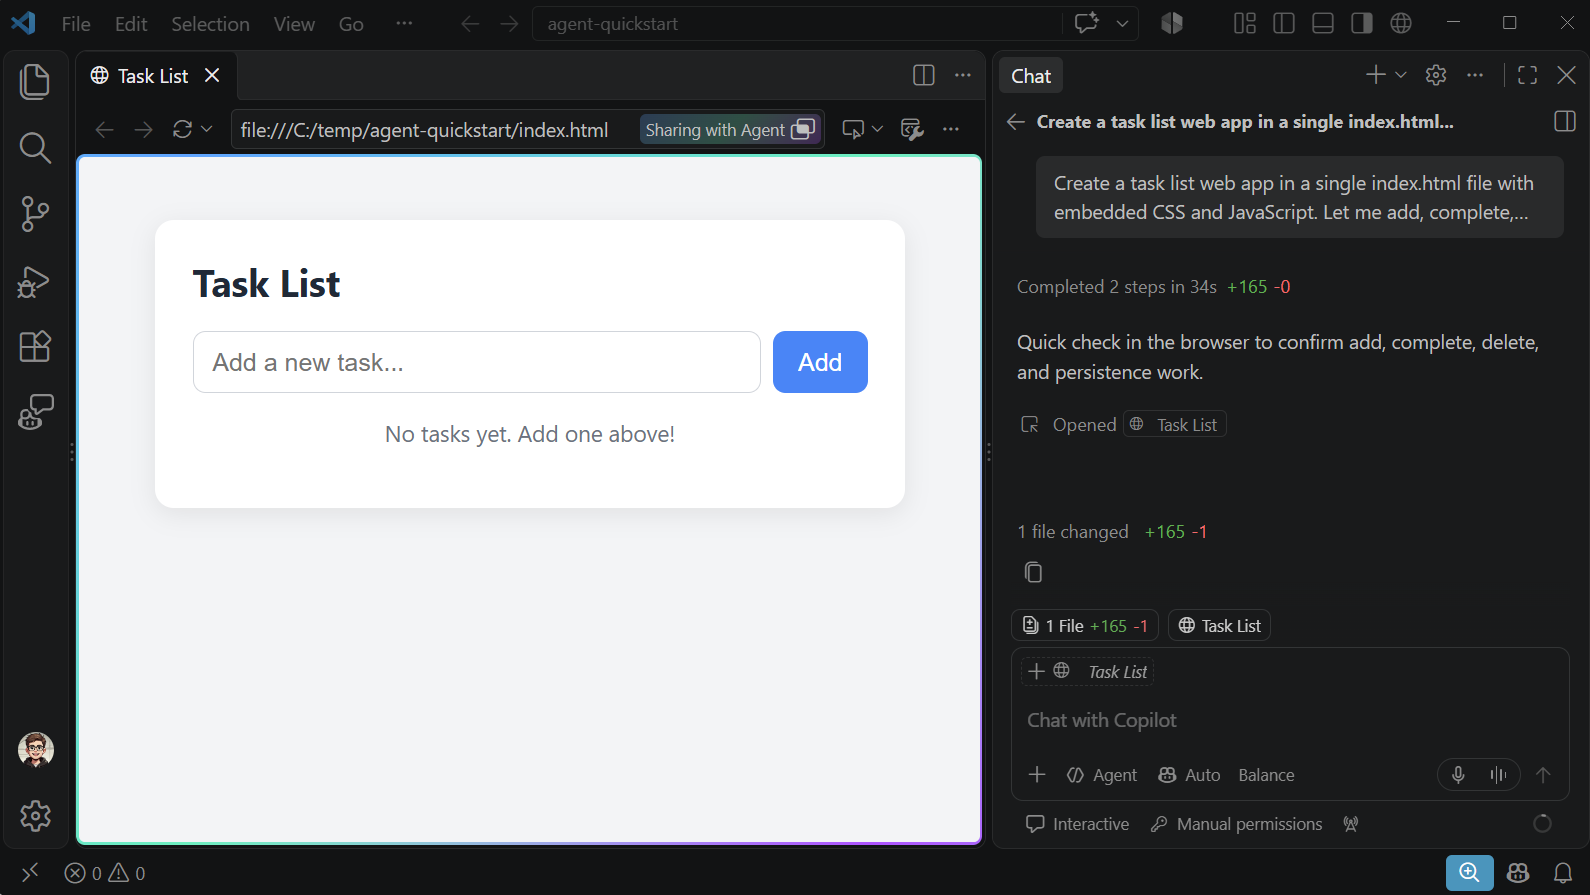
The Agents window is a dedicated window for interacting with agents across different projects.
-
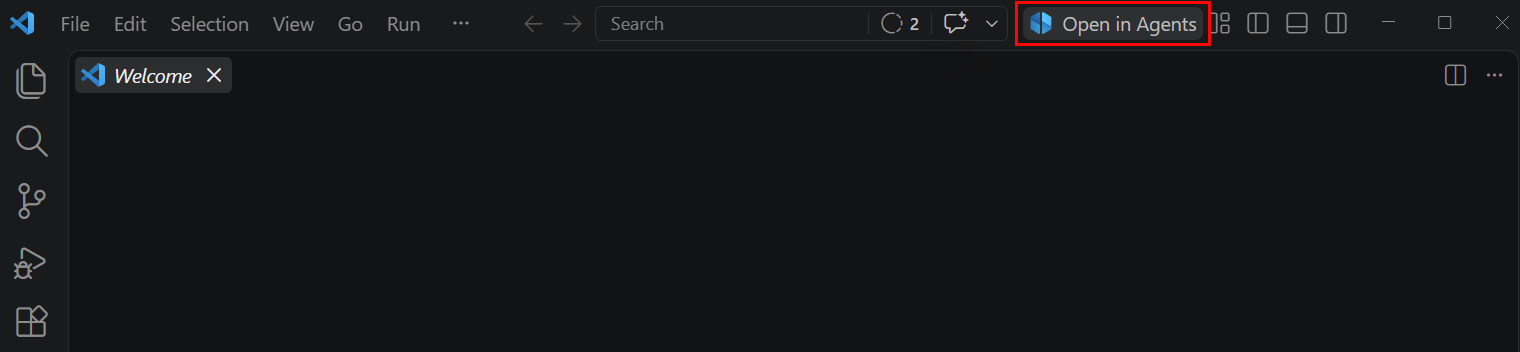
To open the Agents window, select Open in Agents in the title bar of VS Code or run Chat: Open Agents window from the Command Palette (⇧⌘P (Windows, Linux Ctrl+Shift+P)).
-
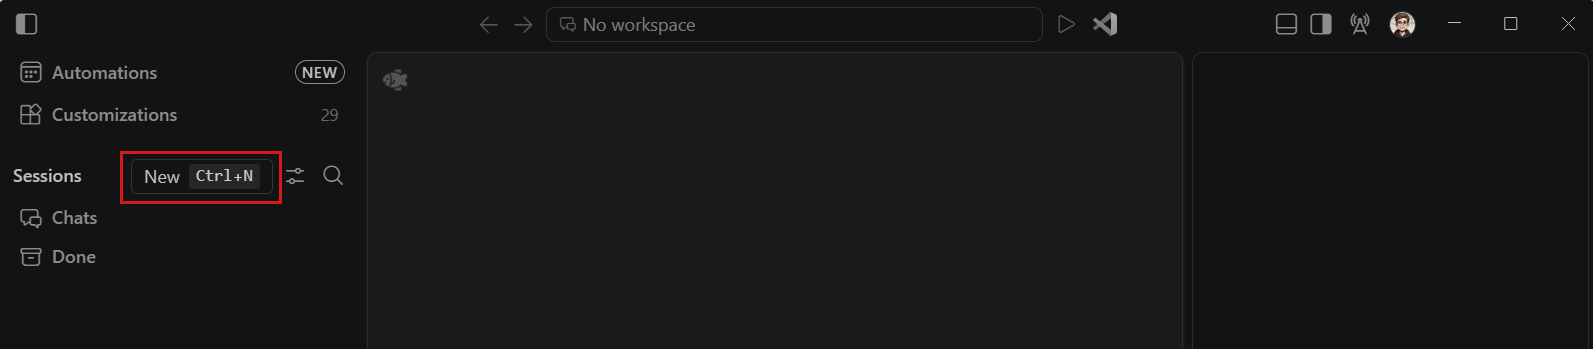
Select New at the top of the left sidebar to start a new agent session.
-
Because the Agents window can operate across different projects, select the
agent-quickstartfolder you created earlier from the dropdown.If VS Code asks whether you trust the folder, select Trust.
-
Configure the following settings for the session. Keep the default values for any other options.
Control Value Short description Session Target Copilot Selects the Copilot harness and its tools and workflow for the session. Agent Agent Uses tools to plan, edit files, run commands, and validate the result. Language model Auto Automatically selects a model based on task complexity and availability. Permissions Manual permissions Requests your approval for running tools or accessing resources. The agent can make file edits in your project folder. 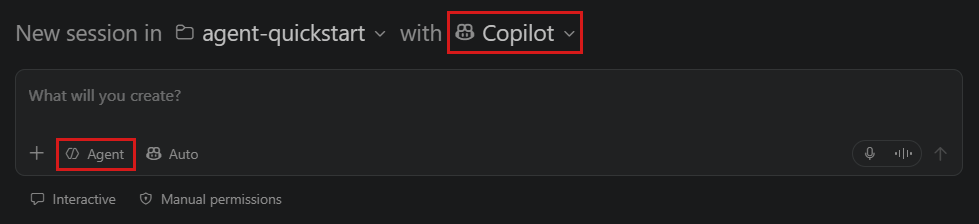
-
Enter the following prompt and press Enter:
Create a task list web app in a single index.html file with embedded CSS and JavaScript. Let me add, complete, and delete tasks. Save the tasks in local storage so they persist after a page reload. Use no external libraries. -
Follow the agent's progress and review each approval request before you accept it.
The agent creates the
index.htmlfile and saves updates as it progresses. Approval prompts appear for actions that aren't covered by your approval settings.TipAt any time you can stop the agent by selecting the Stop button in the chat input or steer it in another direction by sending a new prompt.
-
If the agent asks to open the
index.htmlfile in the integrated browser, select Allow in this Session. You can interact with the app directly in the integrated browser in VS Code.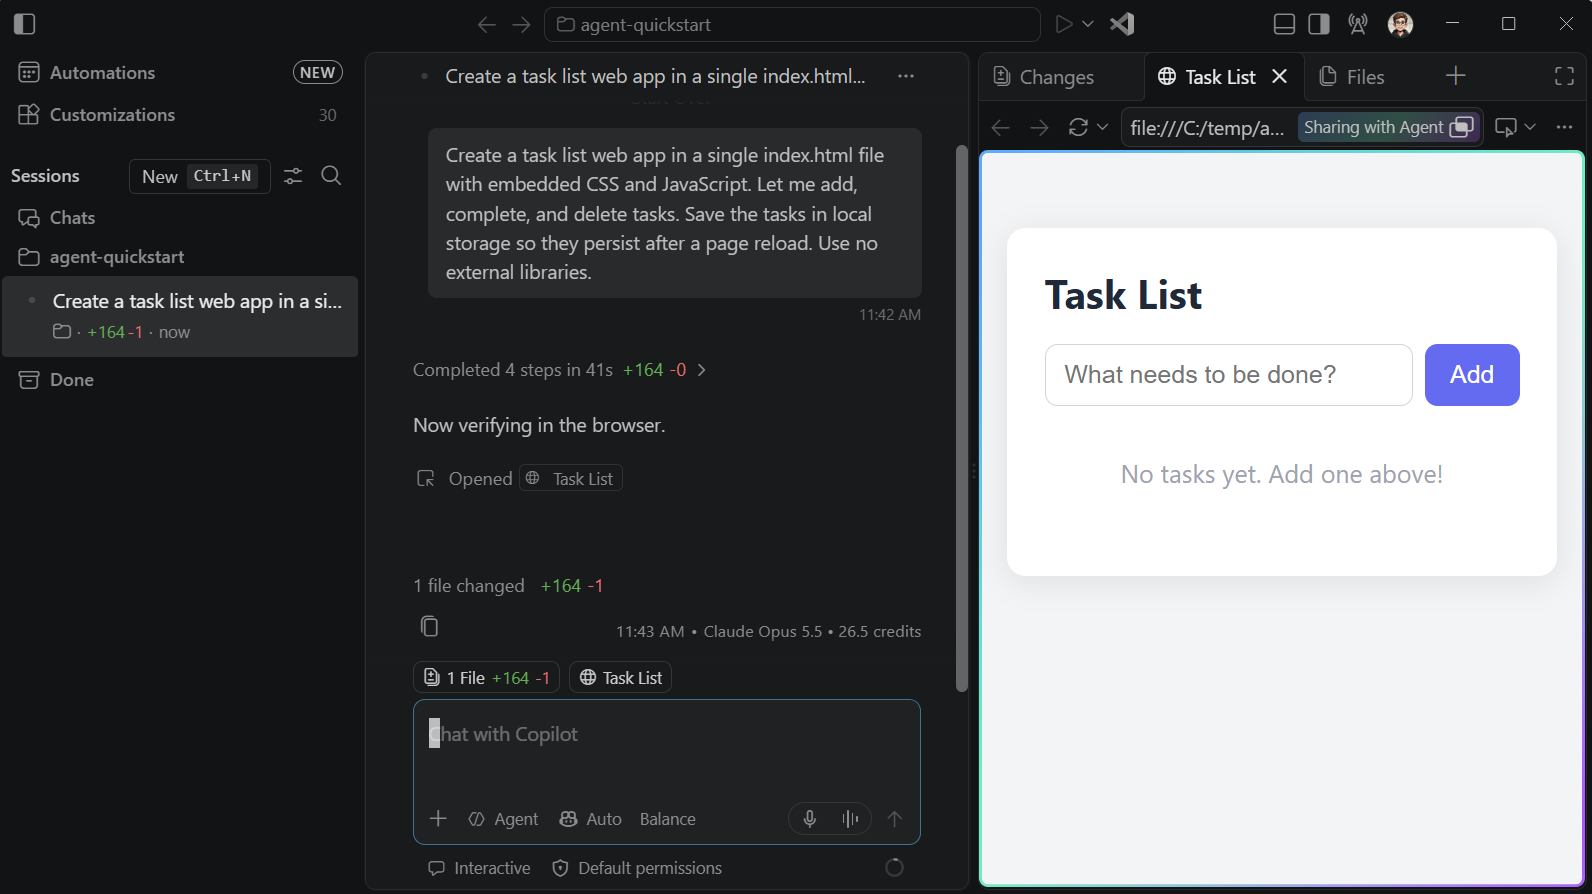
3. Review and validate the result
It's important to review the generated code and outcome carefully. You can let the agent validate key scenarios and edge cases for you by running the app in the integrated browser and observing its behavior.
The agent might already have launched the integrated browser to validate that the app runs correctly as part of creating the task list web app in the previous steps.
In the following steps you'll ask the agent to validate the basic functionality of the task list web app.
-
The Chat view indicates it changed one file and shows diff stats. Select it to review the generated code and its diff.
-
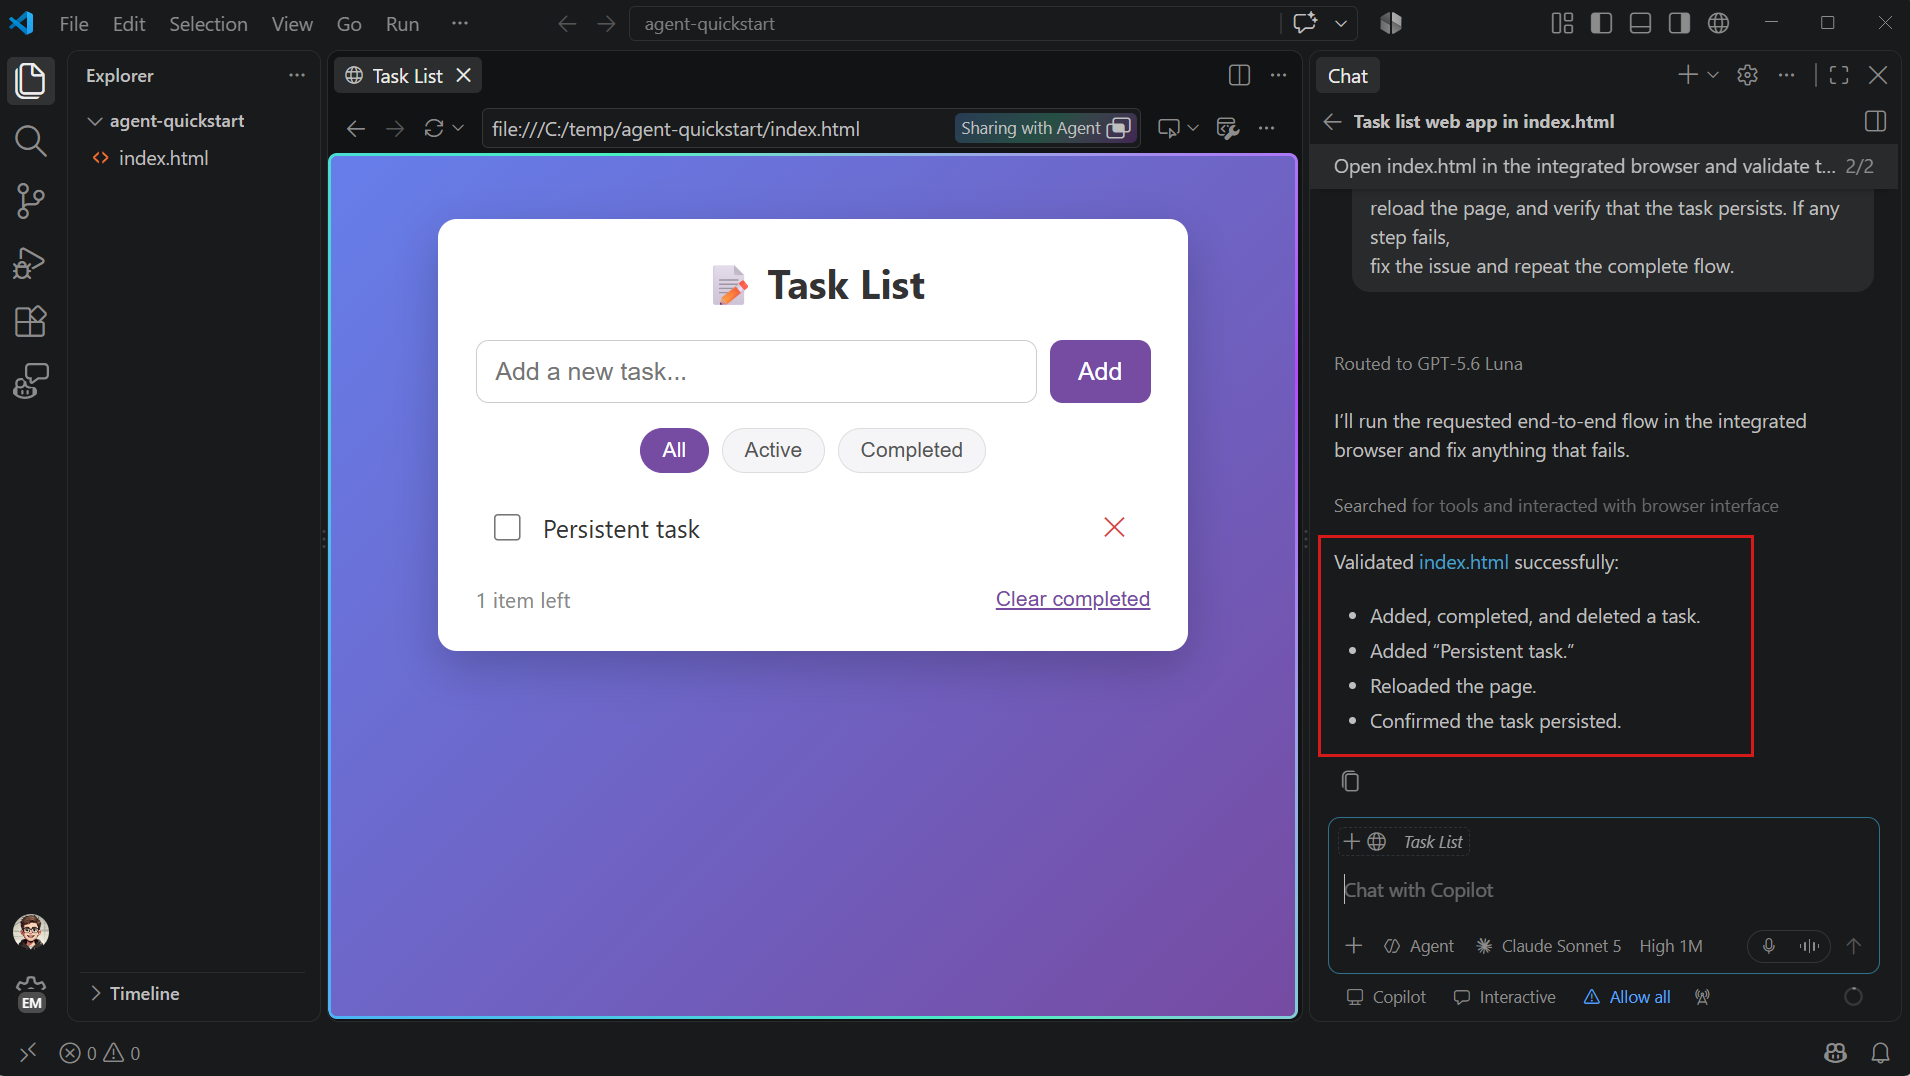
Enter the following prompt to have the agent open the app in the integrated browser and validate its functionality.
Open index.html in the integrated browser and validate the app. Add a task, mark it complete, and delete it. Then add another task, reload the page, and verify that the task persists. If any step fails, fix the issue and repeat the complete flow. -
Notice how the agent interacts with the integrated browser and autonomously validates different user scenarios.
-
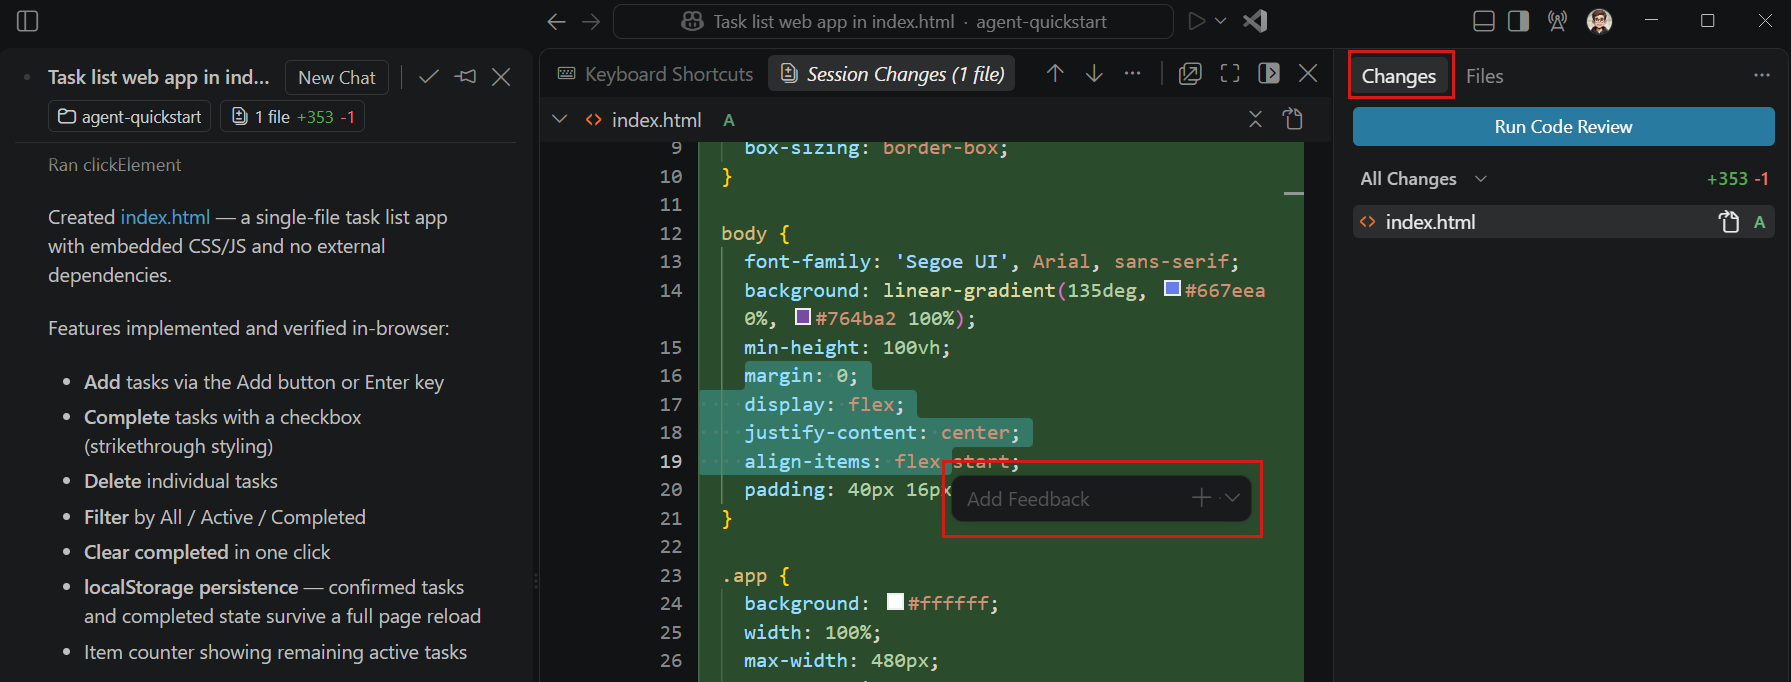
Open the Changes panel in the right sidebar (⌃⇧G (Windows, Linux Ctrl+Shift+G)) and select
index.htmlto review the generated code.If you're not happy with a specific part of the result, select it in the diff view and enter feedback to send it to the agent.
-
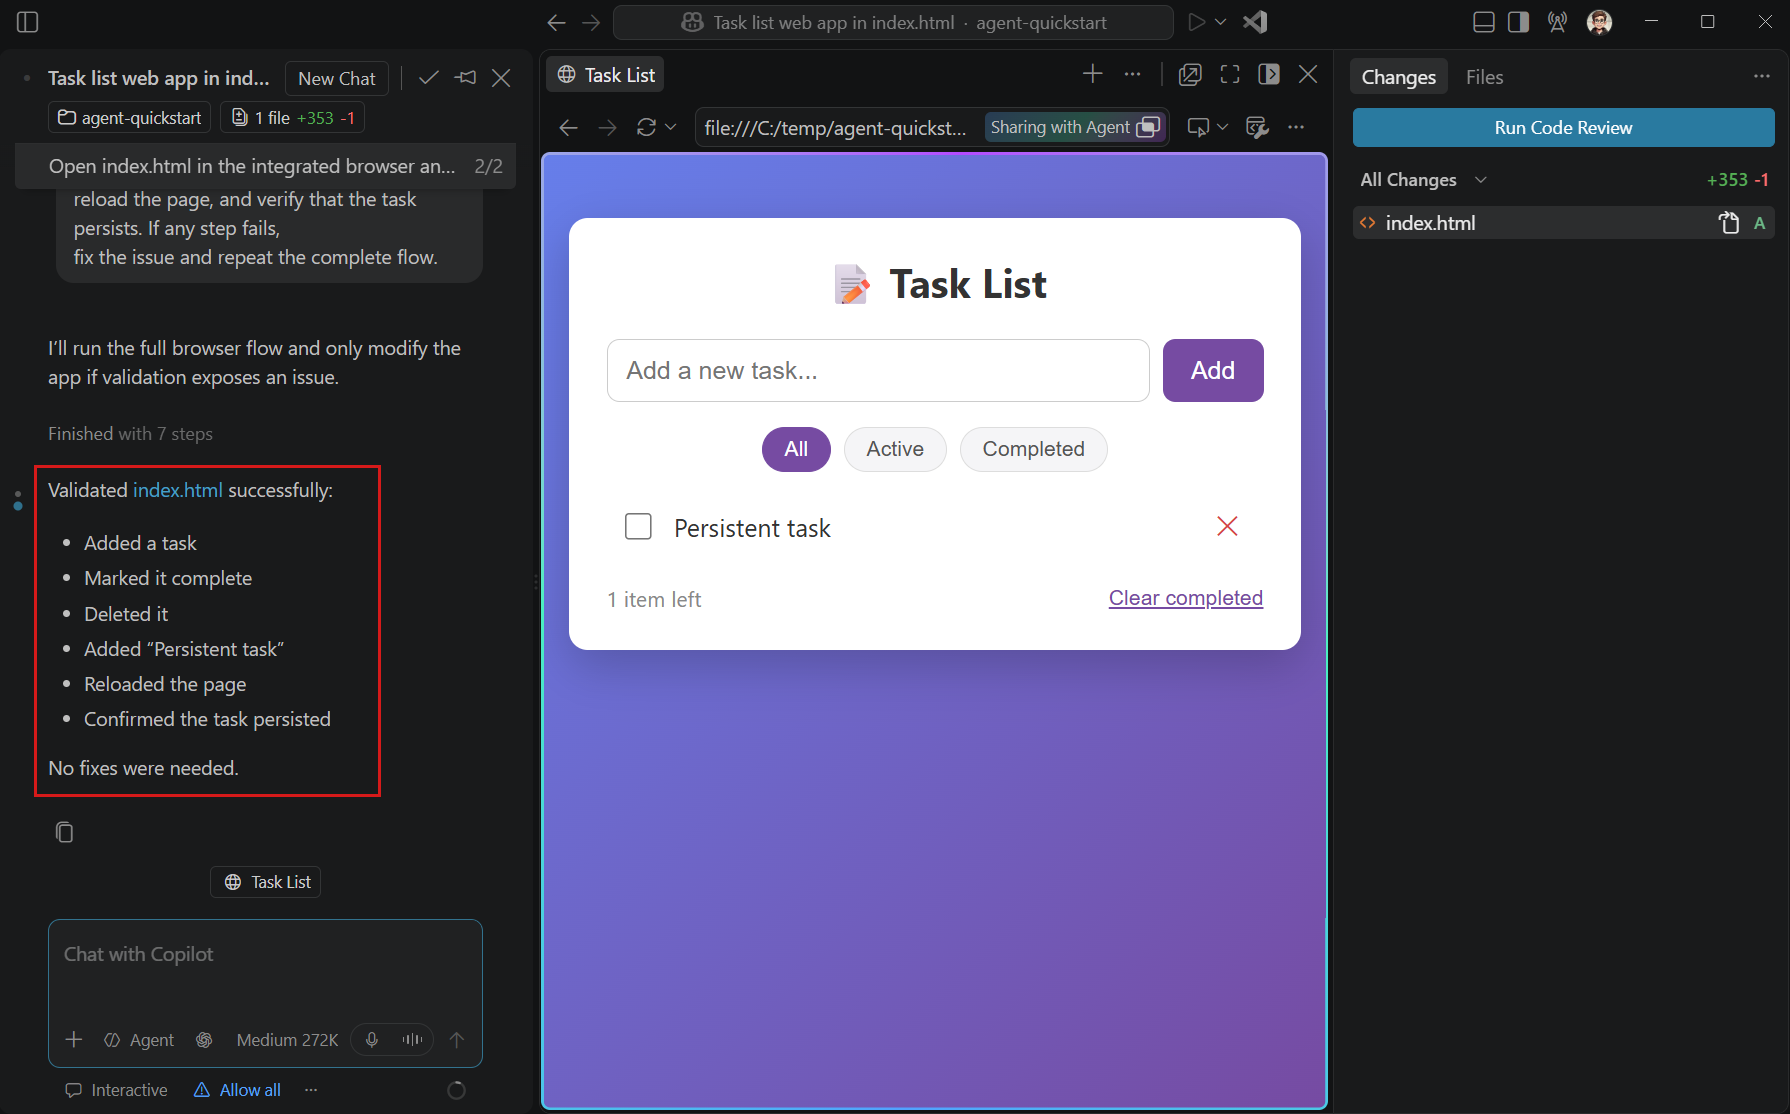
Enter the following prompt to have the agent open the app in the integrated browser and validate its functionality.
Open index.html in the integrated browser and validate the app. Add a task, mark it complete, and delete it. Then add another task, reload the page, and verify that the task persists. If any step fails, fix the issue and repeat the complete flow. -
Notice how the agent interacts with the integrated browser and autonomously validates different user scenarios.
For keyboard and screen reader access to the generated diffs, use the Accessible Diff Viewer.
4. Verify the result yourself
The agent's validation report helps you find problems, but it doesn't replace your own review. In the integrated browser:
- Add a task and mark it complete.
- Reload the page and confirm that the task and its completed state persist.
- Delete the task and confirm that it doesn't return after another reload.
If a check fails, describe what you observed in chat and ask the agent to fix and retest it. Review the resulting diff before you commit the changes.
You have completed your first task with an agent. The agent interpreted your goal, created the code, exercised the app in the browser, and fixed issues it found. You reviewed both the code and the result.
Stop, revise, or undo the work
If you're not satisfied with the agent's actions or the results, you have several options:
-
Stop or redirect the current request: while a request is running, use the Send dropdown to choose Steer with Message or Stop and Send. Stopping doesn't undo actions that already completed.
-
Revise the result: send a follow-up prompt. In a diff, you can select code and provide focused feedback when the interface offers that action.
-
Undo file changes from a request: hover over an earlier request and select Restore Checkpoint. This restores affected workspace files and chat history. It doesn't reverse terminal commands, network requests, deployments, or changes to external services. Learn more about reviewing and reverting agent changes.
If a follow-up doesn't resolve the problem, use Get an agent back on track to choose your next recovery action.
If your screen looks different
-
If the Copilot harness or Agent isn't available, verify your sign-in and review the agent harness setup requirements. Your organization's policies might restrict specific agents, models, or tools.
-
If you reach an AI credits limit, review what remains available and when allowances reset.
Continue in another interface or application
The Agents window and Chat view share your Copilot session, so you can switch between them without losing the conversation.
-
From the Agents window, select Open in Editor in the title bar. VS Code opens the project in an editor window with the session available in the Chat view.
-
From the Chat view, select Open in Agents in the title bar. The Agents window opens with the same session selected.
If you start work in GitHub Copilot CLI or the GitHub Copilot app, you can open and continue supported local sessions from those applications in VS Code. To continue a Copilot session in the CLI, right-click the session and select Resume in Terminal.
Clean up resources
When you no longer need the app, run these steps to clean up your local resources:
- Close the
agent-quickstartfolder in VS Code. - Delete the
agent-quickstartfolder from your computer.