Use the Chat view
The Chat view runs agents beside your code in the main Visual Studio Code window. Use it when you want to collaborate over code in the current workspace while keeping the editor, debugger, tests, terminals, extensions, and notebooks available alongside the conversation.
Start with a question about your project, ask for a change when you're ready, and inspect the result alongside your code. This article shows how to start a session, work with the agent, and arrange chat around your editor. To compare this approach with coordinating tasks in the Agents window, see Choose how you work.
Prerequisites
- Visual Studio Code installed. Download VS Code.
- Access to an AI model through a supported setup:
- For models provided by GitHub Copilot, set up GitHub Copilot in VS Code.
- To use Anthropic Claude, OpenAI Codex, or your own model credentials for supported workflows, review the agent harness authentication options and language model setup.
Open the Chat view
The Chat view opens in the Secondary Side Bar, next to your editor. To open the Chat view, use one of the following methods:
-
Select the Chat menu in the VS Code title bar, and then select Open Chat.
-
Use the keyboard shortcut ⌃⌘I (Windows, Linux Ctrl+Alt+I).
-
Run
code chatfrom the command line to start chat from outside VS Code. Learn more about starting chat from the command line.
Start a session
Claude and Codex harnesses are disabled when Copilot enterprise-managed settings apply. Contact the IT team that deployed the settings to discuss access.
-
Open the project you want to work on and select New Chat (
+) or press ⌘N (Windows, Linux Ctrl+N). -
Before you send the first prompt, choose a Session Target, Agent, Language model, and Permissions in the chat input. Available choices depend on your account, installed providers, and organization policies.
For a first coding task, follow the agents quickstart with Copilot, Agent, Auto, and Manual permissions. To use another setup, compare agent harnesses.
-
Enter a question or describe the task, and press Enter.
Start a Copilot CLI session
To start a new GitHub Copilot CLI conversation from the editor, use one of these options:
- Open the GitHub Copilot CLI terminal profile.
- Run Chat: New Copilot CLI Session from the Command Palette (⇧⌘P (Windows, Linux Ctrl+Shift+P)).
- Enter
copilotin an integrated terminal.
If the CLI isn't installed, copilot offers to install it. You can also add the command to PATH during macOS configuration or Windows setup.
The new session appears in the sessions list. To continue an existing conversation instead, use Resume in Terminal, where available.
If you already have a conversation running in the CLI, continue it in the Chat view with /code (Experimental).
Work with the agent
Keep the code and its checks beside the conversation as you work:
-
Provide relevant context: Point to the files, symbols, or behavior you want to discuss, and describe the outcome you need. Learn how to add context to a request.
-
Ask for an explanation or a change: For example, ask where a behavior is implemented before requesting a fix. Follow the codebase exploration guide for a read-only task, or the add a feature guide to plan and implement a change in your own project.
-
Review and steer the work: Inspect the agent's responses, proposed actions, and changes while using your editor, terminal, debugger, and tests. In a Copilot harness session, expand the working set Editor working set is experimental and might change or be removed. above the chat input to review tracked edits and use Keep or Undo. Edits are already saved; Keep clears their pending-review state. You can also select a changed file in the response to inspect its diff. For revisions, approvals, and sending a correction while work is running, see Use chat.
-
Validate before integrating: Check the agent's test results and run the relevant checks yourself. See Review AI-generated code edits for feedback, checkpoints, and recovery.
The Copilot working set works without Git, but only lists changes made through tracked edit tools, not terminal commands. Review other changed files separately. See review controls by harness and interface for the complete workflow.
To show a changed-files summary after each request, enable chat.checkpoints.showFileChanges . Supported tools depend on your harness and installed extensions. For example, you can work with Jupyter notebooks with the required tools installed. In a remote workspace, the session uses that project's remote context and tools.
If your project is on another machine, see Work in a remote workspace. To make sessions on this machine reachable from other clients, see Make a host available for remote access.
Continue in another interface
When you want to coordinate work across projects, select Open in Agents in the application title bar, then select your existing supported session from the sessions list. You don't have to start the task again. Review the supported session types and continuation steps first: Local sessions and sessions from the OpenAI Codex extension remain editor-only.
You can also keep using inline suggestions as you type, or use inline chat for a focused edit. These approaches complement the conversation rather than replace it.
Layout options
The Chat view offers several layout options within the main VS Code window. Choose the layout that best fits your workflow:
-
Side bar (default): select New Chat (+) > New Chat, or run the Chat: New Chat command. Best for keeping chat visible alongside your code.
-
Editor tab: select New Chat (+) > New Chat Editor, or run the Chat: New Chat Editor command. Best for giving chat more space or comparing sessions side by side.
-
Separate window: select New Chat (+) > New Chat Window, or run the Chat: New Chat Window command. Best for multi-monitor setups.
Interface overview
The Chat view keeps the agent next to your code, so you can prompt, review, and edit in the same window. The Chat view has the following main areas:
-
Sessions list: at the top of the view, where you can view and manage your sessions for the current workspace. Learn more about the sessions list.
-
Chat conversation: in the center, where you see the conversation history and the agent's responses, including the changes it makes to your code.
-
Chat input: at the bottom, where you type prompts and configure the session with the Session Target, Agent, Language model, and Permissions controls.
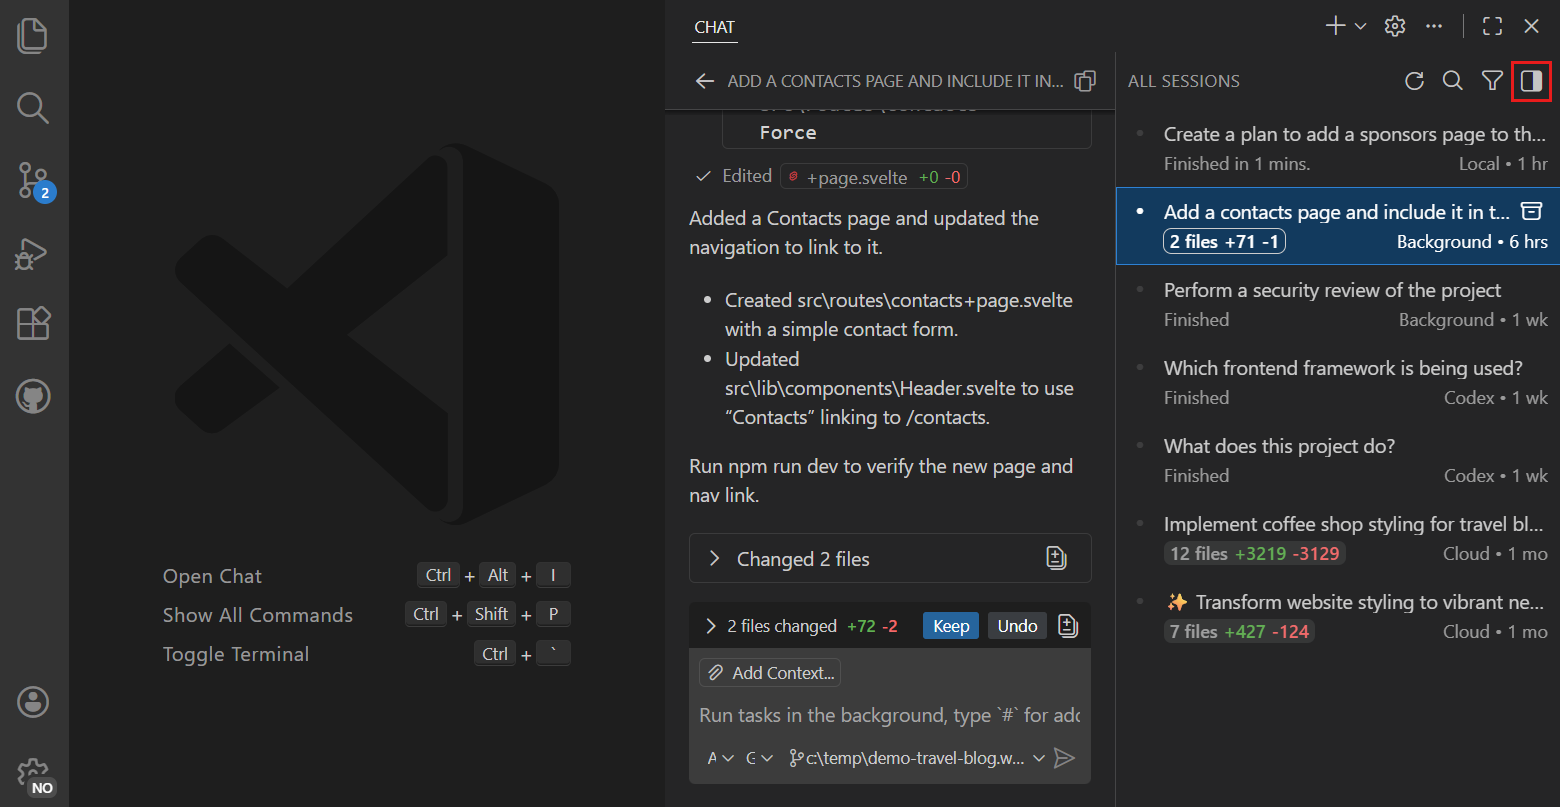
To inspect a chat response with a keyboard or screen reader, run Open Accessible View (⌥F2 (Windows Alt+F2, Linux Shift+Alt+F2)). Learn more about the Accessible View.
Sessions list layout
Use the toggle control in the top-right corner of the Chat view to switch between two layouts:
- Compact: The sessions list and conversation share the same panel. Select a session to open it, then use the back button to return to the list.
- Side-by-side: The sessions list stays visible next to the conversation. Select a session to open its details. Use chat.viewSessions.orientation to configure the orientation.
To hide or show the list, right-click in an empty chat and toggle Show Sessions, or use chat.viewSessions.enabled . For filters and session actions, see Find and resume a session.
Switch chats within a session
With a harness that supports multiple chats, a session can contain a main chat and nested sessions. In the Sessions view, expand the main chat row and select a nested session to open its conversation in the Chat view.
You can continue nested sessions created in the Agents window without starting a new conversation. For creation steps, navigation options, and interface-specific controls, see Run multiple chats in a session.
Session status indicator (Experimental)
Use chat.agentsControl.enabled to show a session status indicator in the title-bar command center. It provides access to sessions without switching views.
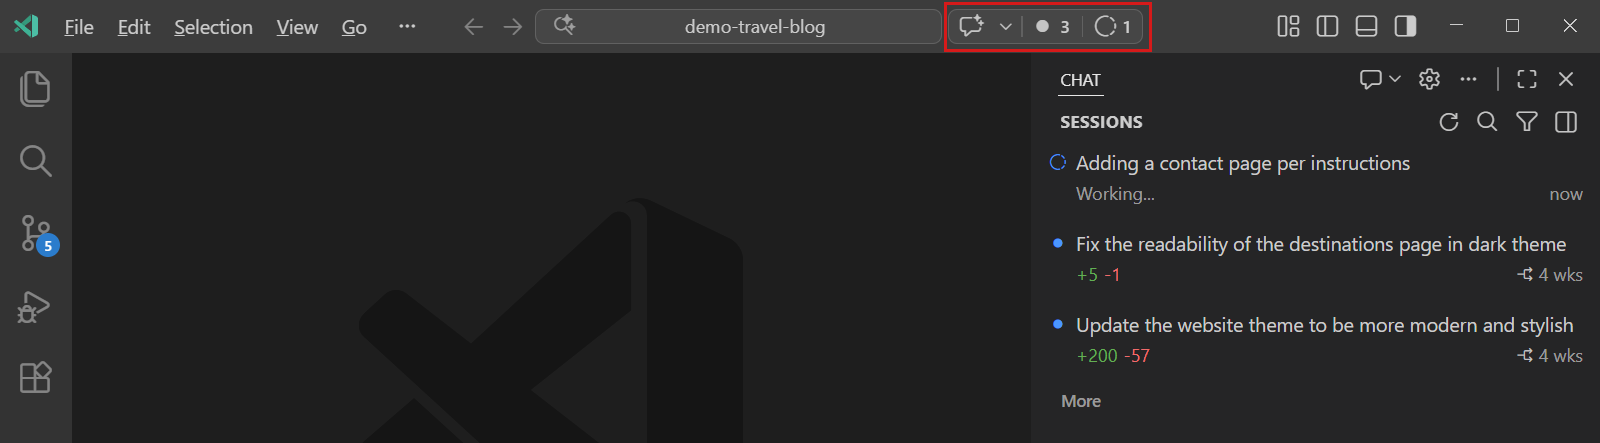
- Select the unread sessions badge to filter the sessions list to conversations with new messages.
- Select the in-progress sessions badge to filter to sessions with running agents.
- Select the sparkle icon for chat and session management options.
View sessions on the welcome page
Set
workbench.startupEditor
to agentSessionsWelcomePage to show recent sessions, an embedded chat widget for new tasks, and quick actions on the welcome page at startup. The startup page opens when no editors are restored from the previous session.
Next steps
- Chat interaction controls - send and steer requests, add context, and navigate a conversation.
- Manage agent sessions - organize, archive, and fork sessions.
- Use the Agents window - work with agents across multiple projects.