Build and test web apps with browser agent tools
Browser agent tools enable AI to autonomously build and verify web applications in a closed development loop. The agent can create HTML, CSS, and JavaScript, open the app in the integrated browser, interact with it to validate functionality, identify issues through console errors and visual inspection, and fix problems without manual intervention.
This guide walks you through using browser agent tools to build a calculator app and watch as the agent discovers and fixes bugs through automated testing.
Prerequisites
To complete this guide, you need:
- Visual Studio Code installed on your computer
- A GitHub Copilot subscription
- Browser agent tools enabled with the workbench.browser.enableChatTools This setting is managed at the organization level. Contact your administrator to change it. setting
How browser agent tools work
When you enable browser agent tools, agents gain access to tools that let them read and interact with pages in the integrated browser. These tools include:
- Page navigation:
openBrowserPage,navigatePage - Page content and appearance:
readPage,screenshotPage - User interaction:
clickElement,hoverElement,dragElement,typeInPage,handleDialog - Custom browser automation:
runPlaywrightCode
By default, pages opened by the agent run in private, in-memory sessions that don't share cookies or storage with your other browser tabs. This gives you control over what browsing data the agent can access.
Learn more about the integrated browser in VS Code.
Administrators can disable browser tools or restrict which domains agent tools can reach with enterprise policies.
Step 1: Enable browser tools for the agent
Before an agent can use browser tools, you must explicitly enable them in the chat tools picker.
-
Open the Chat view (⌃⌘I (Windows, Linux Ctrl+Alt+I)) and select Agent from the Agents dropdown.
-
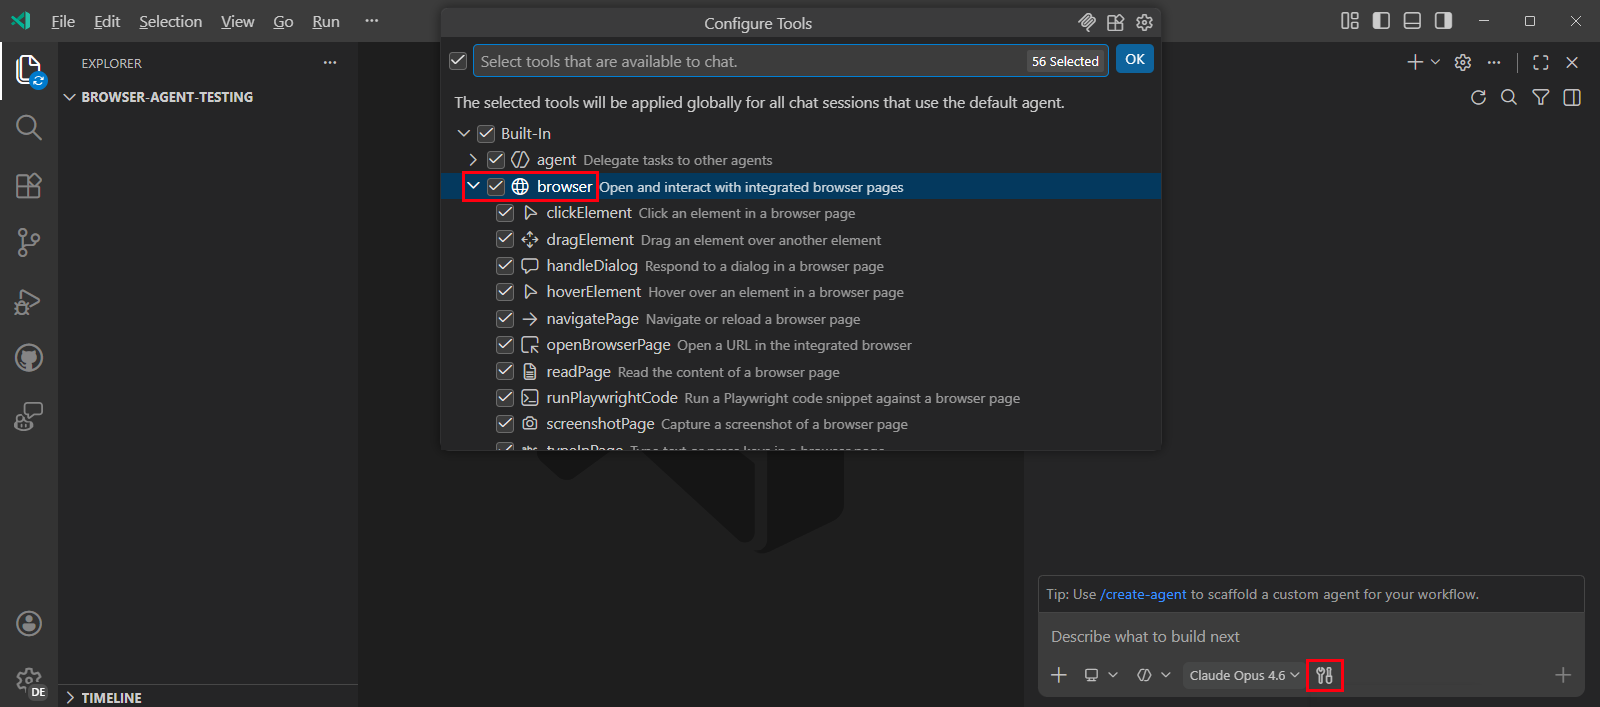
Select the Tools button in the chat input area to open the tools picker.
-
Verify that all the browser tools are enabled (they are grouped under Built-in > Browser).
The agent can now use these tools to interact with web pages.
Step 2: Ask the agent to build a calculator
With browser tools enabled, ask the agent to create a simple calculator application.
-
Create a new project folder and open it in VS Code.
-
In the Chat view, enter the following prompt:
Create a calculator with buttons for digits 0-9, operations (add, subtract, multiply, divide), clear, and equals. Use HTML, CSS, and JavaScript. Style it with a clean, modern design. -
Review the generated files as the agent creates
index.html,styles.css, andscript.js. -
Select Keep to save the files to your workspace.
The agent has built the basic structure of the calculator application.
Step 3: Let the agent test the calculator
Now ask the agent to open the calculator in the integrated browser and verify it works correctly.
-
In the Chat view, enter the following prompt:
Open the calculator in the browser and test if all the operations work correctly. -
Watch as the agent opens
index.htmlin the integrated browser, parses the page content to understand the structure, and systematically tests each button and operation by simulating clicks and checking the results.
The agent reports which operations work correctly and identifies any issues it discovers.
Step 4: Watch the agent debug and fix issues
If the agent discovers bugs during testing, it automatically analyzes the problem and implements a fix.
-
Let's introduce a bug by removing the division by zero check:
function calculate() { if (!operator || shouldReset) return; const a = parseFloat(previous); const b = parseFloat(current); let result; switch (operator) { case '+': result = a + b; break; case '-': result = a - b; break; case '*': result = a * b; break; case '/': result = a / b; break; } -
Ask the agent to test the division operation and fix any issues it finds:
Verify the division operation works correctly. If you find any issues, fix them. -
Watch as the agent encounters an error when dividing by zero, then analyzes and fixes the code, and finally validates the bug fix.
The agent has completed a full development cycle: build, test, debug, and fix by using browser automation.
Step 5: Share a browser page with the agent (optional)
You can also manually open web pages and explicitly share them with the agent for analysis or interaction. By default, the agent can only interact with web pages it opened itself.
-
Open the integrated browser by running the Browser: Open Integrated Browser command from the Command Palette (⇧⌘P (Windows, Linux Ctrl+Shift+P)).
-
Navigate to a web page you want the agent to analyze or interact with.
-
Select the Share with Agent button in the browser toolbar.
A visual indicator on the browser tab shows that the page is actively shared with the agent.
-
Ask the agent to perform actions on the shared page:
What is the main heading on this page? Click the first link and tell me where it goes.
The agent can now access the shared page and perform interactions on your behalf. When you're done, select the Share with Agent button again to revoke access.
Shared pages use your existing browser session, including cookies and login state. Pages opened by the agent use isolated ephemeral sessions, so they don't share cookies or storage with your other browser tabs.
Try these scenarios
Now that you understand how browser agent tools work, try these scenarios to explore different use cases:
-
Form validation testing: have the agent verify validation rules, error messages, and successful submission by building and testing a contact form
-
Responsive layout verification: ask the agent to screenshot a page at different viewport sizes and verify responsive behavior (for example, a landing page with navigation menus)
-
Authentication flow testing: let the agent test credential validation, error handling, and successful redirects in a login page
-
Interactive functionality testing: have the agent verify user interactions and state management
-
Accessibility audits: ask the agent to check any web page for missing alt text, heading hierarchy, keyboard navigation, and color contrast issues