Create and deploy a hosted agent in Foundry Toolkit for VS Code
Hosted Agents are code-based AI agents that run in Microsoft Foundry Agent Service, providing managed hosting, scaling, observability, and secure execution environments so you can focus on agent logic instead of infrastructure. With Microsoft Foundry Toolkit for Visual Studio Code, you can quickly create a new Hosted Agent from a variety of project templates in Python or .NET, develop and test it locally, and deploy it directly to your Foundry project.
Create a new hosted agent
To create a new hosted agent:
-
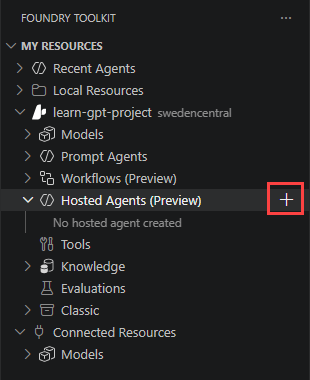
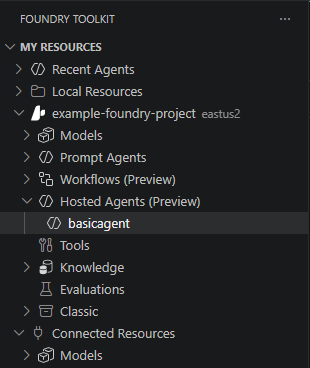
In Foundry Toolkit's primary sidebar, navigate to MY RESOURCES > Your project name > Hosted Agents (Preview) and select the + to the right of that tree node.
-
The "Create Hosted Agent from Sample" designer appears in the main area of Visual Studio Code.
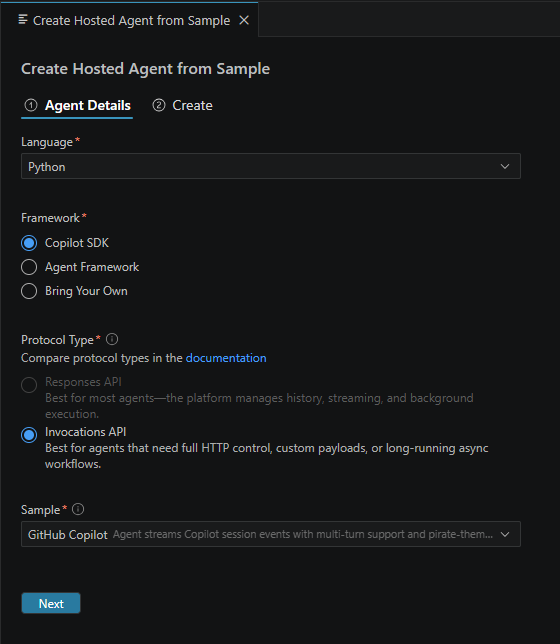
In this first step, you choose your agent's details:
- Programming language - Choose Python or C#.
- Framework - Choose a framework or no framework.
- Protocol Type - Choose a protocol type.
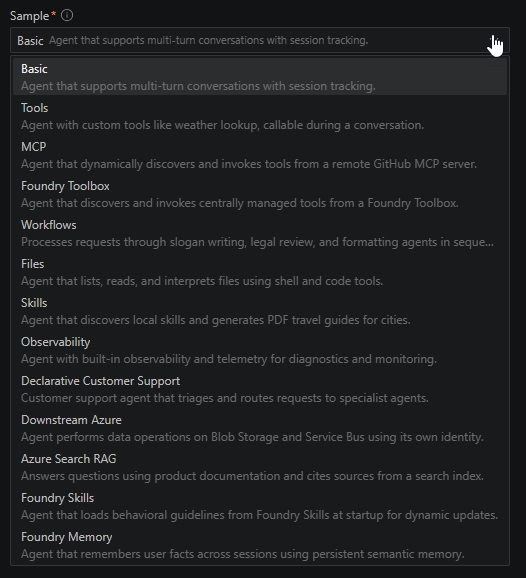
- Sample - The sample project you will use as the starting point for your new hosted agent.
Depending on your selections you will see different sample projects in the drop down list.
 Note
NoteCertain fields may be pre-populated in the designer based on the context of your workspace (like programming language, project, etc.) So, you may not need to "choose" values for every field.
Select the Next button.
-
In the second step, you choose:
- Workspace folder - A location on your local drive that will store the new project's files.
- Environment setup - Select this if you want to choose your deployment target for the new hosted agent in advance. This will display the Subscription and project name and Model deployment options.
- Subscription and project name - Optional step. Select the Azure Subscription and Foundry project name you will deploy to.
- Model deployment - Select the model you will target for this hosted agent.
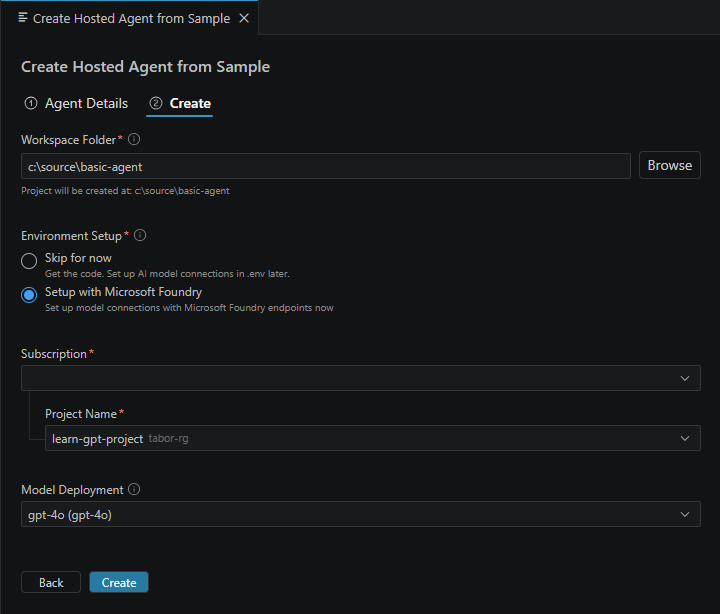
Select the Create button.
-
A new instance of Visual Studio Code will open with your generated files. The number and names of the files will depend on the sample you selected.
-
Read the
README.mdfile for an explanation of the sample, instructions on how to deploy your new hosted agent, and troubleshooting steps.
Deploy your hosted agent
After you modify the sample project to implement your own custom logic, you will deploy your agent to Foundry.
-
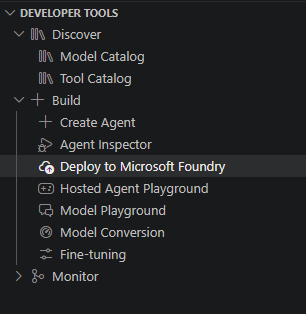
In the Foundry Toolkit sidebar, select DEVELOPER TOOLS > Build > Deploy to Microsoft Foundry.
-
If you do not have a default project selected you will see the first step of the "Deploy Hosted Agents" designer, "Foundry Project Setup", in the main area. Select your Azure subscription and your Foundry project name (or create a new project).

Select the Next button.
-
On the "Basics" step, choose your Deployment method. You'll choose either:
- Code
- Container
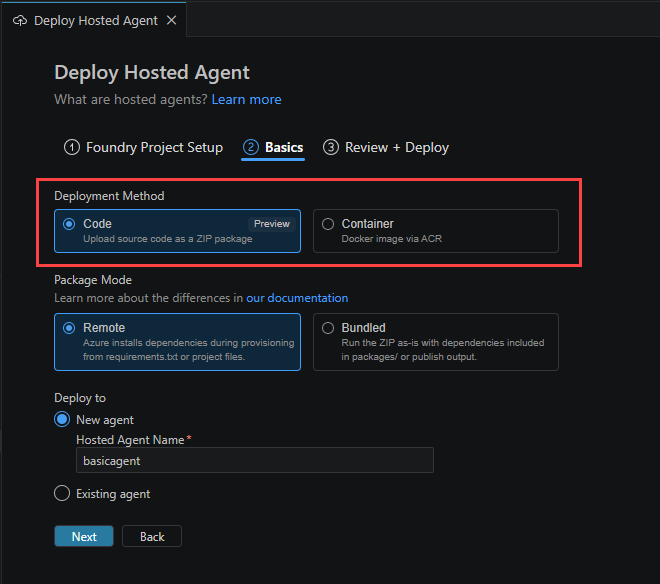
Depending on which you choose, you will be asked to fill in different information in the following steps.
Deploy your hosted agent as source code in a ZIP package
If you selected the Code option:
-
You will next choose between:
- Remote - Azure installs dependencies during provisioning from requirements.txt or project files.
- Bundled - Run the ZIP as-is with dependencies included in
packages/orpublishoutput.

-
You'll choose whether to deploy to:
- New agent - You'll enter a new name for your new hosted agent.
- Existing agent - Select from a listbox containing your existing hosted agents.
Select the Next button.
-
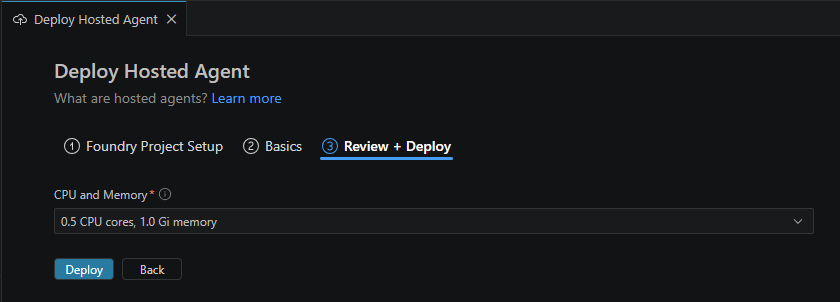
On the "Review + Deploy" step, you'll choose:
- Language - Python or C#.
- Runtime Version - The version of the runtime you want to use.
- Entry point - The command to launch your agent.
- CPU and Memory - The amount of compute and memory you want the hosted agent to utilize.
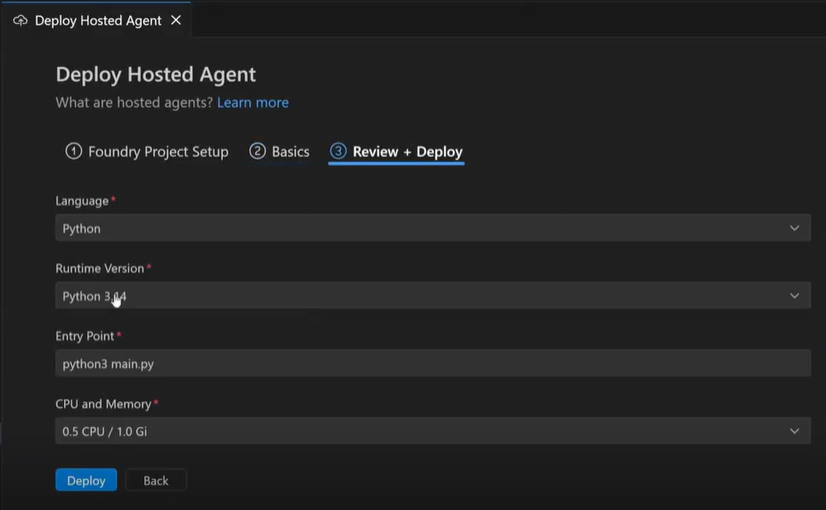 Note
NoteYour choice for CPU and Memory will have an impact on billing for your hosted agent.
-
Select Deploy button. Continue to the section Deployment progress and success.
Deploy your hosted agent as a Docker container via ACR
If you selected the Container option:
-
You will next choose between:
- Default ACR - Foundry creates and manages a container registry for you.
- Custom ACR - Use a container registry you own in Azure
- Custom ACR image - Use a prebuilt ACR image URL
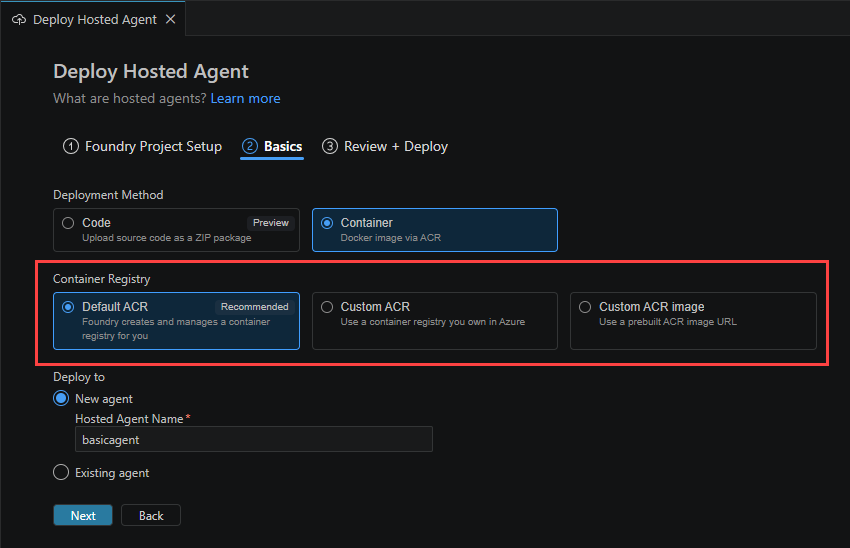
If you choose Custom ACR, you will need to supply the ACR URL.
If you choose Custom ACR image, you will need to supply the Image URL.
- You'll choose whether to deploy to:
- New agent - You'll enter a new name for your new hosted agent.
- Existing agent - Select from a listbox containing your existing hosted agents.
Select the Next button.
-
On the "Review + Deploy" step, you'll choose CPU and Memory - The amount of compute and memory you want the hosted agent to utilize.
 Note
NoteYour choice for CPU and Memory will have an impact on billing for your hosted agent.
-
Select Deploy button. Continue to the section Deployment progress and success.
Deployment progress and success
After you select the Deploy button, you'll see a notification that the deployment is in progress and see information logged to the terminal's output. After a few moments you should see the agent deployed successfully and the Hosted Agent playground loaded into the main view.
Select the Details"** tab to view the Agent and Deployment details.
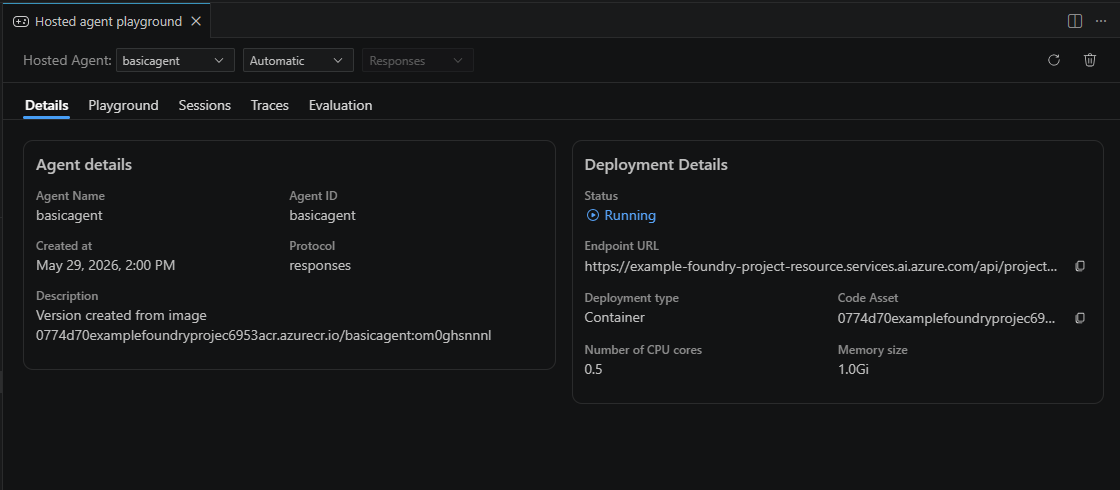
Also, you should now be able to see your new hosted agent appear in the Foundry Toolkit sidebar under MY RESOURCES > Your project name > **Hosted Agents (Preview) Your agent name.
What you learned
In this article, you learned how to:
- Use the "Hosted Agent" feature to create a new hosted agent project based on a sample for your desired programming language, API framework, and so on.
- Use the "Deploy hosted agent** feature to configure and initiate the deployment of your hosted agent to Foundry.
Next steps
- Use the agent inspector to test and debug your agent