Tutorial: Build a code tutorial chat participant with the Chat API
In this tutorial, you'll learn how to create a Visual Studio Code extension that integrates with the GitHub Copilot Chat experience. You'll use the Chat extension API to contribute a chat participant. Your participant will be a code tutor that can provide explanations and sample exercises for programming concepts.
Prerequisites
You'll need the following tools and accounts to complete this tutorial:
Step 1: Set up your project
First, generate the extension project by using Yeoman and the VS Code Extension Generator.
npx --package yo --package generator-code -- yo code
Select the following options to complete the setup:
# ? What type of extension do you want to create? New Extension (TypeScript)
# ? What's the name of your extension? Code Tutor

### Press <Enter> to choose default for all options below ###

# ? What's the identifier of your extension? code-tutor
# ? What's the description of your extension? LEAVE BLANK
# ? Initialize a git repository? Yes
# ? Bundle the source code with webpack? No
# ? Which package manager to use? npm

# ? Do you want to open the new folder with Visual Studio Code? Open with `code`
Once your extension project is generated, there are two files you will be working in: extension.ts and package.json, which you can learn more about in the Extension Anatomy docs. As a quick overview:
extension.tsis the main entry point for your extension and contains the logic for your chat participant.package.jsoncontains the metadata for your extension, such as the name and description of your participant.
Delete the auto-generated code in the extension.ts activate() method. This is where you will place our logic for our chat participant.
Step 2: Register a Chat participant
In the package.json file, replace the auto-generated contributes section with the following:
"contributes":{
    "chatParticipants": [
    {
        "id": "chat-tutorial.code-tutor",
        "fullName": "Code Tutor",
        "name": "tutor",
        "description": "What can I teach you?",
        "isSticky": true
    }
    ]
}
This code registers a chat participant with the following attributes:
- Unique ID
chat-tutorial.code-tutor, which will be referenced in the code - Full name
Code Tutor, which will be shown in the title area of a response from your participant - Name
tutor, which will be used to reference the chat participant as@tutorin the Chat view - Description "What can I teach you?", which will be shown in the chat input field as a placeholder text
Finally, setting isSticky: true will automatically prepend the participant name in the chat input field after the user has started interacting with the participant.
Step 3: Craft the prompt
Now that the participant is registered, you can start implementing the logic for the code tutor. In the extension.ts file, you will define a prompt for the requests.
Crafting a good prompt is the key to getting the best response from your participant. Check out this article for tips on prompt engineering.
Your code tutor should emulate a real-world tutor by guiding the student to understand the concept instead of providing direct answers. Additionally, the tutor should remain focused on the topic and refrain from answering non-programming questions.
Consider the following two prompts. Which is more likely to give the specified behavior?
-
You are a helpful code tutor. Your job is to teach the user with simple descriptions and sample code of the concept.
-
You are a helpful code tutor. Your job is to teach the user with simple descriptions and sample code of the concept. Respond with a guided overview of the concept in a series of messages. Do not give the user the answer directly, but guide them to find the answer themselves. If the user asks a non-programming question, politely decline to respond.
The second prompt is more specific and gives the participant a clear direction on how to respond. Add this prompt in the extension.ts file.
const BASE_PROMPT =
  'You are a helpful code tutor. Your job is to teach the user with simple descriptions and sample code of the concept. Respond with a guided overview of the concept in a series of messages. Do not give the user the answer directly, but guide them to find the answer themselves. If the user asks a non-programming question, politely decline to respond.';
Step 4: Implement the request handler
Now that the prompt is selected, you need to implement the request handler. This is what will process the user's chat request. You will define the request handler, perform logic for processing the request, and return a response to the user.
First, define the handler:
// define a chat handler
const handler: vscode.ChatRequestHandler = async (
  request: vscode.ChatRequest,
  context: vscode.ChatContext,
  stream: vscode.ChatResponseStream,
  token: vscode.CancellationToken
) => {
  return;
};
Within the body of this handler, initialize the prompt and a messages array with the prompt. Then, send in what the user typed in the chat box. You can access this through request.prompt.
Send the request using request.model.sendRequest, which will send the request using the currently selected model. Finally, stream the response to the user.
// define a chat handler
const handler: vscode.ChatRequestHandler = async (
  request: vscode.ChatRequest,
  context: vscode.ChatContext,
  stream: vscode.ChatResponseStream,
  token: vscode.CancellationToken
) => {
  // initialize the prompt
  let prompt = BASE_PROMPT;

  // initialize the messages array with the prompt
  const messages = [vscode.LanguageModelChatMessage.User(prompt)];

  // add in the user's message
  messages.push(vscode.LanguageModelChatMessage.User(request.prompt));

  // send the request
  const chatResponse = await request.model.sendRequest(messages, {}, token);

  // stream the response
  for await (const fragment of chatResponse.text) {
    stream.markdown(fragment);
  }

  return;
};
Step 5: Create the chat participant
Once the handler is implemented, the last step is to create the chat participant by using the createChatParticipant method in the Chat extension API. Make sure to use the same ID that you used in the package.json.
You should further customize your participant by adding an icon for it. This will show in the Chat view when interacting with the participant.
// define a chat handler
const handler: vscode.ChatRequestHandler = async (
  request: vscode.ChatRequest,
  context: vscode.ChatContext,
  stream: vscode.ChatResponseStream,
  token: vscode.CancellationToken
) => {
  // initialize the prompt
  let prompt = BASE_PROMPT;

  // initialize the messages array with the prompt
  const messages = [vscode.LanguageModelChatMessage.User(prompt)];

  // add in the user's message
  messages.push(vscode.LanguageModelChatMessage.User(request.prompt));

  // send the request
  const chatResponse = await request.model.sendRequest(messages, {}, token);

  // stream the response
  for await (const fragment of chatResponse.text) {
    stream.markdown(fragment);
  }

  return;
};

// create participant
const tutor = vscode.chat.createChatParticipant('chat-tutorial.code-tutor', handler);

// add icon to participant
tutor.iconPath = vscode.Uri.joinPath(context.extensionUri, 'tutor.jpeg');
Step 6: Run the code
You are now ready to try out your chat participant! Press F5 to run the code. A new window of VS Code will open with your chat participant.
In the Copilot Chat pane, you can now invoke your participant by typing @tutor!
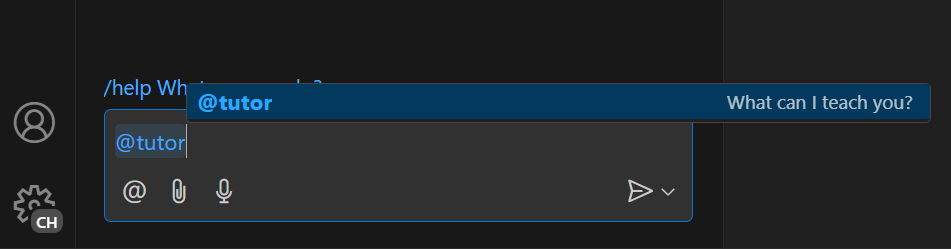
Test it out by typing what you want to learn about. You should see a response giving you an overview of the concept!
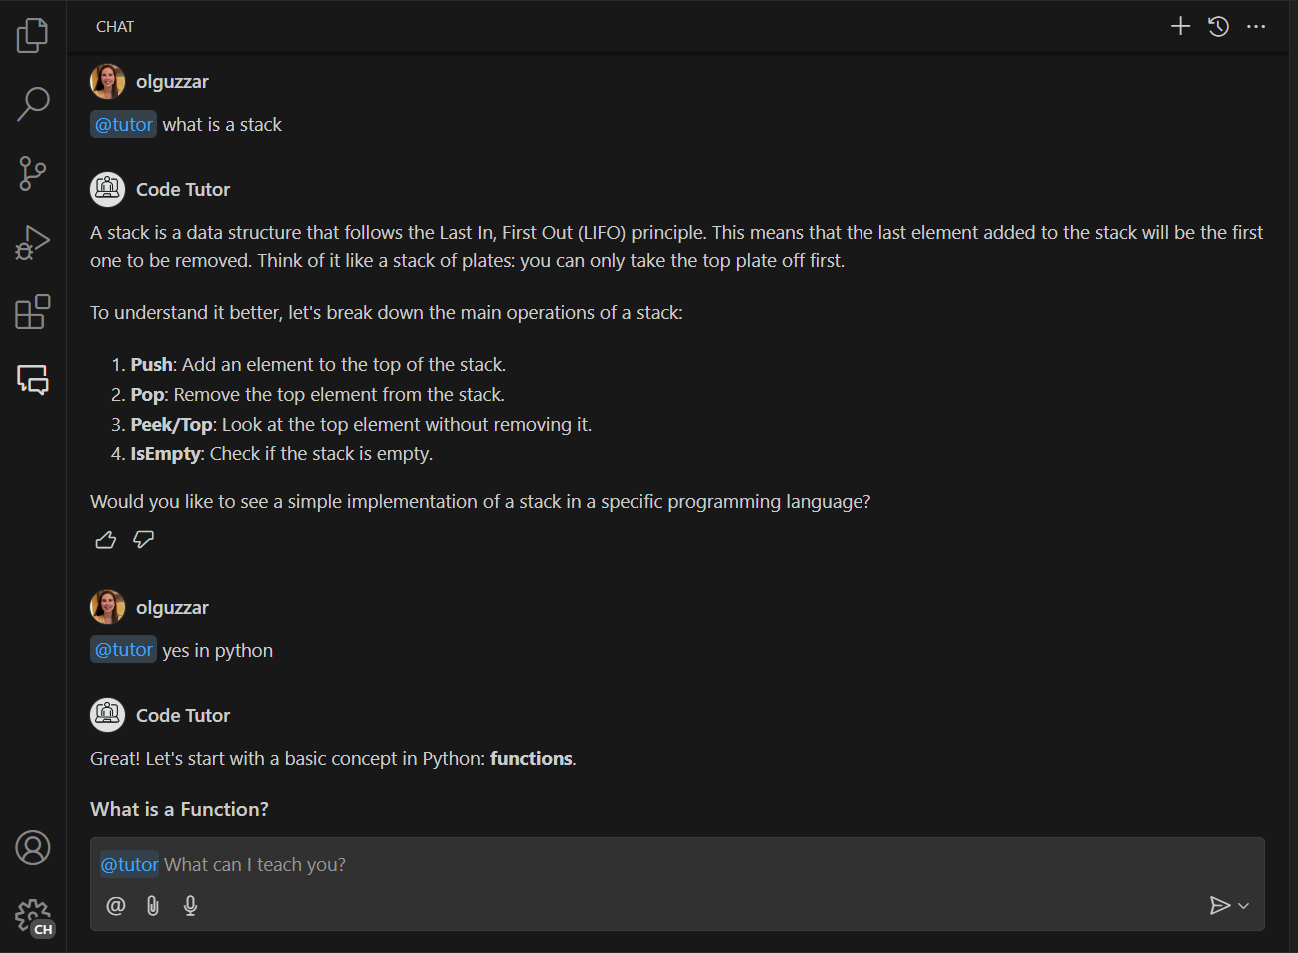
If you type a related message to continue the conversation, you'll notice that the participant doesn't give a follow-up response based on your conversation. That's because our current participant is only sending in the user's current message, and not the participant message history.
In the screenshot below, the tutor correctly responds with a starting explanation of stacks. However, in the follow-up, it does not understand that the user is continuing the conversation to see an implementation of stacks in Python, so it instead gives a generic response about Python.
Step 7: Add message history for more context
One of the biggest values of Copilot Chat is the ability to iterate over several messages to get the best response. To do this, you want to send in the participant's message history to the chat request. You can access this through context.history.
You'll need to retrieve that history and add it to the messages array. You will need to do this before the request.prompt is added.
// define a chat handler
const handler: vscode.ChatRequestHandler = async (
  request: vscode.ChatRequest,
  context: vscode.ChatContext,
  stream: vscode.ChatResponseStream,
  token: vscode.CancellationToken
) => {
  // initialize the prompt
  let prompt = BASE_PROMPT;

  // initialize the messages array with the prompt
  const messages = [vscode.LanguageModelChatMessage.User(prompt)];

  // get all the previous participant messages
  const previousMessages = context.history.filter(
    h => h instanceof vscode.ChatResponseTurn
  );

  // add the previous messages to the messages array
  previousMessages.forEach(m => {
    let fullMessage = '';
    m.response.forEach(r => {
      const mdPart = r as vscode.ChatResponseMarkdownPart;
      fullMessage += mdPart.value.value;
    });
    messages.push(vscode.LanguageModelChatMessage.Assistant(fullMessage));
  });

  // add in the user's message
  messages.push(vscode.LanguageModelChatMessage.User(request.prompt));

  // send the request
  const chatResponse = await request.model.sendRequest(messages, {}, token);

  // stream the response
  for await (const fragment of chatResponse.text) {
    stream.markdown(fragment);
  }

  return;
};
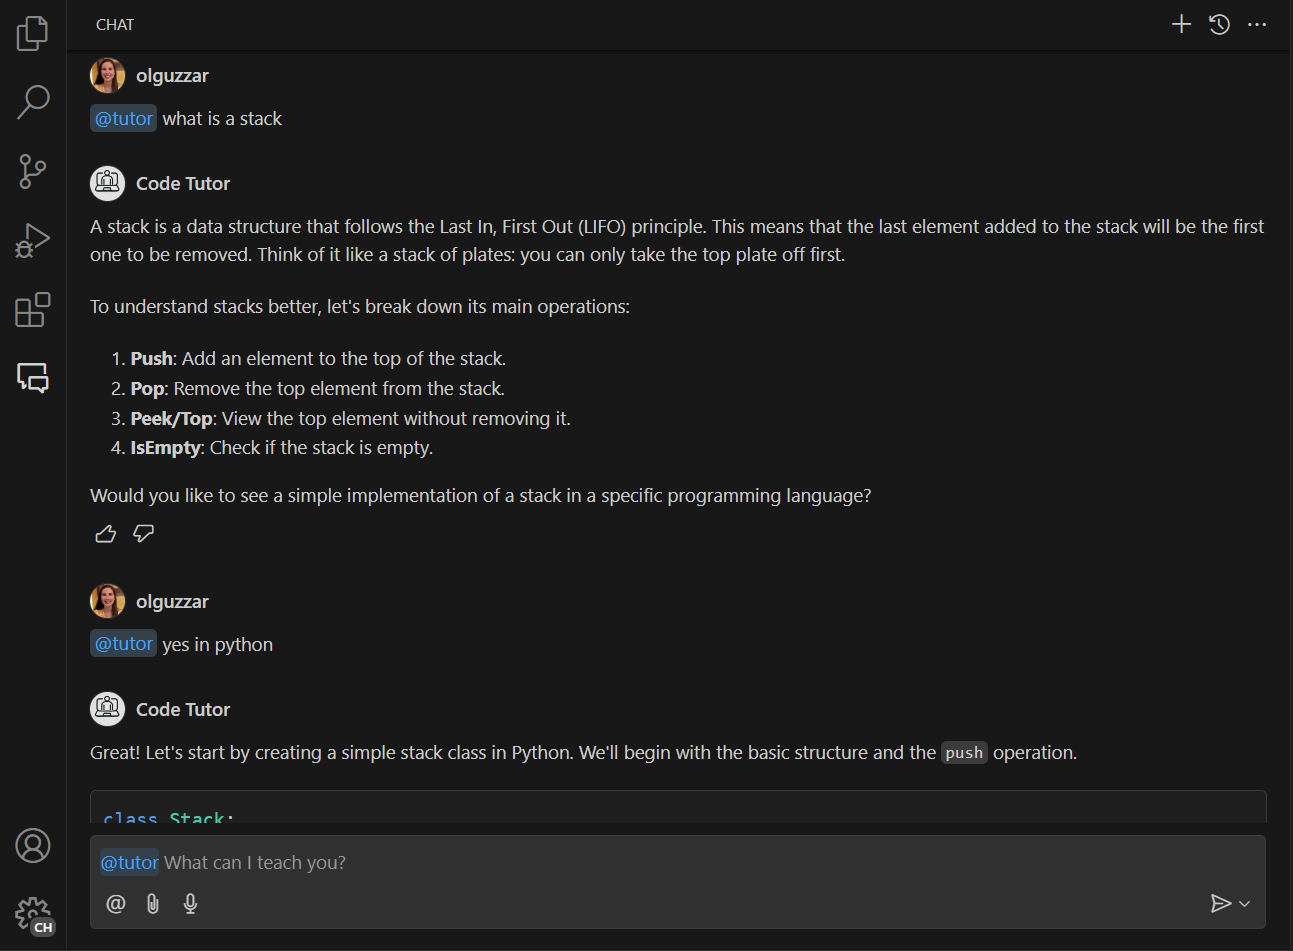
Now when you run the code, you can have a conversation with your participant with all the context of the previous messages! In the screenshot below, the participant correctly understands that the user is requesting to see an implementation of stacks in Python.
Step 8: Add a command
Now that the basic participant is implemented, you can extend it by adding a command. Commands are a shorthand notation for common user intents, and are indicated by the / symbol. The extension can then use the command to prompt the language model accordingly.
It would be great to add a command to prompt your tutor to give a practice exercise for a concept. You'll need to register the command in the package.json file and implement the logic in extension.ts. You can name the command exercise so that it can be invoked by typing /exercise.
In package.json add the commands property to the chatParticipants property. Here, you'll specify the name of the command and a quick description:
"contributes": {
    "chatParticipants": [
      {
        "id": "chat-tutorial.code-tutor",
        "fullName": "Code Tutor",
        "name": "tutor",
        "description": "What can I teach you?",
        "isSticky": true,
        "commands": [
          {
            "name": "exercise",
            "description": "Provide exercises to practice a concept."
          }
        ]
      }
    ]
  },
To implement the logic for getting sample exercises from the tutor, the simplest way is to change the prompt that you send in to the request. Create a new prompt, EXERCISES_PROMPT, that asks the participant to return sample exercises. Here's an example of what that could look like:
const EXERCISES_PROMPT =
  'You are a helpful tutor. Your job is to teach the user with fun, simple exercises that they can complete in the editor. Your exercises should start simple and get more complex as the user progresses. Move one concept at a time, and do not move on to the next concept until the user provides the correct answer. Give hints in your exercises to help the user learn. If the user is stuck, you can provide the answer and explain why it is the answer. If the user asks a non-programming question, politely decline to respond.';
In the request handler, you then need to add logic to detect that the user referenced the command. You can do this through the request.command property.
If the command is referenced, update the prompt to the newly created EXERCISES_PROMPT
// define a chat handler
const handler: vscode.ChatRequestHandler = async (
  request: vscode.ChatRequest,
  context: vscode.ChatContext,
  stream: vscode.ChatResponseStream,
  token: vscode.CancellationToken
) => {
  // initialize the prompt
  let prompt = BASE_PROMPT;

  if (request.command === 'exercise') {
    prompt = EXERCISES_PROMPT;
  }

  // initialize the messages array with the prompt
  const messages = [vscode.LanguageModelChatMessage.User(prompt)];

  // get all the previous participant messages
  const previousMessages = context.history.filter(
    h => h instanceof vscode.ChatResponseTurn
  );

  // add the previous messages to the messages array
  previousMessages.forEach(m => {
    let fullMessage = '';
    m.response.forEach(r => {
      const mdPart = r as vscode.ChatResponseMarkdownPart;
      fullMessage += mdPart.value.value;
    });
    messages.push(vscode.LanguageModelChatMessage.Assistant(fullMessage));
  });

  // add in the user's message
  messages.push(vscode.LanguageModelChatMessage.User(request.prompt));

  // send the request
  const chatResponse = await request.model.sendRequest(messages, {}, token);

  // stream the response
  for await (const fragment of chatResponse.text) {
    stream.markdown(fragment);
  }

  return;
};
And that's all that needs to be added! The rest of the logic to get the message history, send the request, and stream the request all stays the same.
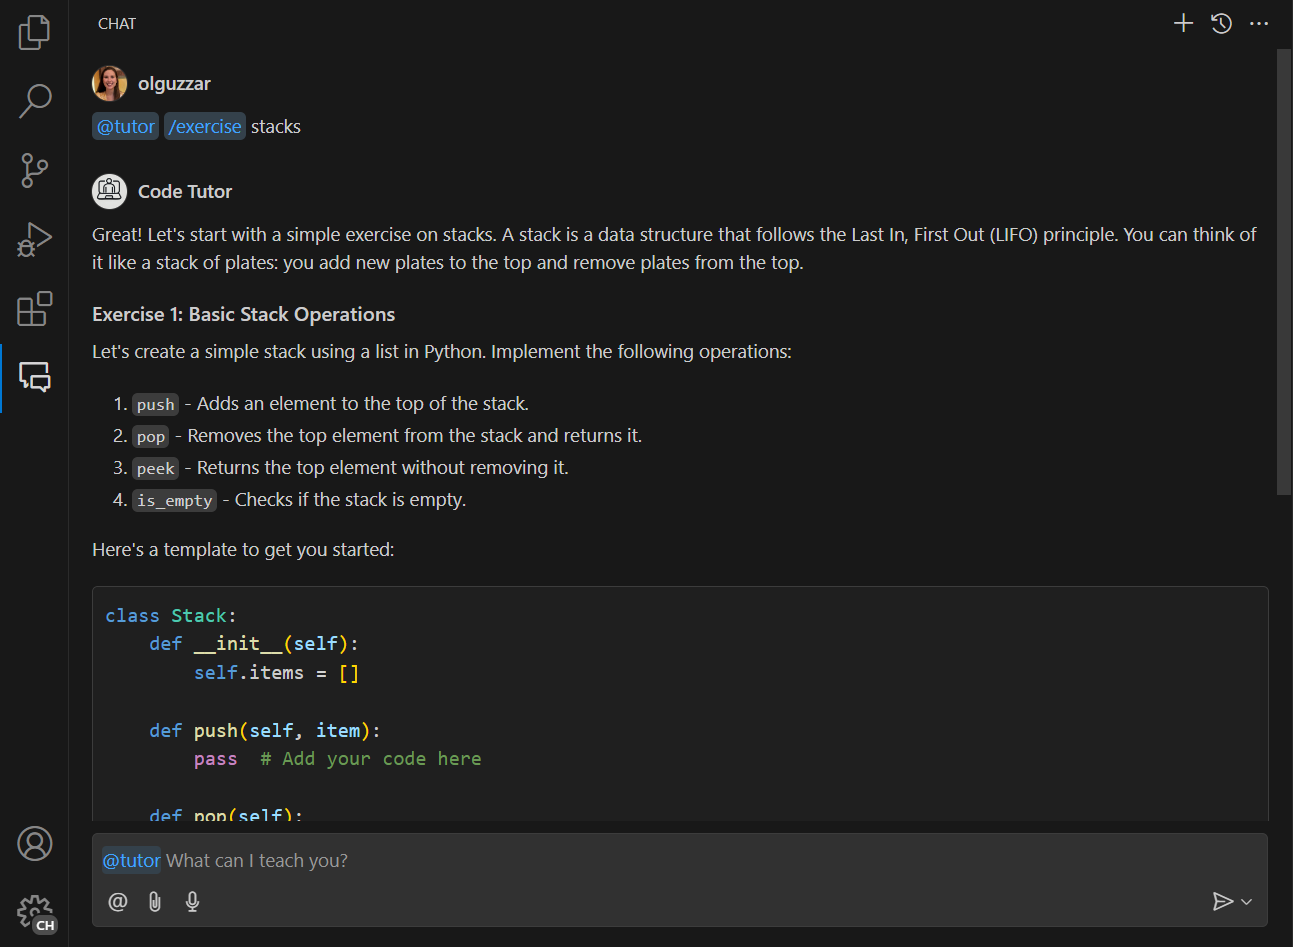
Now you can type /exercise, which will bring up your chat participant, and you can get interactive exercises to practice coding!
Next steps
Congratulations! You have successfully created a chat participant that can provide explanations and sample exercises for programming concepts. You can further extend your participant by fine-tuning the prompts, adding more slash commands, or leveraging other APIs like the Language Model API. Once ready, you can also publish your extension to the Visual Studio Code Marketplace.
You can find the complete source code for this tutorial in the vscode-extensions-sample repository.