Exploring Models with Model Catalog
When building AI applications, one of the hardest parts is not implementation, it is picking the right model. You can have strong prompts and a clean workflow, but if the model is mismatched, quality and speed both take a hit.
In this chapter, we will use Foundry Toolkit in Visual Studio Code to walk a practical selection path from recommendations to side-by-side validation.
Think of it as model selection with receipts.
Each step is useful on its own. The real magic happens when the full loop runs end to end.
What You Will Learn
This chapter is about building a repeatable model-selection process, not making one-off guesses. We will combine GitHub Copilot recommendations, Model Catalog filtering, model-card review, deployment, and Playground comparison into one loop you can reuse.
In this chapter, you will learn how to:
- Generate a shortlist: Use GitHub Copilot to produce an initial set of realistic candidates.
- Refine the catalog: Use filters to reduce model options to a relevant subset.
- Validate capabilities: Check model cards before deployment.
- Deploy selected models: Push selected candidates into your Foundry project.
- Compare behavior: Evaluate outputs side by side in Playground.
Before we run the workflow, let's be clear about why this structure matters.
Problem Framing: Model Selection Is a Risk-Reduction Process
It helps to treat model selection as risk reduction, not preference testing. You are not trying to find a universally "best" model. You are trying to find the most reliable fit for your workload, constraints, and region.
That framing changes how you evaluate results, because consistency and deployability matter just as much as output style.
Pretty output is nice. Deployable output wins.
A simple way to apply this is to score each candidate against four practical checks: capability fit, regional availability, cost profile, and behavior quality under the same prompts. When a model wins across those checks, your choice is easier to defend to both engineering and product stakeholders.
Prerequisites
Before we compare anything, let's make sure the environment is ready. This chapter depends on local tooling and cloud availability, so a quick setup check now saves annoying failures later.
If these prerequisites are in place, every step in this chapter should map cleanly to what you see in the UI.
- Visual Studio Code: Installed and updated so extension workflows and command surfaces are available.
- Foundry Toolkit extension: Installed and visible in the activity bar.
- Azure subscription and region: Selected for deployment checks and quota-aware filtering.
- Connected Foundry project: Available in Foundry Toolkit under your resources.
With setup confirmed, let's define exactly what this chapter teaches and how it maps to day-to-day model work.
You are about to replace guesswork with a repeatable loop.
Why Model Selection Matters
Model selection can get overwhelming fast when you have multiple providers, model families, sizes, and capability flags. A structured process keeps decisions grounded in evidence and prevents teams from optimizing on preference alone.
It also creates traceability, which matters when you need to explain results to stakeholders.
For example, if your scenario requires image input and deployment in Sweden Central, a model that is excellent in general but unavailable in that region is not a practical choice. This is exactly where a disciplined filter-and-validate workflow saves time.
In practice, this workflow gives you:
- Faster narrowing: Reduce large candidate sets before deep testing.
- Higher confidence: Validate capabilities and availability before committing.
- Cleaner trade-off analysis: Compare speed, style, and quality with identical prompts.
- Better production fit: Select models that align with quota, region, and deployment constraints.
Let's talk about how to run this workflow in practice.
Step 1: Start with GitHub Copilot Recommendations
It's a good idea to start with GitHub Copilot recommendations before you dive into the catalog. This is because Copilot can combine capability requirements with subscription and regional constraints while shaping recommendations.
For this step, let's ask for a shortlist of models that meet three practical criteria:
- Toolkit support: Whether models are accessible through your current Foundry flow.
- Regional deployability: Whether your target region supports the model.
- Capability fit: Whether image processing or other required features are present.
Therefore, a suitable prompt to Copilot is one that combines these three constraints into a single request like the below:
Recommend two models for a marketing scenario that require image input support and are deployable in my subscription and region.
Next, let's use this prompt:
-
Open GitHub Copilot Chat in Visual Studio Code.
-
Paste your recommendation prompt.
-
Run the prompt in chat rather than in the terminal.
Here's an example prompt you can use:
Recommend two models for a marketing scenario that require image input support and are deployable in my subscription and region.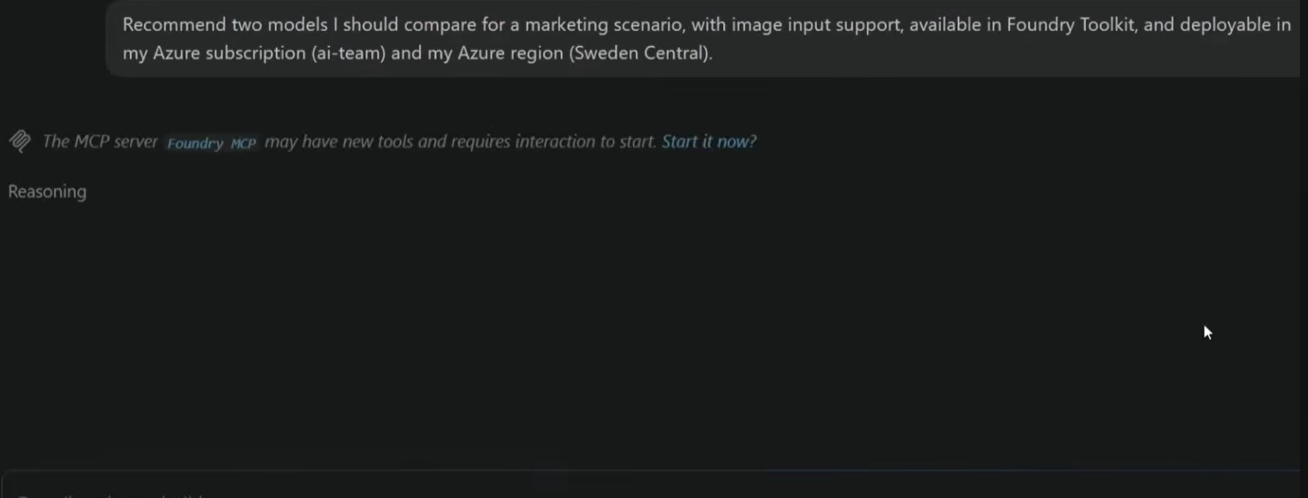
Fig 1: Example prompt asking GitHub Copilot for model recommendations.
-
Review the response and note the recommended models.
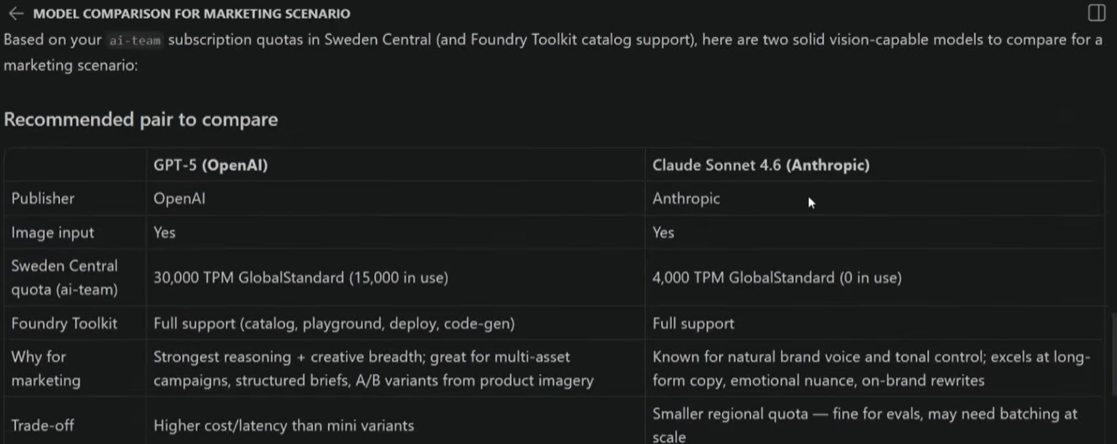
Fig 2: Example result from GitHub Copilot recommendations.
That is a much better starting line than scrolling hundreds of models cold.
Now that we have a starting point, let's move into the catalog to see how to filter and validate candidates.
Step 2: Explore the Model Catalog
Model Catalog is your central discovery surface in Foundry Toolkit. You can use it to compare models from multiple providers, check capabilities, and validate deployment constraints before you commit to a candidate.
Next, let's open the catalog and see how we can reduce the candidate set to a manageable number for deeper inspection.
- Open Foundry Toolkit.
- Go to Developer Tools.
- Select Model Catalog before reviewing any specific model.
Now you should see a list of models that includes multiple providers and hosting paths, something like the below image:
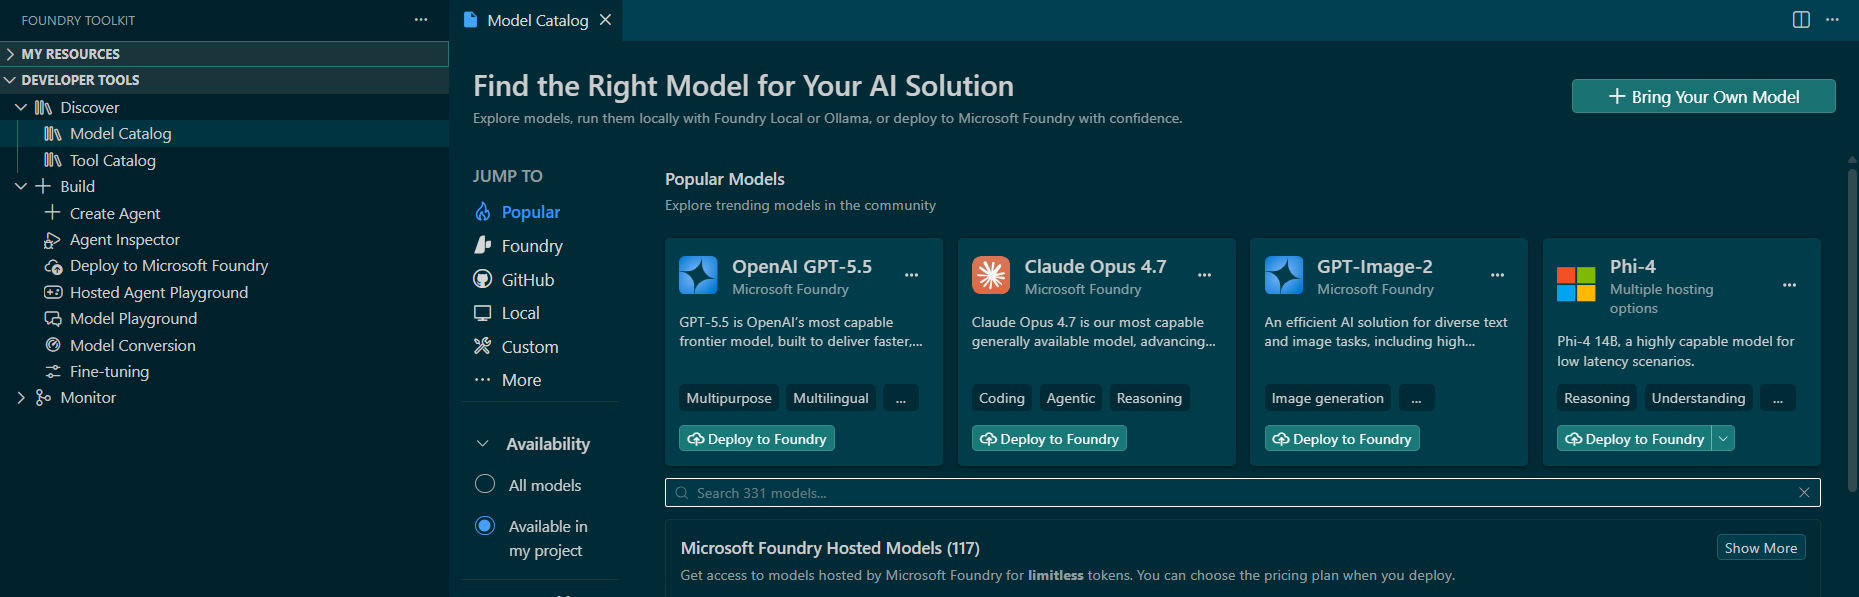
Fig 3: Model Catalog in Foundry Toolkit.
In the next step, we will apply filters to narrow this list to a manageable set of candidates.
Step 3: Use Filters to Narrow Candidates
Filtering helps us narrow down the candidate list to a manageable set of models that meet our requirements. This is especially useful when requirements include capability-specific needs such as vision input.
Here's all the filtering criteria you could apply to reduce candidates to a manageable set:
- Hosting source: Limit to the hosting path you actually plan to deploy.
- Publisher: Compare models within a provider or across providers intentionally.
- Feature support: Require capabilities such as image attachment.
- Runtime type: Include local CPU, GPU, or NPU options when relevant.
- Fine-tuning support: Keep only models that match adaptation requirements.
Next, let's go from "interesting list" to "actual candidates."
-
Open the filter panel in Model Catalog.
-
Set the filter like so:
Hosted By: Foundry Publisher: OpenAI
You should see a reduced candidate list similar to below.
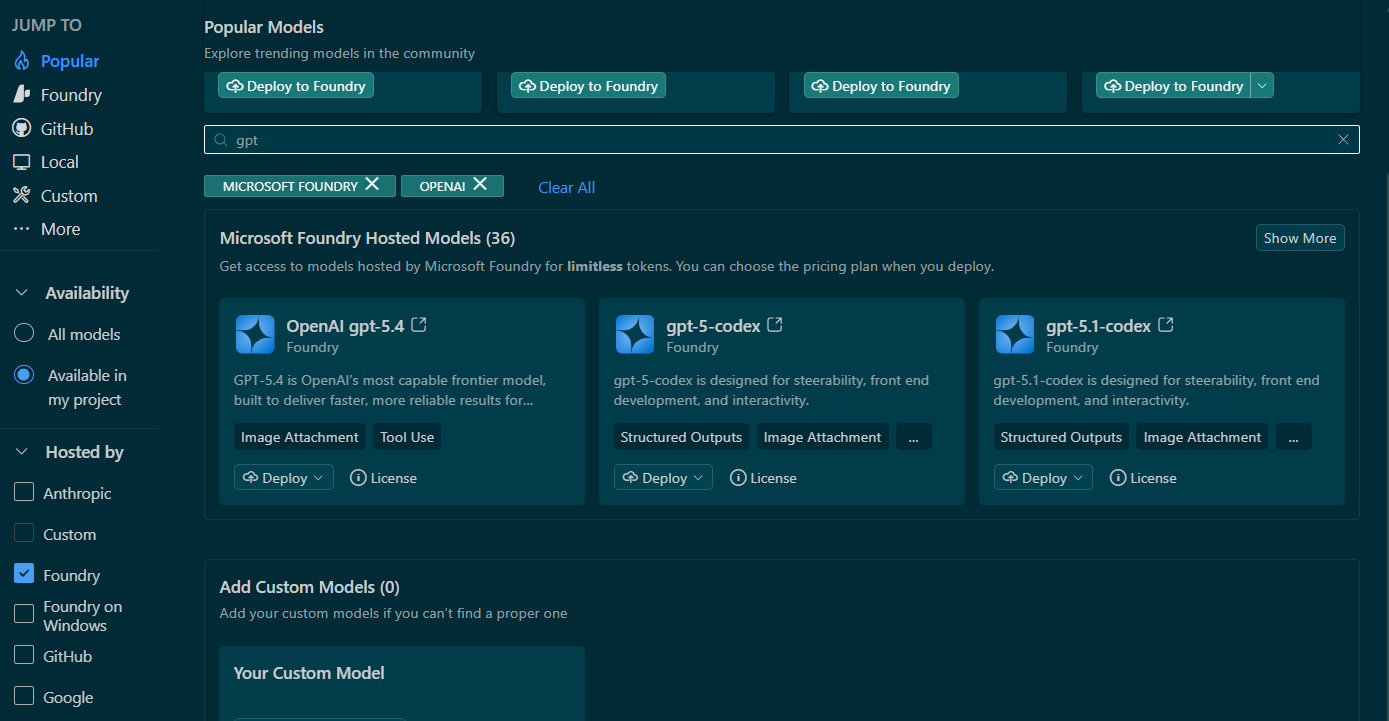
Fig 4: Model filter panel in Foundry Toolkit. Here we select Hosted By: Foundry, Publisher: OpenAI
Your candidate list drops to a manageable set you can inspect in minutes instead of scanning dozens of entries.
At that point, the next step is to review the model cards for each candidate to confirm capabilities, pricing, and constraints before deployment.
Step 4: Review the Model Card
Before deployment, open each model card and verify what the provider actually guarantees. This prevents hidden mismatch later, especially around pricing, input constraints, and capability assumptions.
Think of this as your pre-deployment check.
In practice, model-card review should answer: can this model do what we need, at acceptable cost, with the expected behavior profile?
- Capabilities: Confirm required modalities and strengths.
- Use cases: Check whether your scenario aligns with intended usage.
- Pricing: Understand expected token-cost behavior.
- Technical specs: Review limits, context details, and operational constraints.
To review a model card:
- Select one filtered model.
- Open its model card page.
- Check capabilities and pricing before moving to deployment.
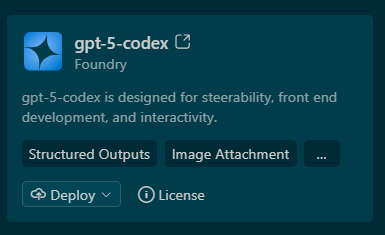
After you're satisfied with the model card review, you are ready to deploy the candidates into your Foundry project for side-by-side comparison.
Step 5: Deploy Shortlisted Models
Deployment moves model comparison from theory to hands-on testing. In this step, two OpenAI candidates are deployed into the same Foundry project so they can be evaluated under identical prompts.
Great, let's kick off a deployment.
- Choose Deploy from the model card.
- Select your connected Foundry project as the deployment target.
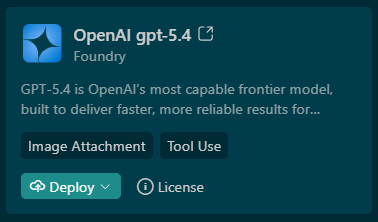
This should kick off a deployment process that takes a few minutes. Once complete, you will see the deployed model in your Foundry project.
For our next step, we will compare the two deployed models side by side in Playground to evaluate their behavior under identical prompts.
Step 6: Compare Models in Playground
An important step in model selection is to compare outputs under identical prompts. This ensures that differences in output are due to model behavior, not prompt drift.
This comparison uses two prompt types to surface different strengths: a marketing-text prompt and a vision extraction prompt.
Here are the two prompts we will use for comparison:
Text prompt:
Generate a short LinkedIn post for developer productivity with AI tools.
Vision prompt:
Extract text from an attached image.
Next, we will use Playground's Compare mode to evaluate the two deployed models side by side.
To do this comparison, follow the steps below:
- Open Playground.
- Enable Compare mode.
- Assign one deployed model to each response pane.
When you inspect outputs, evaluate a consistent set of dimensions:
- Latency: Which model returns usable output faster?
- Style: How different are tone, fluency, and structure?
- Verbosity: Is the response concise or overly expansive for the task?
- Scenario fit: Which output is closer to what the business actually needs?
After choosing a candidate, one important step remains: prompt and parameter refinement.
Step 7: Refine Behavior with Prompt and Parameters
Model choice is only part of quality. You still need to shape output behavior with system instructions and generation controls.
This step aligns responses with voice, audience, and channel constraints before you move deeper into agent workflows.
A typical refinement pass adds a system prompt and tunes generation controls in small increments, then re-tests with the same scenario prompts.
- System prompt: Set role, tone, and output boundaries.
- Max response tokens: Control response length.
- Temperature: Tune creativity versus determinism.
- Top-p: Adjust token sampling behavior.
Here's a simple refinement loop you can use to tune behavior:
- Add a system prompt in Playground.
- Tune one generation setting at a time.
- Evaluate each change before adjusting the next setting.
Quick Question
If two models produce similarly good text but one is unavailable in your target region, which one is the better production choice and why?
Answer
The better production choice is the model that can be deployed in your target region with acceptable behavior and cost. A slightly better output that cannot be deployed where you need it creates delivery risk you cannot hide later. Production fit always includes availability, not just raw output quality.
What's Next
You are now ready to move from model selection into agent development. In the next chapter, we will use this model-evaluation foundation to build agents that ask better questions, use tools effectively, and produce outputs that are easier to evaluate and ship.
You now have signal, not vibes, driving the model decision.
Learn more
If you want to reinforce this chapter, the best next step is to review the same workflow from three angles: this written guide, product guidance, and deployment details. This combination helps you move from understanding concepts to applying them in real projects. Use the links below in order, and you will see the same recommendation-to-comparison flow from both tutorial and reference perspectives.
- GitHub Copilot in Visual Studio Code: Review Copilot capabilities and workflows in Visual Studio Code docs.
- Optional companion video: Watch the full video for this chapter.
- Model Catalog overview: Review the official Model Catalog documentation.
- Foundry SDK development guide: Explore SDK-based development guidance for Azure AI Foundry.
- Model deployment reference: See how to deploy OpenAI models in Azure AI Foundry.
- Next-step agent quickstart: Continue into Azure AI Agents quickstart.