Using tools with agents
Tools are how agents act on your request. They search your workspace, read files, edit code, run terminal commands, fetch web content, and call external services. In this guide, you will start with a small task, choose only the tools the task needs, and decide when to use a tool set, approvals, or sandboxing.
Prerequisites
Before you start, install VS Code, enable AI features, and sign in to GitHub Copilot. You also need access to any extra tools you want to try, such as MCP servers or extensions that contribute tools.
Start with a task
Imagine you want the agent to explain how authentication works in a repository and then suggest one small test to add. That task needs repository context, but it probably does not need terminal access, web access, or external services at the start.
Use this prompt in an agent session:
Explain the authentication flow in this project. Find the main files involved, then suggest one focused test I should add next.
Before you send it, decide which tools the agent should have. VS Code supports three kinds of tools:
- Built-in tools, such as read, edit, search, execute, and web.
- MCP tools from installed Model Context Protocol servers.
- Extension tools contributed by VS Code extensions.
The agent selects from the enabled tools based on your prompt and context. Your job is to give it enough capability to finish the task without giving it a noisy list of unrelated options.
Choose tools for the first pass
-
Open the Chat view.
-
Select Agent from the agent picker.
-
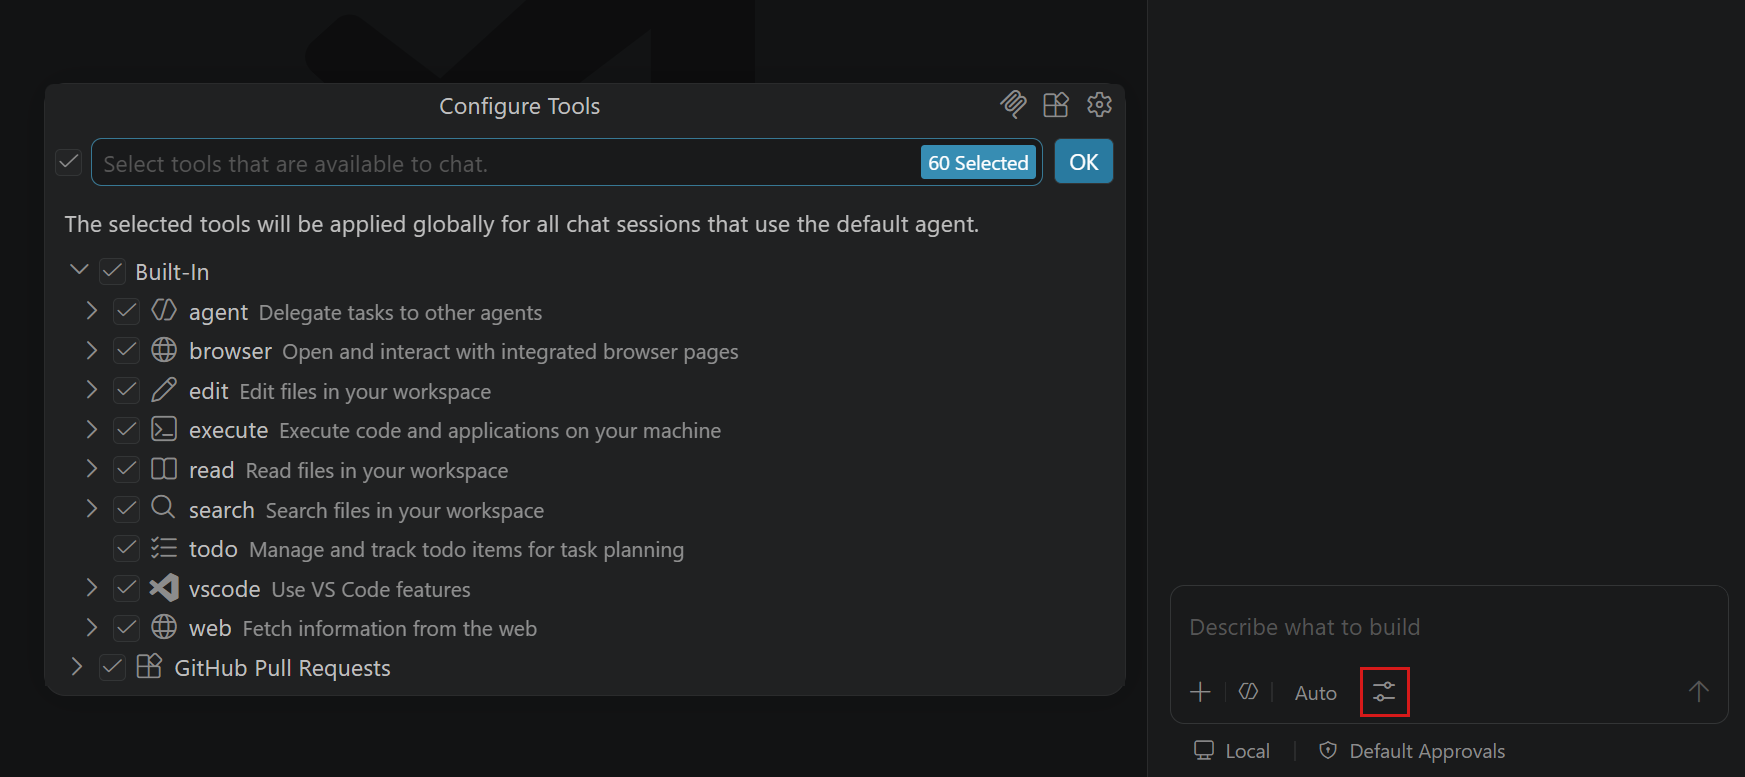
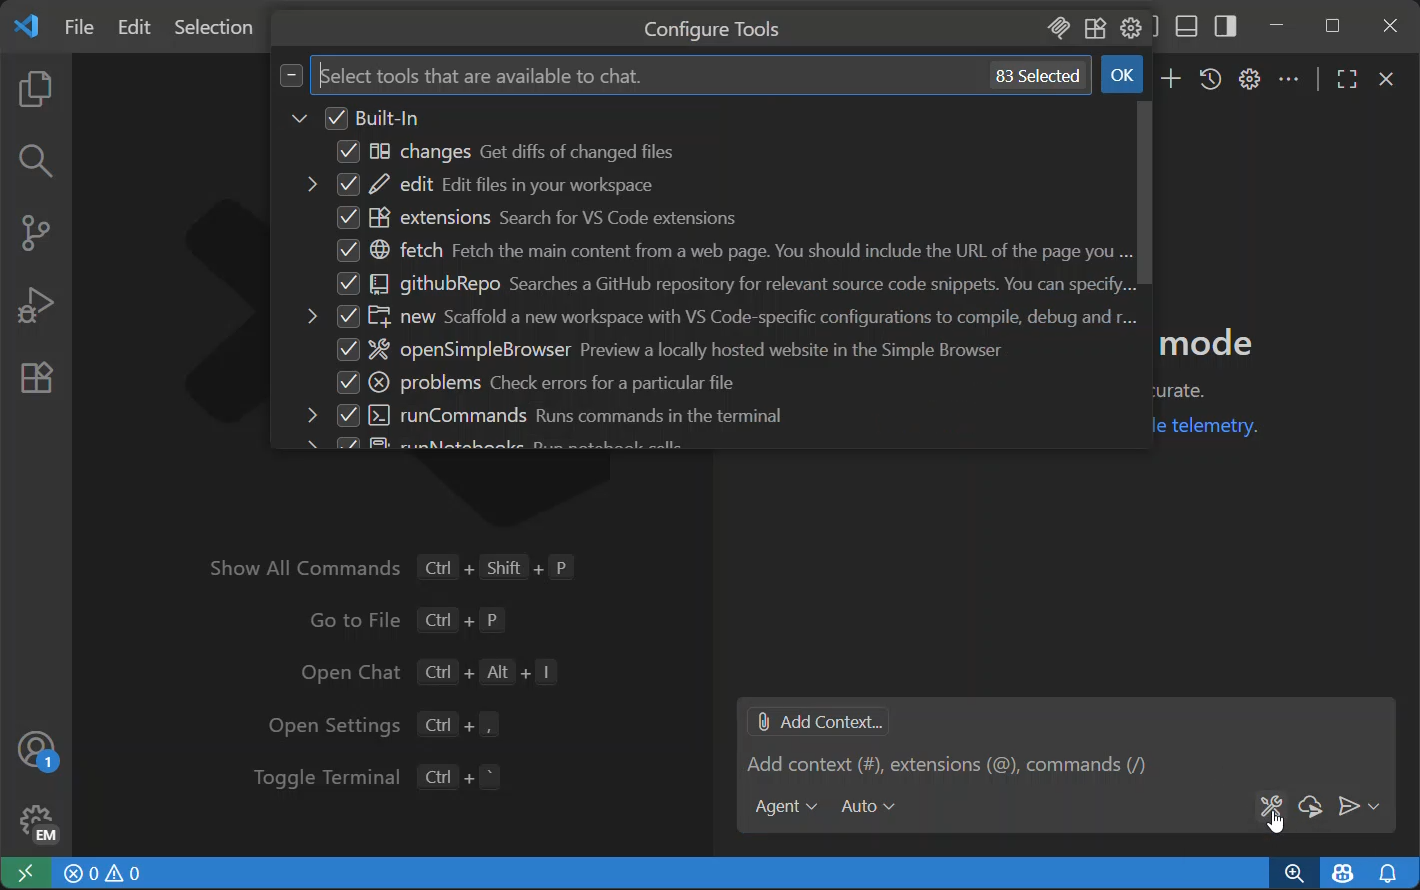
Select Configure Tools in the chat input.
-
Keep repository search and file-reading tools enabled.
-
Leave terminal, web, and external service tools off for this first pass.
-
Send the prompt.
Starting small helps the agent stay focused. It also reduces tool definitions in the model context window. VS Code can expose some groups as virtual tools to keep tool counts manageable, but a smaller active set still makes the task easier for the model to reason about.
If the agent says it needs to run tests or inspect generated output, add the terminal tool for the next request instead of restarting with every tool enabled.
Add a specific tool when needed
Sometimes you know exactly which tool should ground the answer. Type # in the chat input to see available tools, context sources, and tool sets.
For example, revise the previous prompt like this:
Explain the authentication flow in this project. Focus on repository context. #codebase
Use explicit tool references when the task has a clear source of truth:
- Use
#codebasewhen the answer should come from your repository. - Use
#problemswhen you want the agent to fix current diagnostics. - Use
#webwhen the answer needs current external documentation.
Decide between individual tools and tool sets
Individual tools work well for one-off requests. Tool sets work better when you repeat the same setup.
| Use | Good fit | Example |
|---|---|---|
| Individual tools | A short task with one clear source of context. | Explain a file with #codebase and no terminal access. |
| Tool set | A repeated workflow that needs the same group of tools. | A Python maintenance workflow with search, edit, testing, and Python language tools. |
| Custom agent tools | A role that should always run with the same boundaries. | A planning agent with search and web tools, but no edit or terminal tools. |
Create a tool set for repeat work
In this step, create a reusable tool set for repository cleanup work.
-
Open the Command Palette.
-
Run Chat: Configure Tool Sets and select Create new tool sets file.
-
In the
.jsoncfile that opens, add the tools you use for the cleanup workflow, such as search, edit, and test tools, plus adescriptionandicon. -
Save the file.
-
Return to Chat and select the tool set from Configure Tools, or reference it in a prompt by typing
#followed by the tool set name.
Now try a prompt that uses the saved setup:
Find one small cleanup opportunity in this repository, make the change, and run the focused validation for it.
Tool sets solve the problem of repeatedly rebuilding the same tool selection. They also make reviews easier because the saved file shows which tools are expected for a workflow.
Limit tools for a custom agent
When you build a custom agent, you can list the tools and tool sets it has access to in the tools field of the agent's Markdown frontmatter:
---
description: Python testing helper
tools: ['search', 'edit', 'pylance', 'runTests']
---
You can also edit the tools field directly, or open the tools picker with the Configure Tools button in the Chat view and let VS Code update the agent's list for you.
Use a custom agent when the tool boundary is part of the role. For example, a planning agent should not edit files by accident, so give it search and web tools but leave out edit and terminal tools. An implementation agent needs a broader set because its job is to modify code and validate the change.
Pick a permission level
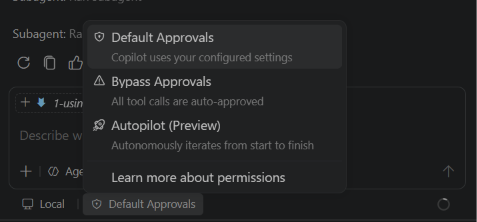
Next, decide how much review you want before tools run. The permissions picker controls how much autonomy the agent has during a session.
- Default Approvals asks before sensitive actions.
- Bypass Approvals auto-approves tool calls.
- Autopilot (Preview) auto-approves tool calls and continues working until the task is done.
Use the mode that matches the risk of the task:
- Use Default Approvals while exploring unfamiliar code or when the agent can run commands you want to review.
- Use Bypass Approvals for routine workflows in a trusted workspace after you know which tools will run.
- Use Autopilot for contained tasks where the agent can keep iterating until it reaches a result you can review.
You can keep your preferred mode across sessions with chat.permissions.default . Autopilot is available when chat.autopilot.enabled is on.
Higher autonomy levels reduce the amount of review you do before tools run. Use them with care, especially when the agent can edit files or run terminal commands.
Add sandboxing for terminal work
Agent sandboxing adds OS-level isolation for terminal commands run by the agent. It limits file system and network access, and sandboxed commands are auto-approved because they already run in a controlled environment.
Enable it with chat.agent.sandbox.enabled This setting is managed at the organization level. Contact your administrator to change it.. On macOS and Linux, you can choose full isolation or file system isolation with network access.
Sandboxing is a good fit when the agent needs terminal access but should not reach beyond the workspace or approved domains. For example, use sandboxing before asking the agent to run a generated script, start a local tool, or inspect a project with unfamiliar package scripts.
Your turn
Try the same repository task three ways:
-
Run it with only repository search and file-reading tools.
-
Add the terminal tool and ask the agent to run one focused validation.
-
Save the tool selection as a tool set and reuse it in a new chat.
After each run, compare what changed. Notice whether the agent stayed focused, asked for missing permissions, or used tools you did not expect.
Why this matters
The right tool mix keeps agents focused. Tool sets make good workflows repeatable. Custom agents make tool boundaries part of a role. Approvals and sandboxing help you stay in control when the agent can make changes or reach outside the workspace.
What's next
Now that you know how to use tools, the next course shows how MCP servers add external data and actions to an agent session.