Remote SSH with Visual Studio Code
July 25, 2019 by Sana Ajani, @sana_ajani
Remote - SSH: Easy, smooth, and (like) local
In case you missed it, Visual Studio Code recently released the Remote Development extensions. The Remote extensions allow you to develop against a container, a remote machine or virtual machine (VM), or the Windows Subsystem for Linux (WSL), while using VS Code with its full feature set as your development environment.
Limitless: You are not bound to your local machine
More and more developers work on large and complex projects that require them to work against specialized developer VMs or servers that offer more storage or compute power than a normal laptop.
However, this kind of development comes with its fair share of challenges:
- If you're using remote access software (like VNC), you'll likely experience a lag when editing because your UI is no longer local.
- If you're using the Remote Desktop Protocol (RDP), it can be hard to manage multiple connections.
- Mounting the remote file system and executing bulk operations can be slow.
- It's annoying to keep your remote and local environments in sync and you often hit problems where things work in one place, but not the other.
- Remotely editing files using SSH and Vim means you're no longer in the comfort of your go-to coding editor.
Wouldn't it be great to break out of the physical limitation of your local machine without giving up your tools. Now comes the magic of the Remote - SSH extension.
Remote Development with Linux
As long as your Linux VM supports SSH, it can be hosted anywhere; on your local host, on premise, in Azure, or in any other cloud. You can also be on any client - Windows, macOS, or Linux.
Note: macOS and Windows SSH hosts are not yet supported.
In this blog post, we'll use a Windows client and target a Linux VM on Azure.
Get started
To get started, you need to have done the following:
- Install an OpenSSH compatible SSH client (PuTTY is not supported).
- Install Visual Studio Code.
- Have an Azure subscription (If you don't have an Azure subscription, create a free account before you begin).
Create a VM
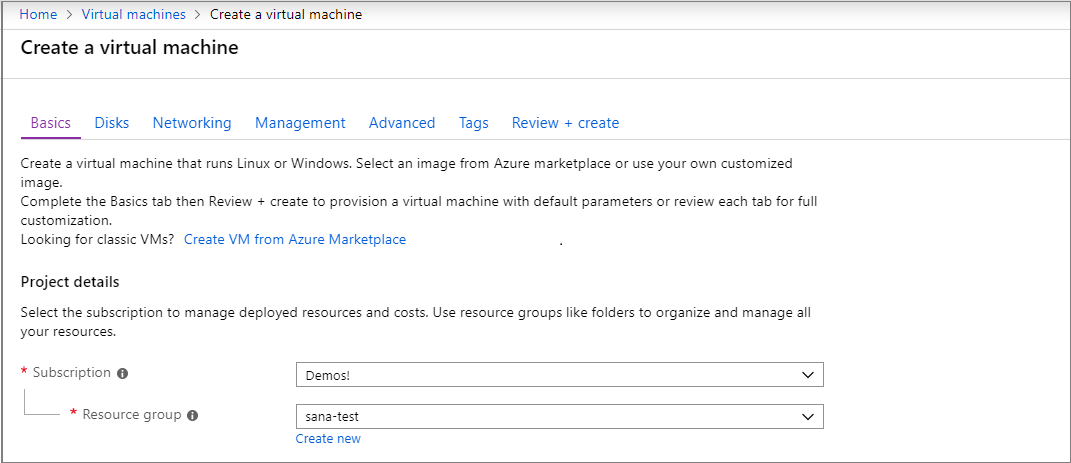
If you don't have an existing Linux virtual machine, you can create a new VM through the Azure portal. In the Azure portal, search for "Virtual Machines", and choose Add. From there, you can select your Azure subscription and create a new resource group, if you don't already have one.
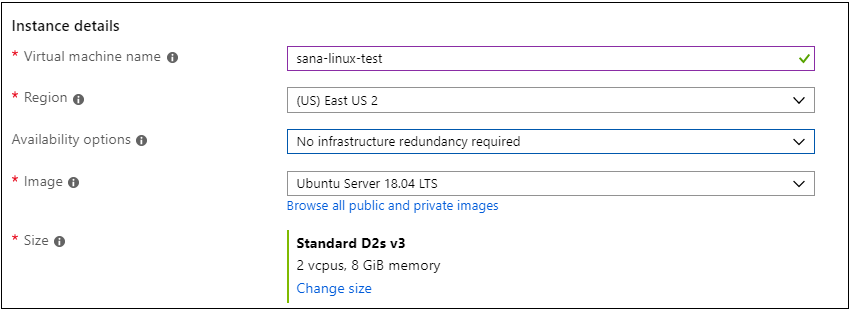
Now you can specify details of your VM, such as the name, the size of, and the base image. We will choose Ubuntu Server 18.04 LTS for this example, but you can choose recent versions of other Linux distros and look at our supported SSH servers.
Set up SSH
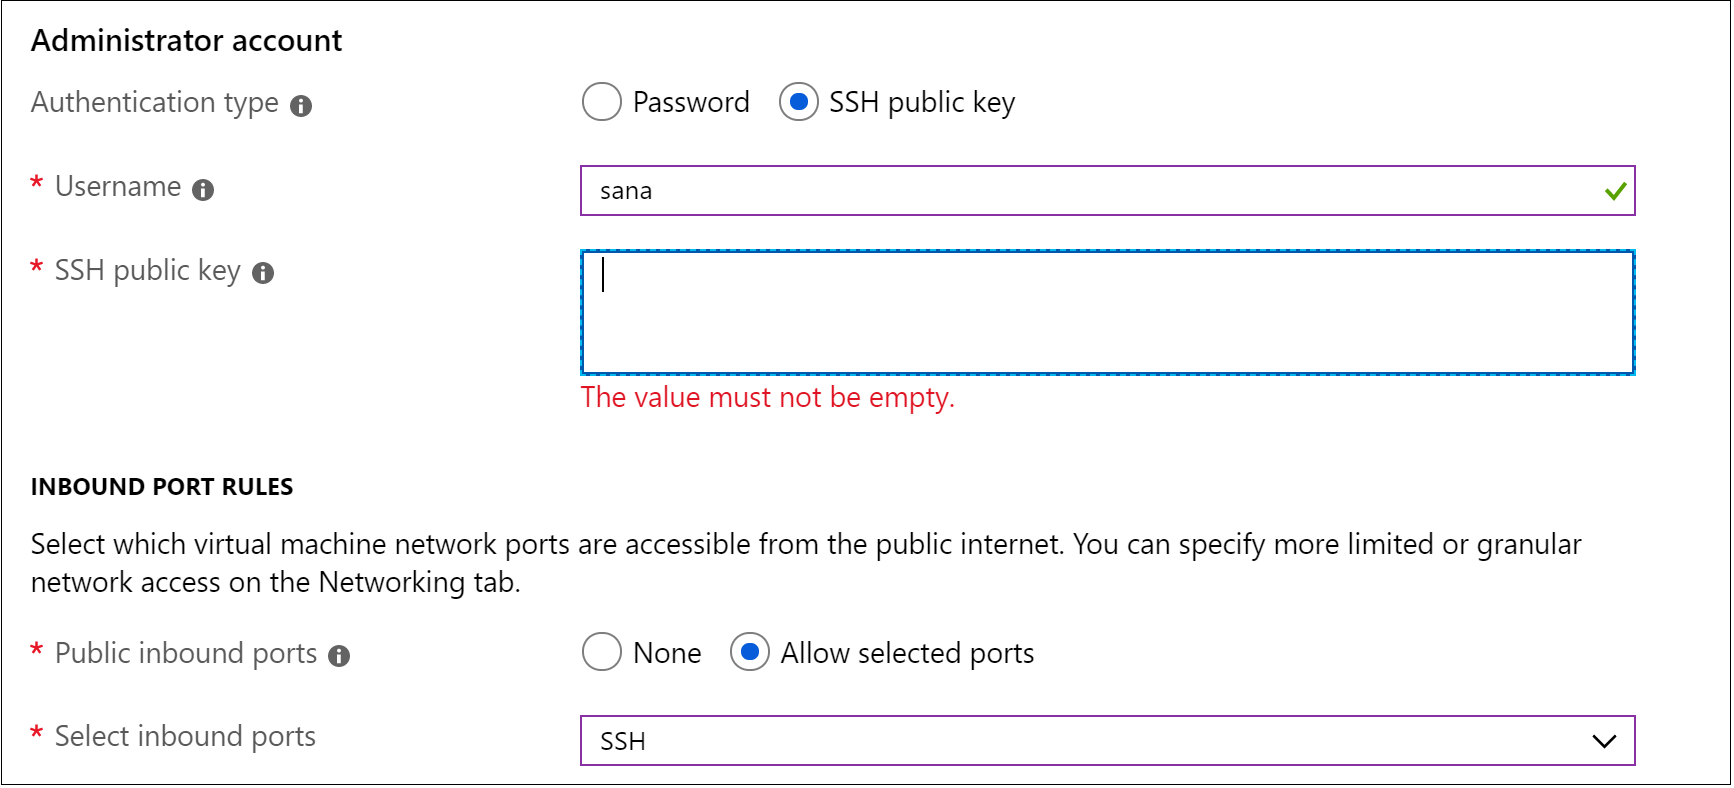
There are several authentication methods into a VM, including an SSH public/private key pair or a username and password. We strongly recommend using key-based authentication so you do not need to enter your password each time you connect. If you're on Windows and have already created keys using PuttyGen, you can reuse them.
If you don't have an SSH key pair, open a bash shell or the command line and type in:
ssh-keygen -t ed25519
This will generate the SSH key. Press Enter at the following prompt to save the key in the default location.

You will then be prompted to enter a secure passphrase but you can leave that blank.
Add SSH keys to your VM
In the previous step, we generated an SSH key pair. We'll take the public key and paste it into our VM setup, by copying the contents of the id_ed25519.pub. You also want to allow your VM to accept inbound SSH traffic.
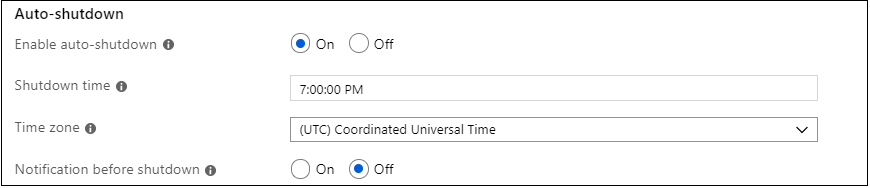
A cool feature of using Azure VMs is the ability to enable auto-shutdown (because let's face it, we all forget to turn off our VMs…). If you go to the Management tab, you can set the time you want to shut down the VM daily.
Select Review and Create and Azure will deploy your VM for you!
Connect using Remote - SSH
Now that we've covered how to create an SSH host, let's connect to it!
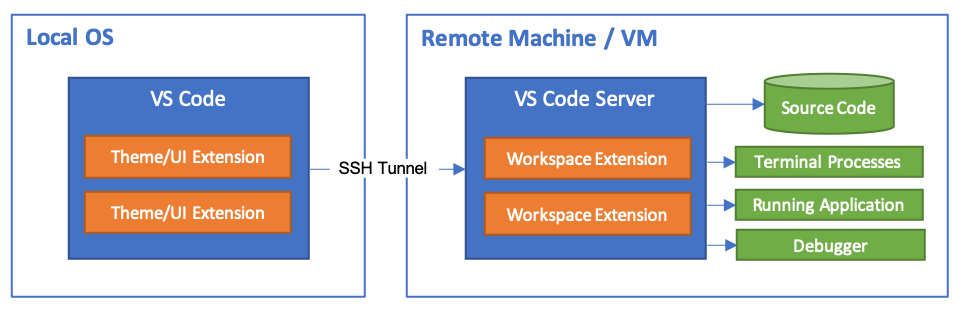
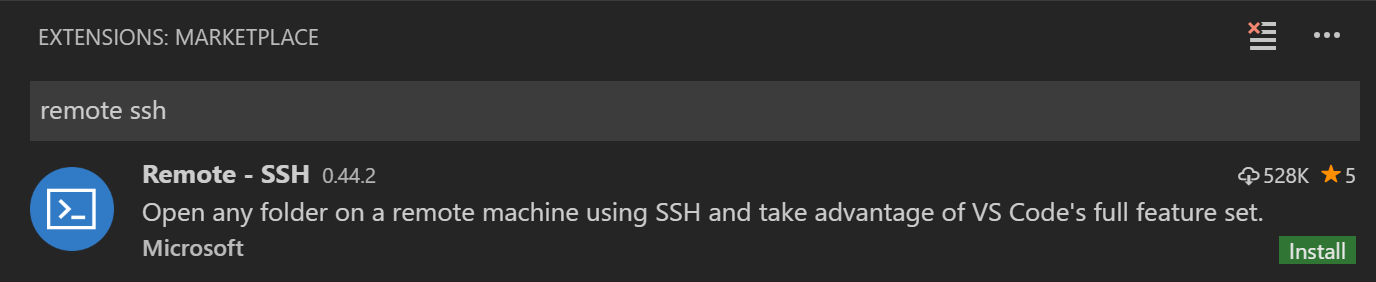
The VS Code Remote - SSH extension allows you to connect to a remote machine or VM using SSH, all from inside VS Code. If you don't already have the Remote - SSH extension installed, you can search for "remote ssh" in the Extensions view (Ctrl + Shift + X).
You'll have noticed an indicator on the bottom-left corner of the Status bar. This indicator tells you in which context VS Code is running (local or remote). Click on the indicator to bring up a list of Remote extension commands.
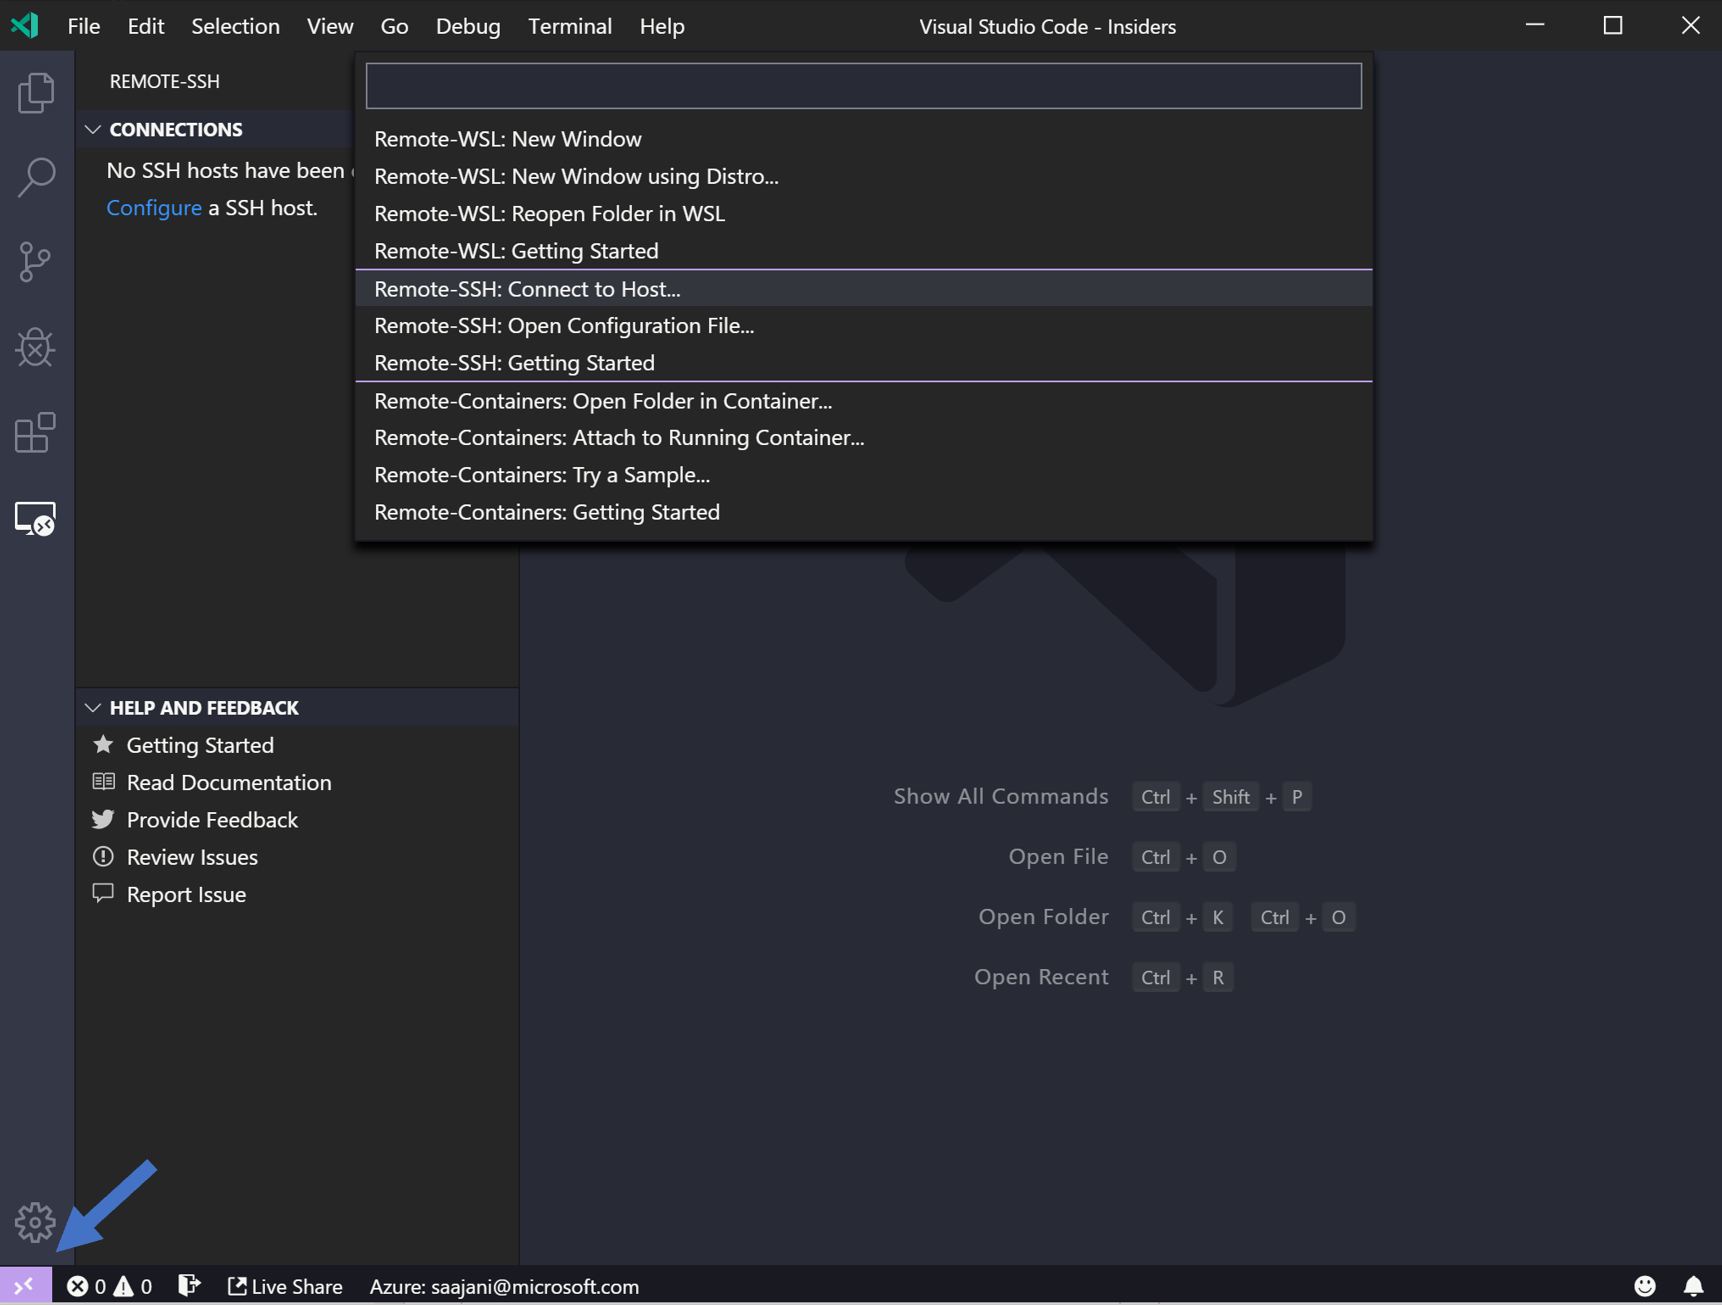
Choose the Remote-SSH: Connect to Host command and connect to the host by entering connection information for your VM in the following format: user@hostname.
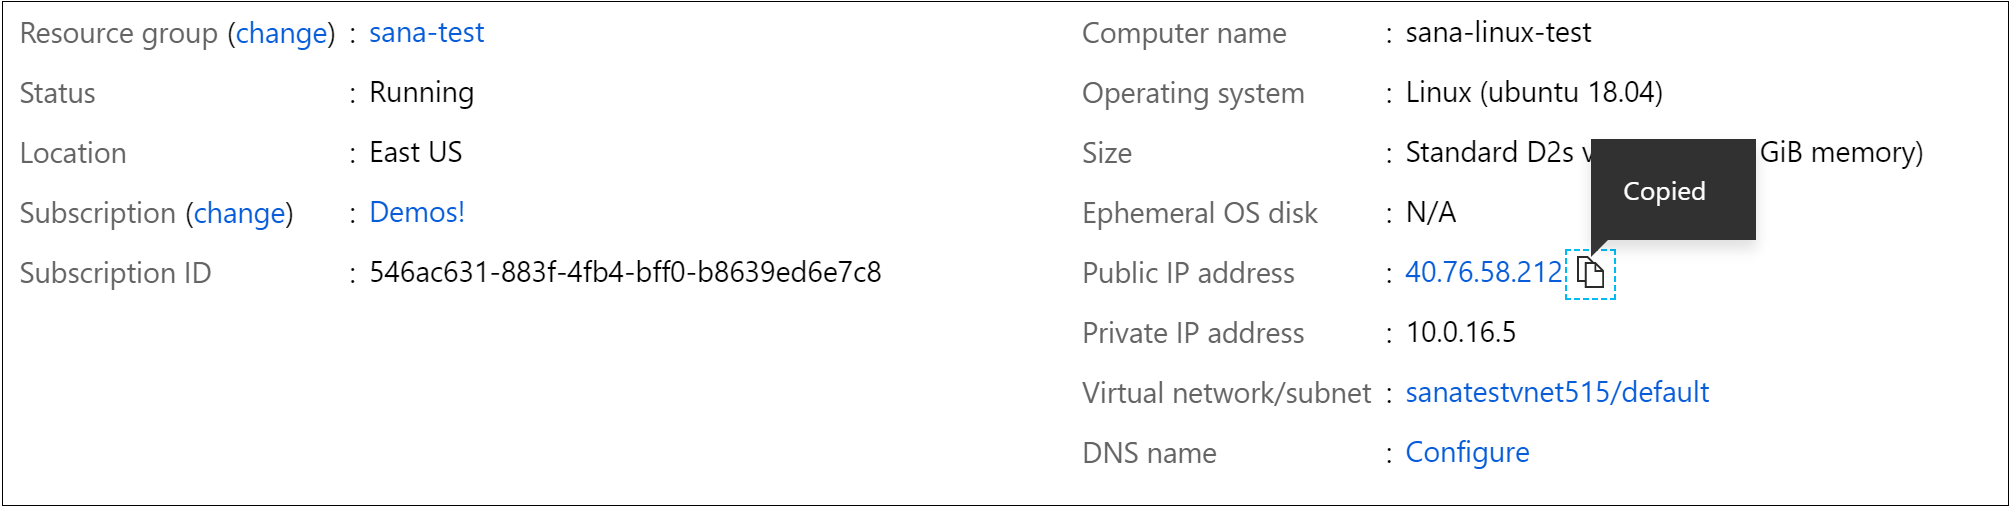
The user is the username you set when adding the SSH public key to your VM. For the hostname, go back to the Azure portal and in the Overview pane of the VM we created, copy the Public IP address.
Set the user and hostname in the connection information text box.

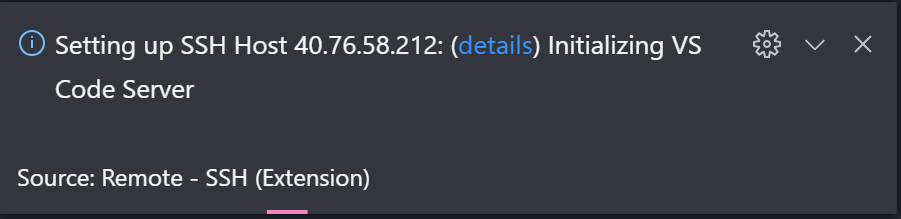
VS Code will now open a new window (instance). You'll then see a notification that the "VS Code Server" is initializing on the SSH Host. Once the VS Code Server is installed on the remote host, it can run extensions and talk to your local instance of VS Code.
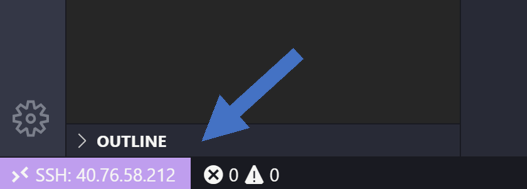
You'll know you're connected to your VM by looking at the indicator in the Status bar. Now it shows the hostname of our VM!
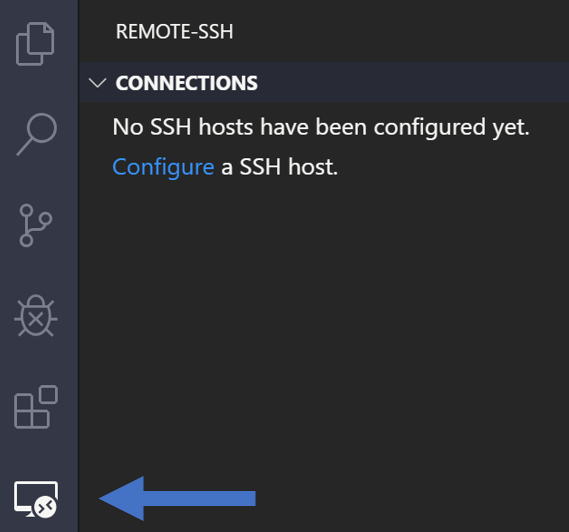
The Remote - SSH extension also contributes a new icon on your Activity bar, and clicking on it will open the SSH explorer. Here you can configure your SSH connections. For instance, you can save the hosts you connect to the most and access them from here instead of entering the user and hostname.
Once you're connected to your SSH host, you can interact with files and open folders on the remote machine. If you open the integrated terminal, you'll see you're working inside a bash shell while you're on Windows. Hold up, we're already connected to our VM? That was way too easy. That's the point. These extensions make remote development feel easy, smooth, and… well, not remote. 😃

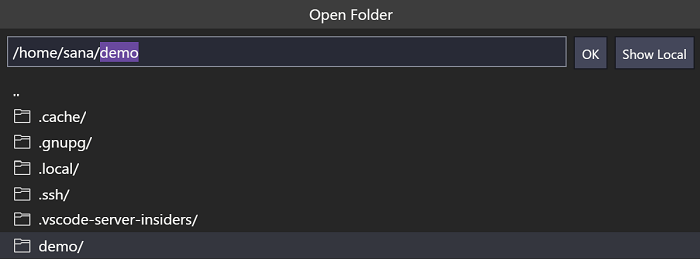
You can use the bash shell to browse the file system on the VM. Create a new folder "demo" with mkdir demo, and you can browse and open folders on the remote home directory with File > Open Folder.
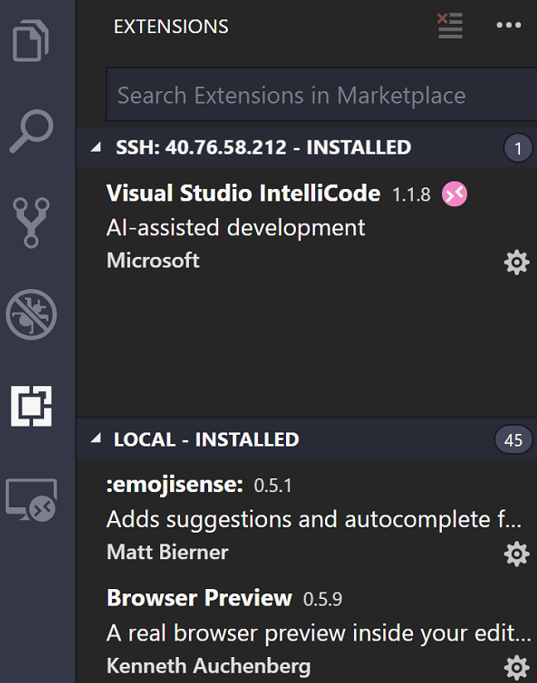
You can also install extensions specifically on the remote SSH host. Extensions that affect the UI, like themes and snippets, are installed locally and the remaining extensions will need to be installed on the remote SSH host. You'll notice there's two sections when you open the Extensions view, one for extensions on your local machine and one for extensions on your remote host. Even if you SSH into your remote machine from different clients, your remote extensions and setup will remain the same. When you go to install an extension, VS Code will automatically install it in the correct context.
Hello World
Let's deploy a basic "Hello World" Python app to our VM. We'll be using a popular Python web framework called Flask. In your bash shell, run the following command.
sudo apt install python3-flask
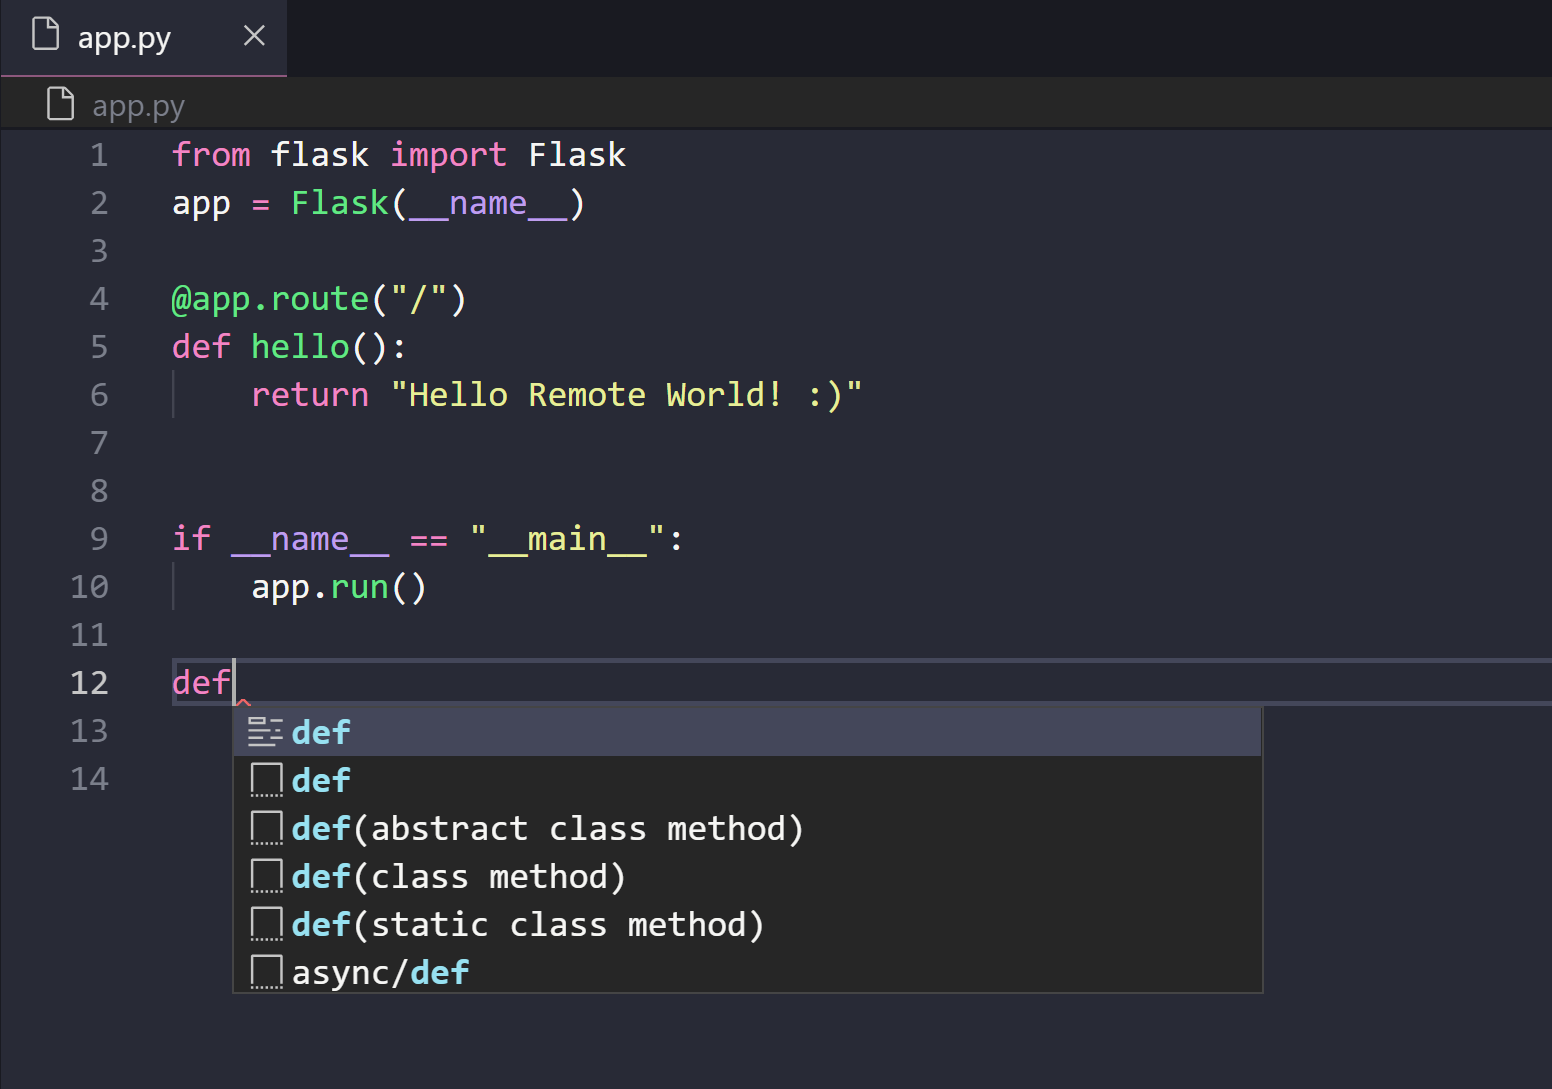
In the "Demo" folder you made earlier, create a new file (Ctrl + N) named app.py with a basic Hello world Flask application.
from flask import Flask
app = Flask(__name__)

@app.route("/")
def hello():
    return "Hello Remote World! :)"

if __name__ == "__main__":
    app.run()
Once VS Code identifies the file language as Python, you'll see a notification recommending the Microsoft Python extension if it is not already installed on the remote machine.

Select Install, reload VS Code, and you'll start seeing VS Code's IntelliSense and colorizations on our remote machine.
To run the app, press F5, and select the Flask debug configuration. In the Python Debug Console, you'll see that the app is running on localhost at port 5000. However, localhost currently refers to the remote server, not your local machine. To be able to browse to the web app on your local machine, we're going to leverage another feature called Port Forwarding.
To be able to access a port on the remote machine that may not be publicly exposed, we need to establish a connection or a tunnel between a port on our local machine and the server. With the app still running, open the SSH Explorer and find the Forwarded Ports view. Click on the Forward a port link and indicate that we want to forward port 5000:

Name the connection "browser":

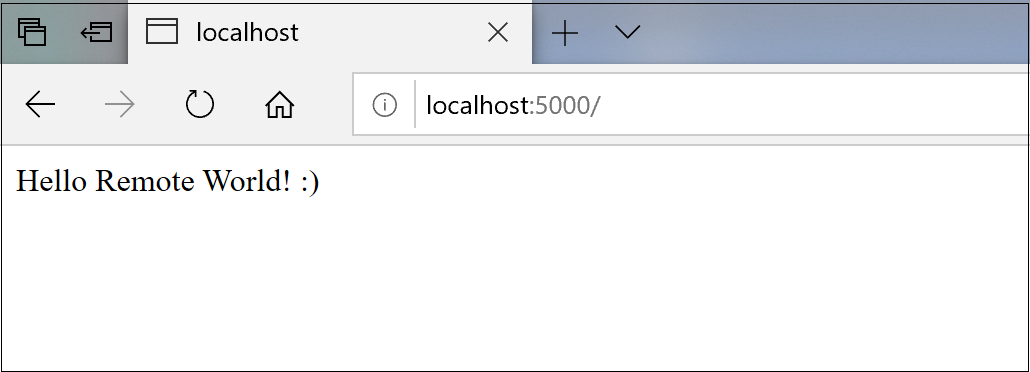
The server will now forward traffic on port 5000 to our local machine. When you browse to http://localhost:5000, you see the running web app.
Now, the real question is…can we debug from VS Code on our remote machine? YES! With the app still running, put a breakpoint on the line that returns the string "Hello Remote World" and select the restart button in the debugging control. Refresh the page in your browser and you'll hit the breakpoint! You're getting the same VS Code experience, with editing, debugging, and all your settings and extensions. 😊

To switch back to your local machine for local development, you close the remote connection with File > Close Remote Connection.
Using the Remote - SSH extension, you can work against a VM with all of VS Code's productivity features and extensions on your remote machine. You get the full-fledged development experience you know and love in VS Code, no matter where your code is hosted.
If you want to learn more about VS Code Remote, you can read our blog post announcing remote development. You can also try out the other remote extensions, Dev Containers and WSL, and read our full remote development documentation.
Happy Remote Coding,
Sana Ajani, VS Code Program Manager @sana_ajani