Using WebAssembly for Extension Development - Part Two
June 7, 2024 by Dirk Bäumer
In the previous blog post about using WebAssembly for Extension Development, we demonstrated how the component model can be used to integrate WebAssembly code into your Visual Studio Code extension. In this blog post, we focus on two additional independent use cases: (a) running the WebAssembly code in a worker to avoid blocking the extension host's main thread, and (b) creating a language server using a language that compiles to WebAssembly.
To run the examples in this blog post, you need the following tools: VS Code, Node.js, the Rust compiler toolchain, wasm-tools, and wit-bindgen.
Executing WebAssembly code in a worker
The examples in the previous blog post ran the WebAssembly code in the VS Code extension host main thread. This is fine as long as the execution time is short. However, long-running operations should be executed in a worker to ensure that the extension host main thread remains available for other extensions.
The VS Code component model provides a meta model that makes this easier by enabling us to automatically generate the necessary glue code on both the worker and extension main side.
The following code snippet shows the necessary code for the worker. The example assumes that the code is stored in a file named worker.ts:
import { Connection, RAL } from '@vscode/wasm-component-model';
import { calculator } from './calculator';

async function main(): Promise<void> {
  const connection = await Connection.createWorker(calculator._);
  connection.listen();
}

main().catch(RAL().console.error);
The code creates a connection to communicate with the extension host main worker and initializes the connection with the calculator world generated by the wit2ts tool.
On the extension side we load the WebAssembly module and bind it to the calculator world as well. The corresponding calls to perform the calculations need to be awaited since the execution happens asynchronously in the worker (for example, await api.calc(...)).
// The channel for printing the result.
const channel = vscode.window.createOutputChannel('Calculator');
context.subscriptions.push(channel);

// The channel for printing the log.
const log = vscode.window.createOutputChannel('Calculator - Log', { log: true });
context.subscriptions.push(log);

// The implementation of the log function that is called from WASM
const service: calculator.Imports.Promisified = {
  log: async (msg: string): Promise<void> => {
    // Wait 100ms to slow things down :-)
    await new Promise(resolve => setTimeout(resolve, 100));
    log.info(msg);
  }
};

// Load the WASM model
const filename = vscode.Uri.joinPath(
  context.extensionUri,
  'target',
  'wasm32-unknown-unknown',
  'debug',
  'calculator.wasm'
);
const bits = await vscode.workspace.fs.readFile(filename);
const module = await WebAssembly.compile(bits);

// Create the worker
const worker = new Worker(
  vscode.Uri.joinPath(context.extensionUri, './out/worker.js').fsPath
);
// Bind the world to the worker
const api = await calculator._.bind(service, module, worker);

vscode.commands.registerCommand(
  'vscode-samples.wasm-component-model-async.run',
  async () => {
    channel.show();
    channel.appendLine('Running calculator example');
    const add = Types.Operation.Add({ left: 1, right: 2 });
    channel.appendLine(`Add ${await api.calc(add)}`);
    const sub = Types.Operation.Sub({ left: 10, right: 8 });
    channel.appendLine(`Sub ${await api.calc(sub)}`);
    const mul = Types.Operation.Mul({ left: 3, right: 7 });
    channel.appendLine(`Mul ${await api.calc(mul)}`);
    const div = Types.Operation.Div({ left: 10, right: 2 });
    channel.appendLine(`Div ${await api.calc(div)}`);
  }
);
There are a couple of important things to note:
- The WIT file used in this example is no different from the one used for the calculator example in the previous blog post.
- Since the execution of the WebAssembly code happens in a worker, the implementation of imported services (for example, the
logfunction above) can return aPromise, but it doesn't have to. - WebAssembly currently only supports a synchronous execution model. As a result, every call from the worker that executes the WebAssembly code to the extension host main thread to call imported services requires the following steps:
- Post a message to the extension host main thread describing the service to be called (for example, call the
logfunction). - Suspend the worker execution using
Atomics.wait. - Process the message in the extension host main thread.
- Resume the worker and notify it about the result using
Atomics.notify.
- Post a message to the extension host main thread describing the service to be called (for example, call the
This synchronization adds measurable time overhead. Although all these steps are handled transparently by the component model, developers should be aware of them and consider this when designing the imported API surface.
You can find the full source code for this example in the VS Code extension sample repository.
A WebAssembly based language server
When we started working on WebAssembly support for VS Code for the Web, one of our envisioned use cases was to execute language servers using WebAssembly. With the latest changes to VS Code's LSP libraries and the introduction of a new module to bridge WebAssembly and LSP, implementing a WebAssembly language server is now as straightforward as implementing it as an operating system process.
Additionally, WebAssembly language servers run on the WebAssembly Core Extension, which fully supports WASI Preview 1. This means that language servers can access the files in the workspace using the regular filesystem API of their programming language, even if the files are stored remotely, such as in a GitHub repository.
The following code snippet shows a Rust language server based on the example server from the lsp_server crate. This language server doesn't perform any language analysis but simply returns a predefined result for a GotoDefinition request:
match cast::<GotoDefinition>(req) {
    Ok((id, params)) => {
        let uri = params.text_document_position_params.text_document.uri;
        eprintln!("Received gotoDefinition request #{} {}", id, uri.to_string());
        let loc = Location::new(
            uri,
            lsp_types::Range::new(lsp_types::Position::new(0, 0), lsp_types::Position::new(0, 0))
        );
        let mut vec = Vec::new();
        vec.push(loc);
        let result = Some(GotoDefinitionResponse::Array(vec));
        let result = serde_json::to_value(&result).unwrap();
        let resp = Response { id, result: Some(result), error: None };
        connection.sender.send(Message::Response(resp))?;
        continue;
    }
    Err(err @ ExtractError::JsonError { .. }) => panic!("{err:?}"),
    Err(ExtractError::MethodMismatch(req)) => req,
};
You can find the full source code of the language server in the VS Code example repository.
You can use the new @vscode/wasm-wasi-lsp npm module to create a WebAssembly language server within the extension's TypeScript code. Instantiate the WebAssembly code as a worker with WASI support by using the WebAssembly Core Extension, which is described in detail in our Run WebAssemblies in VS Code for the Web blog post.
The TypeScript code of the extension is straightforward as well. It registers the server for plain text files.
import {
  createStdioOptions,
  createUriConverters,
  startServer
} from '@vscode/wasm-wasi-lsp';

export async function activate(context: ExtensionContext) {
  const wasm: Wasm = await Wasm.load();

  const channel = window.createOutputChannel('LSP WASM Server');
  // The server options to run the WebAssembly language server.
  const serverOptions: ServerOptions = async () => {
    const options: ProcessOptions = {
      stdio: createStdioOptions(),
      mountPoints: [{ kind: 'workspaceFolder' }]
    };

    // Load the WebAssembly code
    const filename = Uri.joinPath(
      context.extensionUri,
      'server',
      'target',
      'wasm32-wasip1-threads',
      'release',
      'server.wasm'
    );
    const bits = await workspace.fs.readFile(filename);
    const module = await WebAssembly.compile(bits);

    // Create the wasm worker that runs the LSP server
    const process = await wasm.createProcess(
      'lsp-server',
      module,
      { initial: 160, maximum: 160, shared: true },
      options
    );

    // Hook stderr to the output channel
    const decoder = new TextDecoder('utf-8');
    process.stderr!.onData(data => {
      channel.append(decoder.decode(data));
    });

    return startServer(process);
  };

  const clientOptions: LanguageClientOptions = {
    documentSelector: [{ language: 'plaintext' }],
    outputChannel: channel,
    uriConverters: createUriConverters()
  };

  let client = new LanguageClient('lspClient', 'LSP Client', serverOptions, clientOptions);
  await client.start();
}
Running the code adds a Goto Definition entry to the context menu of plain text files. Executing this action sends a corresponding request to the LSP server.
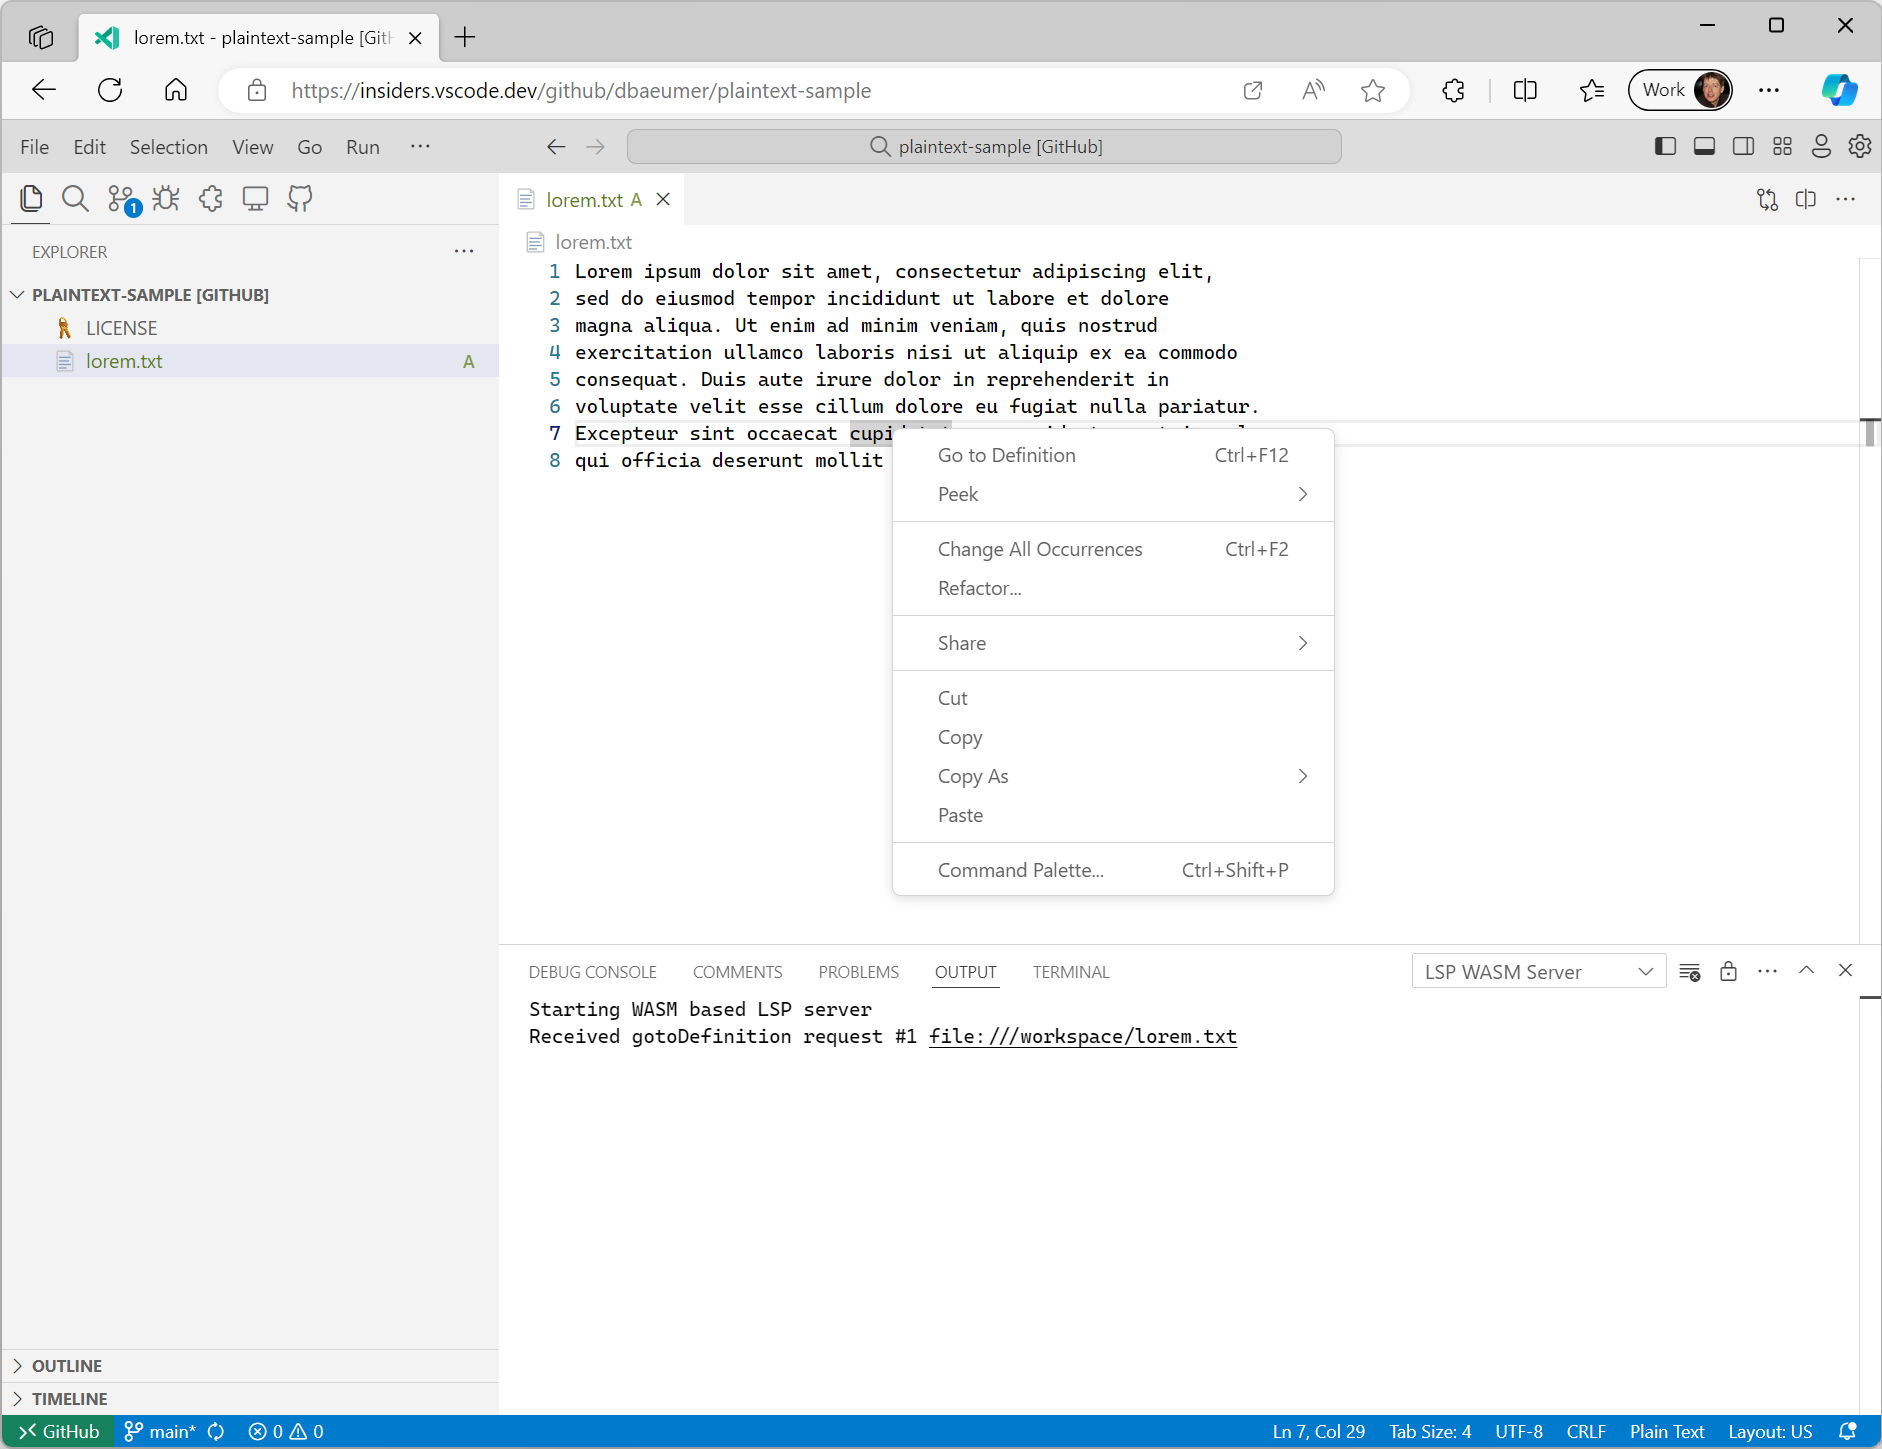
It is important to note that the @vscode/wasm-wasi-lsp npm module automatically transforms document URIs from their workspace value to the one recognized in the WASI Preview 1 host. In the above example, the text document's URI inside VS Code is usually something like vscode-vfs://github/dbaeumer/plaintext-sample/lorem.txt, and this value gets transformed into file:///workspace/lorem.txt, which is recognized inside the WASI host. This transformation also happens automatically when the language server sends a URI back to VS Code.
Most language server libraries support custom messages, making it easy to add features to a language server that are not already present in the Language Server Protocol Specification. The following code snippet shows how to add a custom message handler for counting the files in a given workspace folder to the Rust language server we used previously:
#[derive(Debug, Eq, PartialEq, Clone, Deserialize, Serialize)]
#[serde(rename_all = "camelCase")]
pub struct CountFilesParams {
pub folder: Url,
}
pub enum CountFilesRequest {}
impl Request for CountFilesRequest {
type Params = CountFilesParams;
type Result = u32;
const METHOD: &'static str = "wasm-language-server/countFilesInDirectory";
}
//...
for msg in &connection.receiver {
match msg {
//....
match cast::<CountFilesRequest>(req) {
Ok((id, params)) => {
eprintln!("Received countFiles request #{} {}", id, params.folder);
let result = count_files_in_directory(¶ms.folder.path());
let json = serde_json::to_value(&result).unwrap();
let resp = Response { id, result: Some(json), error: None };
connection.sender.send(Message::Response(resp))?;
continue;
}
Err(err @ ExtractError::JsonError { .. }) => panic!("{err:?}"),
Err(ExtractError::MethodMismatch(req)) => req,
}
}
//...
}
fn count_files_in_directory(path: &str) -> usize {
WalkDir::new(path)
.into_iter()
.filter_map(Result::ok)
.filter(|entry| entry.file_type().is_file())
.count()
}
The TypeScript code to send this custom request to the LSP server looks like this:
const folder = workspace.workspaceFolders![0].uri;
const result = await client.sendRequest(CountFilesRequest, {
folder: client.code2ProtocolConverter.asUri(folder)
});
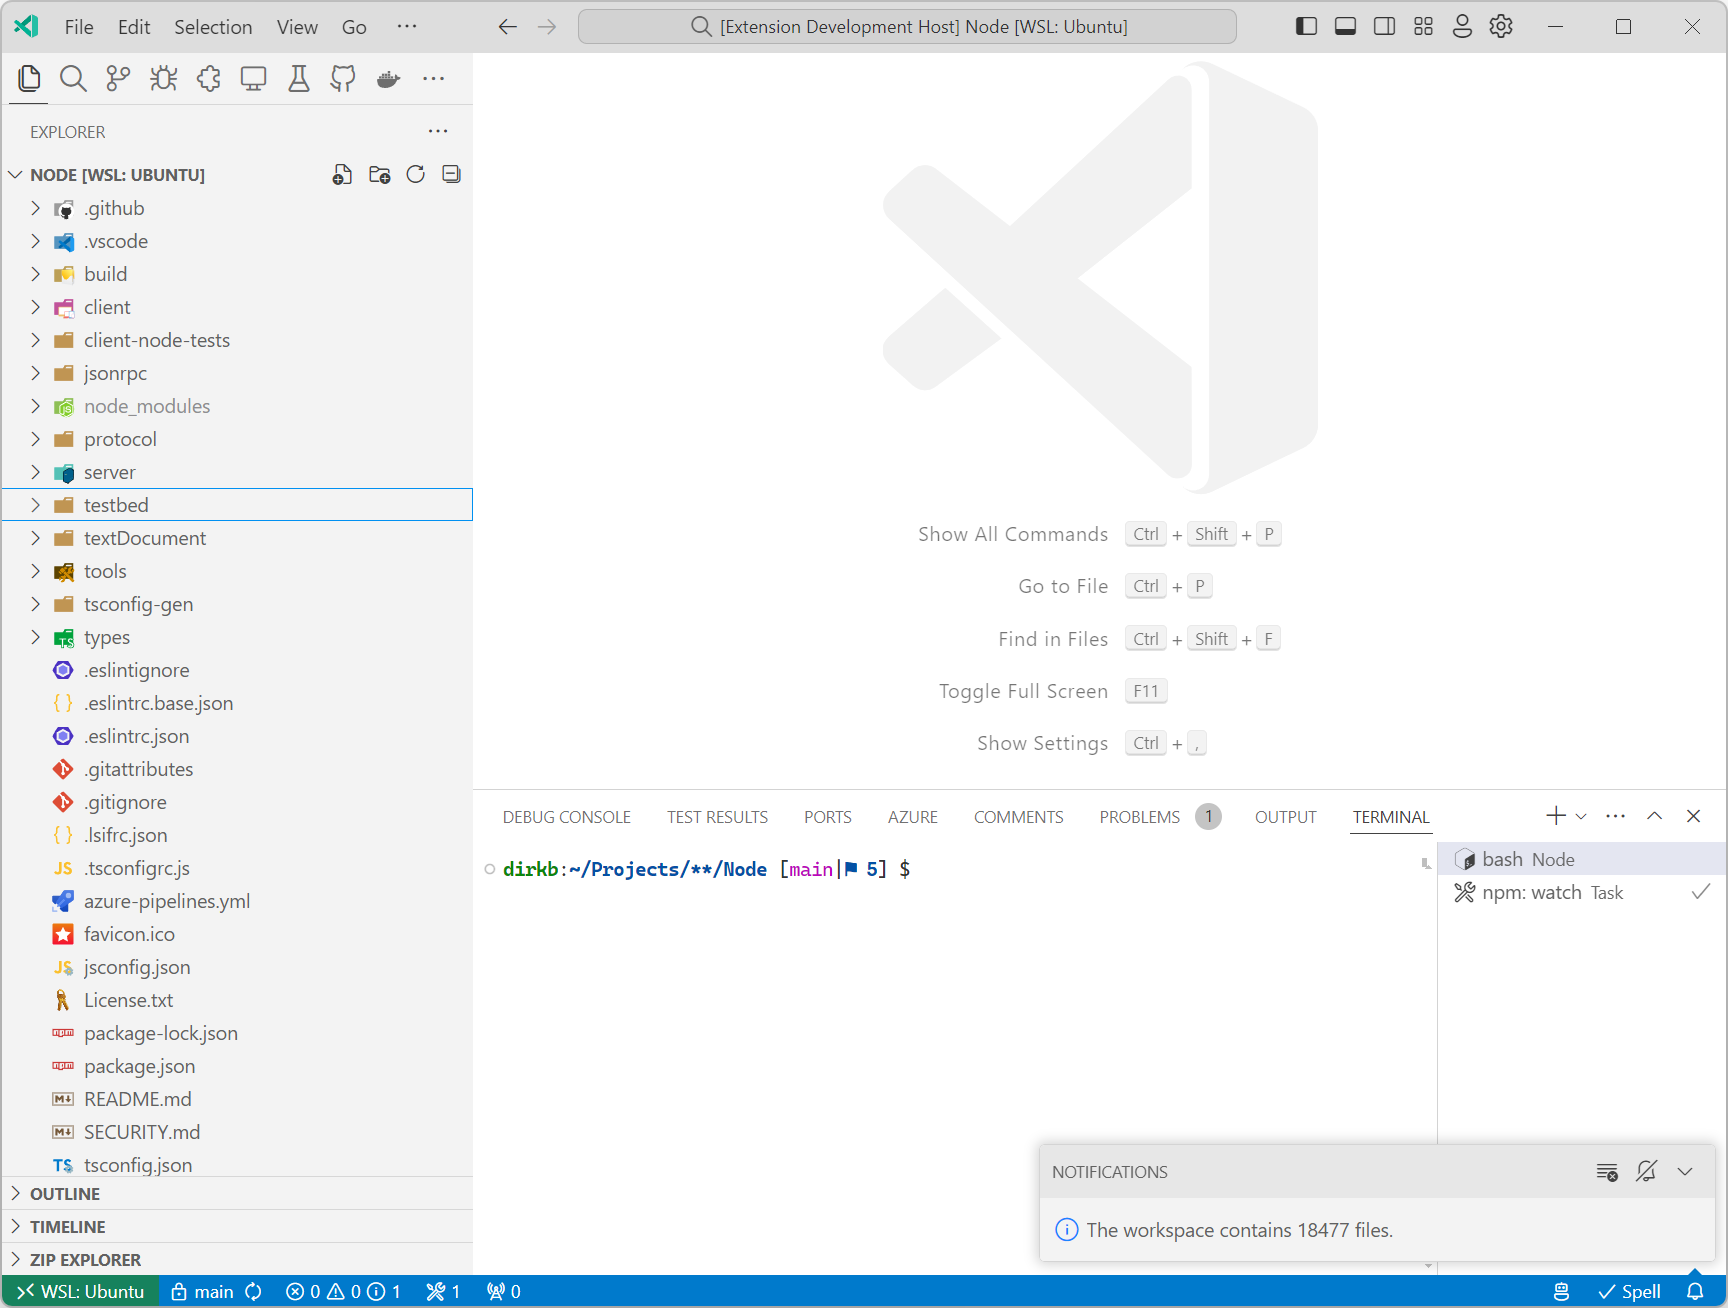
window.showInformationMessage(`The workspace contains ${result} files.`);
Running this on the vscode-languageserver repository shows the following notification:
Please note that a language server doesn't necessarily need to implement any of the features specified in the Language Server Protocol specification. If an extension wants to integrate library code that can only be compiled to the WASI Preview 1 target, implementing a language server with custom messages might be a good choice until VS Code supports the WASI 0.2 preview in its component model implementation.
What Comes Next
As mentioned in the previous blog post, we continue our efforts to implement the WASI 0.2 preview for VS Code. We also plan to broaden the code examples to include languages other than Rust that compile to WASM.
Thanks,
Dirk and the VS Code team
Happy Coding!